

For the most part, Windows 11 and Windows 10 manage system resources very well, but there are certain instances where users are left wondering why their Windows performance is bad. This issue comes up, especially when the computer has a weak processor and an app is particularly intensive. Thankfully, a Task Manager feature that lets you set CPU affinity so you can claw back some resources from other apps.
To be clear, when you set processor affinity in Windows 10, you won’t always notice a substantial difference. It all depends on if resources are being used by other apps on your system, whether your PC meets the recommended specs and various other factors. However, knowing how to use the feature to assign certain CPU cores to specific applications can be very useful in some scenarios.
Additionally, some have success in modifying their processor affinity for gaming. Some very old games, for example, try to spread a single-core workload across a multi-core processor, which can lead to a crash. Manually assigning the application to a single thread solves this. Conversely, those getting lag on Discord or other VoIP applications while playing an intensive game can assign only a portion of their cores to the game to ensure their system has enough resources to handle both at once.
In this tutorial, we’ll be covering how to set CPU/processor affinity for individual apps, as well as how to change the CPU priority to prefer foreground apps.
How to Set CPU Affinity for a Specific App
In most cases, it will be enough to set processor affinity for a specific app that you’d like to have some more resources. When looking at the set affinity in Task Manager, bear in mind that the CPU numbers displayed are core/logical cores. This means you may see 6 on a 4 core processor, or 12 on a 6 core Ryzen 2600, for example. For the most part, all you need to consider is the ratio available of cores your program is getting, not which ones.
⚠️ Please note: The process described below is the same in Windows 11 as it is in Windows 10. However, bear in mind that we’ll be using screenshots from Windows 10, so your UI may look a little different. We’ll point out any changes you need to be aware of as they come up.
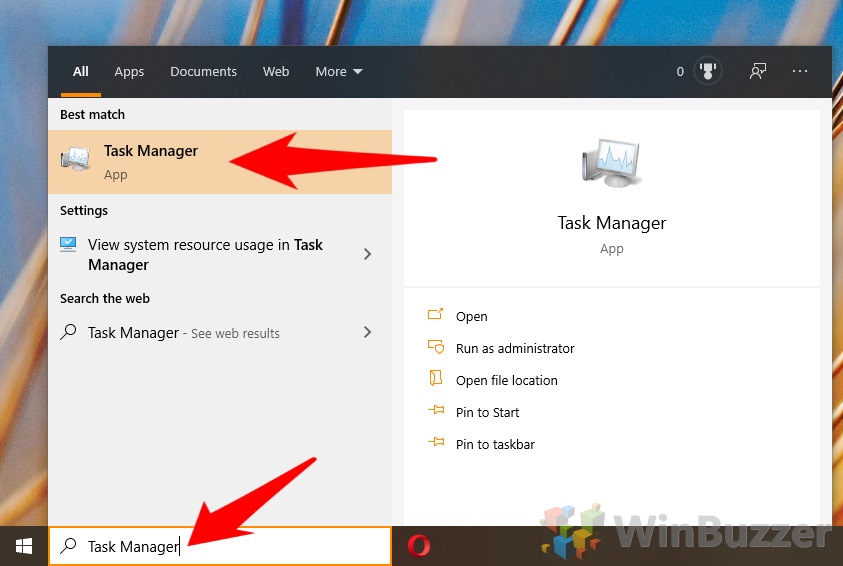
- Open Task Manager
Press the Windows key and type “Task Manager”, clicking the first result, or press “Ctrl + Shift + Esc”.
- Click “More details”
Depending on whether you’ve opened Task Manager before, you may not have to do this.

- Right-click the app you want to modify and click “Go to details”

- Right-click the app in the “Details” window and choose “Set affinity”

- Select the cores/logical cores you’d like to assign to the program

How to Change CPU Priority to Prefer Windows Background Apps or Programs
As well as designating CPU cores for each application, you can change the way Windows 11 and 10 schedules CPU resources generally. This takes two forms: a focus on programs or a focus on background apps, with the former being the default.
- Open System Properties
Press “Windows + R” to open Run and type “sysdm.cpl” and press “Enter”.

- Go to the “Advanced” tab of System Properties
While there, look under the “Performance” tab for “Settings”.

- In Performance Options, change your CPU affinity scheduling to “Programs” or “Background services”
Once you’re done, press “OK”.

How to Set CPU Affinity Using PowerShell
-
Open PowerShell:
- Right-click on the Start menu and select “Windows PowerShell (Admin)” to run PowerShell with administrative privileges.
-
Find the Process ID (PID):
- First, you need to find the Process ID (PID) of the application for which you want to set the CPU affinity. Type
Get-Processto list all running processes along with their PIDs.
- First, you need to find the Process ID (PID) of the application for which you want to set the CPU affinity. Type
-
Set CPU Affinity:
- Use the
ProcessAffinityproperty to set the CPU affinity. The affinity is set using a bitmask, where each bit represents a CPU core. For example, to set an application to use only the first core, use 1 (binary 0001), for the first two cores use 3 (binary 0011), and so on. - The command format is:
(Get-Process -Id PID).ProcessorAffinity = AFFINITY_VALUE - For example, to set the affinity of a process with PID 1234 to use the first two cores, the command is:
(Get-Process -Id 1234).ProcessorAffinity = 3
- Use the
- Administrator Privileges: You need administrator privileges to change the CPU affinity of a process.
- Understanding Bitmask: Each bit in the bitmask represents a CPU core. The rightmost bit is the first core, the next bit to the left is the second core, and so on.
- Temporary Change: These changes are temporary and only apply until the application is closed or the computer is restarted.
Remember, incorrectly setting CPU affinity can lead to system instability or degraded performance, so use these commands carefully.
How to Set CPU Affinity Using Command Prompt
-
Open Command Prompt:
- Search for “cmd” in the Start menu, right-click on “Command Prompt” and select “Run as administrator”.
-
Use the Windows Management Instrumentation Command-line (WMIC):
- WMIC allows more direct control but is a bit more complex. The command format is:
wmic process where processid="PID" CALL setpriority "AFFINITY_VALUE"
- WMIC allows more direct control but is a bit more complex. The command format is:
-
Example:
- To set the affinity for a process with PID 1234 to use only the first two cores, the command is:
wmic process where processid="1234" CALL setaffinity "3"
- To set the affinity for a process with PID 1234 to use only the first two cores, the command is:
- Administrator Privileges: You need administrator privileges to change the CPU affinity of a process.
- Understanding Bitmask: Each bit in the bitmask represents a CPU core. The rightmost bit is the first core, the next bit to the left is the second core, and so on.
- Temporary Change: These changes are temporary and only apply until the application is closed or the computer is restarted.
Remember, incorrectly setting CPU affinity can lead to system instability or degraded performance, so use these commands carefully.
FAQ on CPU Affinity and Priority Settings
Can setting CPU affinity improve performance for gaming?
Yes, particularly for older games not optimized for multi-core processors. Assigning these games to a single core can prevent crashes and improve performance.
What is the difference between CPU affinity and CPU priority?
CPU affinity determines which cores an application can use, while CPU priority decides the amount of CPU time allocated to an application.
Is it better to set CPU affinity for individual apps or change overall CPU priority?
It depends on your needs. Setting affinity is useful for specific apps, especially if they are resource-intensive, while changing CPU priority affects how the system allocates resources to all applications.
Does setting CPU affinity affect all users on the computer?
No, CPU affinity settings apply only to the specific instance of the application and need to be set each time the application is run.
Can setting CPU affinity harm my computer?
No, it won’t harm your computer, but improper configuration may lead to suboptimal performance of applications.
What are Prefetch and SuperFetch in Windows 10 and 11?
Prefetch and SuperFetch are features that accelerate startup for frequently used applications by preloading data into memory.
How do I know which CPU cores to assign to an application?
You don’t need to select specific cores; focus on the ratio of cores allocated to the program, considering the total number of cores your processor has.
Can I set CPU affinity for background services?
While CPU affinity is typically set for applications, CPU priority settings can influence how resources are allocated to background services.
What should I do if setting CPU affinity doesn’t improve performance?
If there’s no noticeable improvement, try resetting the affinity to its default state or adjusting CPU priority settings.
Is setting CPU affinity useful for all types of applications?
It’s most beneficial for CPU-intensive applications or older programs not optimized for multi-core processors.
How does setting CPU affinity interact with multi-core processors?
It allows you to control how an application uses the multiple cores, which can be crucial for performance in multi-core environments.
Can I set CPU affinity from the command line?
Yes, you can use command-line tools like Windows PowerShell to set affinity, though this method is more advanced and not covered in the tutorial.
Extra: How to Disable/Enable Prefetch and Superfetch in Windows
The Windows 11 and Windows 10 features “Prefetch” and “SuperFetch” provide startup acceleration for frequently used applications. To achieve this, the prefetch algorithm tries to anticipate when data most probably won´t be available in cache to directly load it from the respective drive. In our other guide, we show you how Prefetch and Superfetch work and how you can disable, enable or fine-tune the features.

Last Updated on January 19, 2024 2:14 pm CET by Markus Kasanmascheff


