

No matter how technically-minded you are, it’s always smart to have a Windows 10 boot stick to hand. It takes just a few minutes to create a bootable Windows 10 USB, but it can save countless hours if your OS breaks down and you don’t have a spare PC to hand.
These days, a Windows 10 USB is the preferred method to perform a clean install of Microsoft’s operating system. With disk drives more or less dead, it’s often the only real choice on a completely new PC. Flash drives also don’t get scratched, are faster to write to, and take up less space.
Those wondering exactly how to make a bootable USB for Windows will be pleased to hear there are three generally accepted methods. One involves Microsoft’s Media Creation Tool, which greatly simplifies the experience, while third-party tool Rufus is best used to create a bootable USB from an iso. We’ll also be covering the creation of a boot stick from Windows 7, for the few of you still left on the outdated OS.
First, though, it’s worth noting that Windows machines generally have two BIOS types: Legacy or UEFI. You can read a full explanation on superuser here, but the general gist is that UEFI is supported on most modern PCs. If you’re unsure, take a look at your System Information app. Windows will list the type under ‘BIOS mode’.
How to Create a Windows 10 USB via the Media Creation Tool (UEFI or Legacy)
This is the Microsoft-recommended route to put Windows 10 on a USB drive, and for good reason. The Media Creation Tool cuts out some of the licensing annoyances in the setup process.
- Download the Windows 10 Media Creation Tool
The Windows 10 Media Creation Tool can be grabbed from Microsoft’s official site, and you shouldn’t obtain it from anywhere else. Once there, decide if you want your Windows 10 boot stick to install a 32 or 64-bit version of the OS (64-bit is a safe bet for most people). Click the relevant “Download tool now” button and open the file.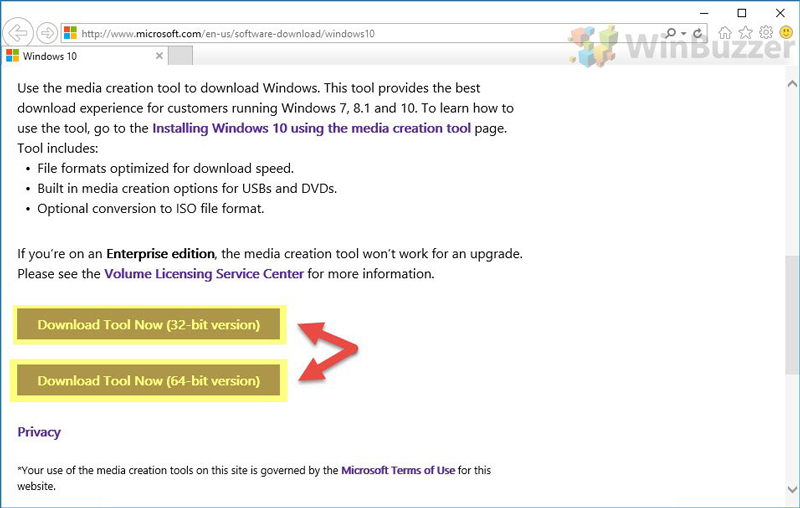
- Use the Windows 10 bootable USB tool to create media for another PC
When the Media Creation Tool boots, it’ll ask you to choose whether to create installation media this PC or another one. Click “Create installation media for another PC” and click “Next”.
- Choose a system architecture for your Windows 10 USB
When you install Windows 10 to a USB, Microsoft asks you to choose the system’s architecture, language, and edition. Check your license key to see if you want a Windows 10 Home or Windows 10 Pro download, and select 64-bit or 32-bit. Again, you can find your architecture in your System Information app, but you can always choose both if you have the space on the USB drive. Once you’re done, click “Next”.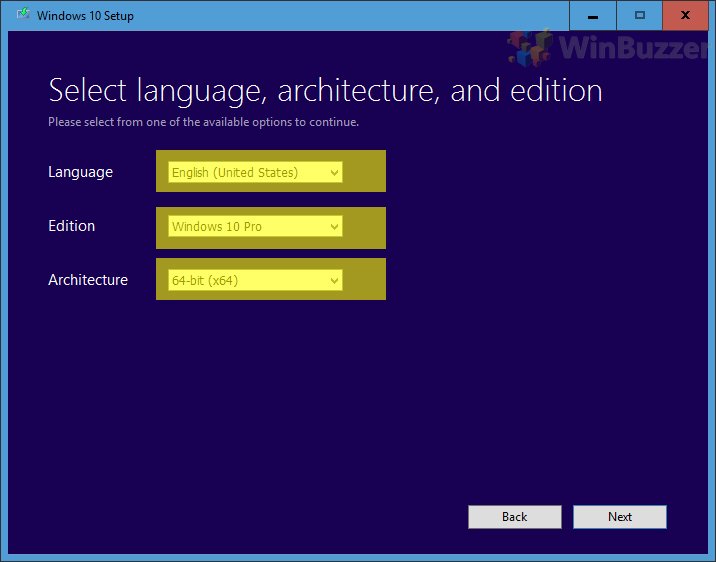
- Agree to install Windows 10 to a USB flash drive
On the “Choose which media to use” screen, click “USB flash drive”. Click “Next”.
- Select your USB boot stick
Plug in your USB boot stick and click “Refresh drive list”. Select the USB drive and click “Next”.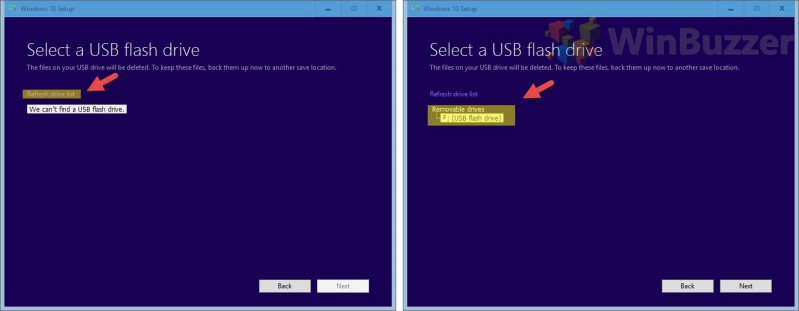
- Wait for the ISO to download and automatically create a bootable USB
The download may take some time, depending on your internet connection, the speed of your hard drive, and the speed of your USB stick.
- Finish the Windows 10 USB creation
When everything has been written to the drive, the Media Creation Tool will display the message “Your USB flash drive is ready”. Click “Finish”.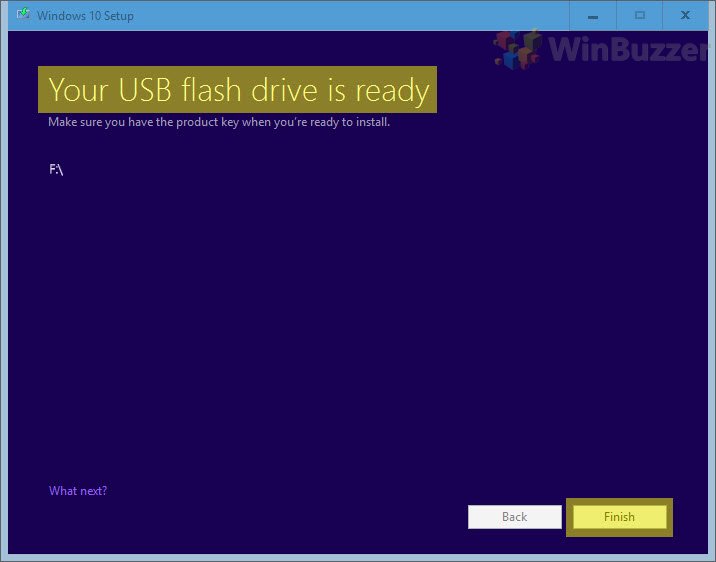
How to Put Windows 10 on a USB Drive via ISO with Rufus (Legacy or UEFI)
The in-built Windows 10 download tool is good enough, but there are some instances where you might want to use third-party tool Rufus. For example, if you followed our how to download Windows 10 ISO files guide and have a disc image lying around already. It can also be better if you don’t have enough space on your C:/ drive for the Media Installation Tool to function.
- Download a Windows 10 ISO file
There are several ways you can obtain an ISO:
? Via the Media Creation Tool
? Directly from the Microsoft servers
? From an unofficial source (not recommended)
? By converting an official Windows Update ESD file into ISO format
? By slipstreaming all available updates into a Windows 10 ISO file - Grab the Rufus Windows 10 download
Download Rufus from the official website, either in regular or portable version. We choose Rufus because it’s free and tends to be faster than other alternatives like UNetbootin, Universal USB Installer, Windows 7 USB download tool, or WintoUSB. - Plug in the USB Flash Drive and run Rufus
It should boot straight to the Rufus bootable usb screen without any extra fuss. - Create a Windows 10 UEFI boot USB with Rufus
To create a UEFI boot USB, select the following options, and click Start:
? Device: Your USB drive
? Partition scheme and target system type: GPT partition scheme for UEFI
? File system: Fat32 (Default)
? Cluster size: 4096 bytes (Default)
? New volume label: Windows 10 UEFI
? Format Options:
✔ Quick format
✔ Create a bootable disk using: ISO image (here you need to select your 64-bit Windows 10 ISO file from your computer)
✔ Standard Windows installation
✔ Create extended label and icon files
Once you’re done, click “Start”.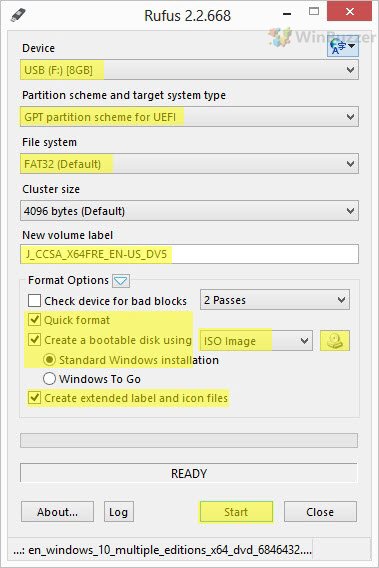
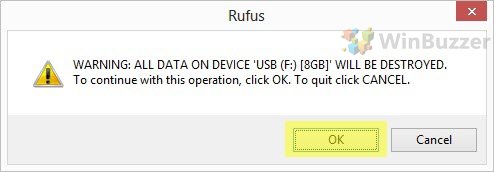
Accept the warning by clicking “OK”.
Rufus will now create a Windows 10 UEFI boot USB. This process may take some time.
- Create a Windows 10 Legacy Boot USB with Rufus
The settings for a Rufus bootable USB that’s compatible with Legacy BIOS versions are quite different. Select the following:
? Device: Your USB drive
? Partition Scheme and target system type: MBR partition scheme for BIOS or UEFI-CSM
? File system: NTFS
? Cluster size: 4096 bytes (Default)
? New volume label: Windows 10 Legacy Boot USB
? Format Options:
✔ Quick format
✔ Create a bootable disk using: ISO image (here you need to select your 64-bit Windows 10 ISO file)
✔ Standard Windows installation
✔ Create extended label and icon files
When you’re done, click “Start”.
Accept the warning by clicking “OK”.
Rufus will now create a Windows 10 USB in the legacy format. This may take some time.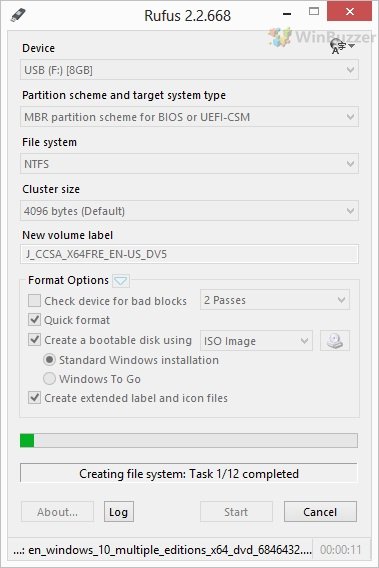
How to Create a Windows 10 Bootable USB fro ISO via the Windows 7 USB/DVD Download Tool (Legacy)
If you want a legacy BIOS but want to stick to Microsoft’s official tool, the old Windows 7 USB/DVD tool is also a good choice.
- Download a Windows 10 ISO file
? Via the Media Creation Tool
? Directly from the Microsoft servers
? From an unofficial source (not recommended)
? By converting an official Windows Update ESD file into ISO format
? By slipstreaming all available updates into a Windows 10 ISO file - Download and Install the Windows 7 USB/DVD Download Tool
You can grab the latest version here.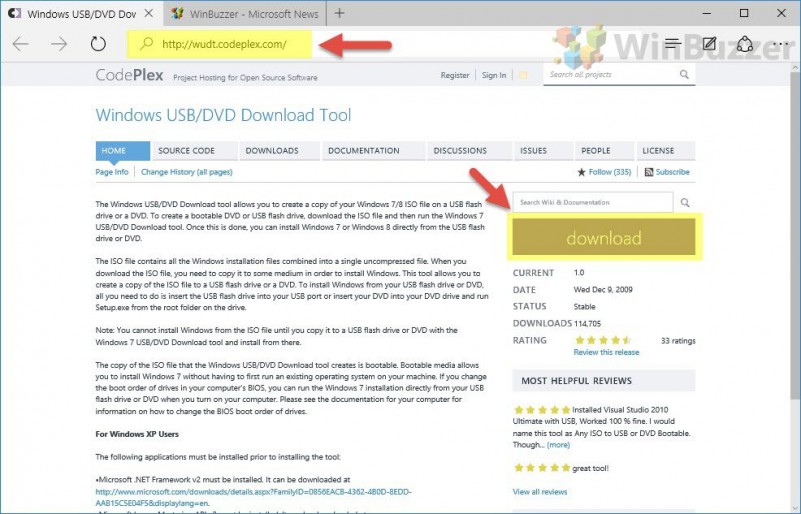
- Click “Browse”

- Select your Windows 10 ISO file and press “Open”
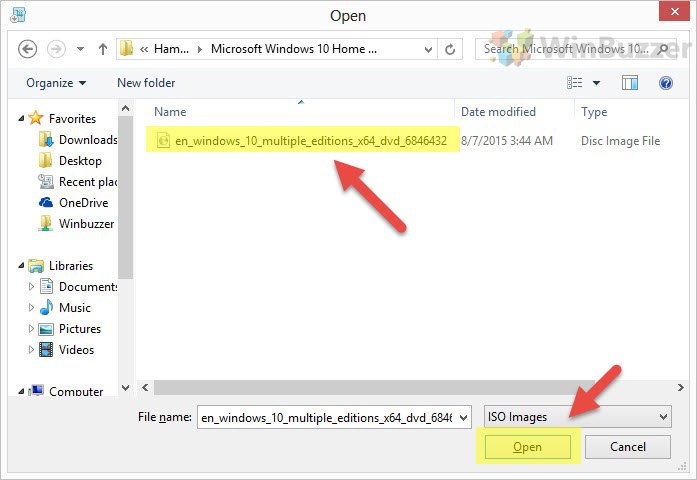
- Click “Next”
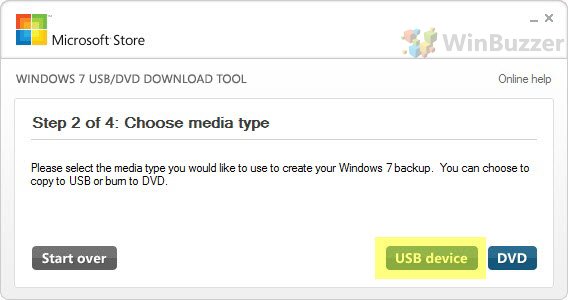
- Choose “USB device”
- Select the Windows 10 USB you want to make into a boot stick
If it doesn’t display immediately, ensure it’s plugged in correctly and press the refresh icon. Then click “Begin copying”.
- Erase the USB drive

- Confirm the drive erase by clicking “Yes”

- Wait for the Windows 7 USB/DVD Download Tool to create a Windows 10 boot stick
Depending on your hard drive/USB speeds, this could take some time.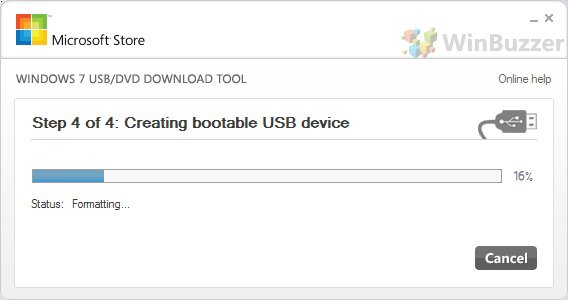
- Close the USB/DVD Download tool
When you see the “Bootable USB device created successfully” message, it’s safe to close.
Last Updated on August 14, 2020 8:25 pm CEST by Markus Kasanmascheff


