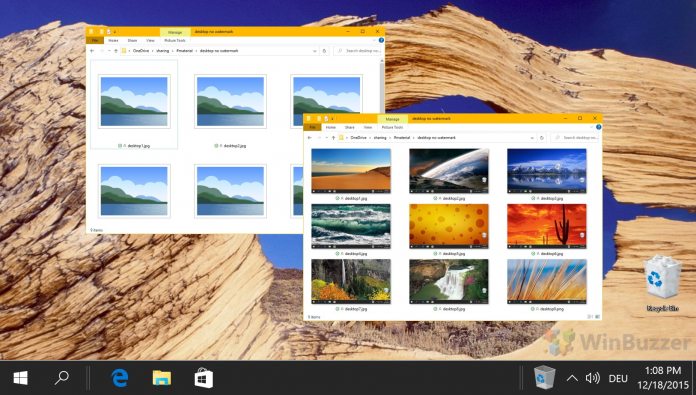
Windows 10’s preview thumbnails are incredibly useful if you have confusing file names, but those who are well-organized may just find them an annoyance. Though they act as a media preview and video previewer, they can also slow down low-powered PCs and cause UI clutter. This leads many to wonder how to remove the preview pane in Windows 10, as well as thumbnails in general.
For the unfamiliar, preview thumbnails in Windows 10 are the little icons that show for every image and video. They’re what helps you quickly find the media file you’re looking for. Disabling them replaces that with a generic icon, all of them showing the logo of the application Windows opens them in. This simple visual style can be beneficial if you need to quickly separate images from video files.
This tutorial will cover 4 different methods to turn off and on thumbnail previews in Windows Explorer. Note that some of these apply to only the current user, while others persist across the entire system. You should naturally be careful about making system-wide changes if you share a PC. It’s worth noting that preview thumbnails only appear when you have medium, large, or extra-large icons selected, so changing that is always an option.
How to Turn Preview Thumbnails in Windows 10 On or Off via File Explorer Properties
This is by far the easiest method but only affects your current user account.
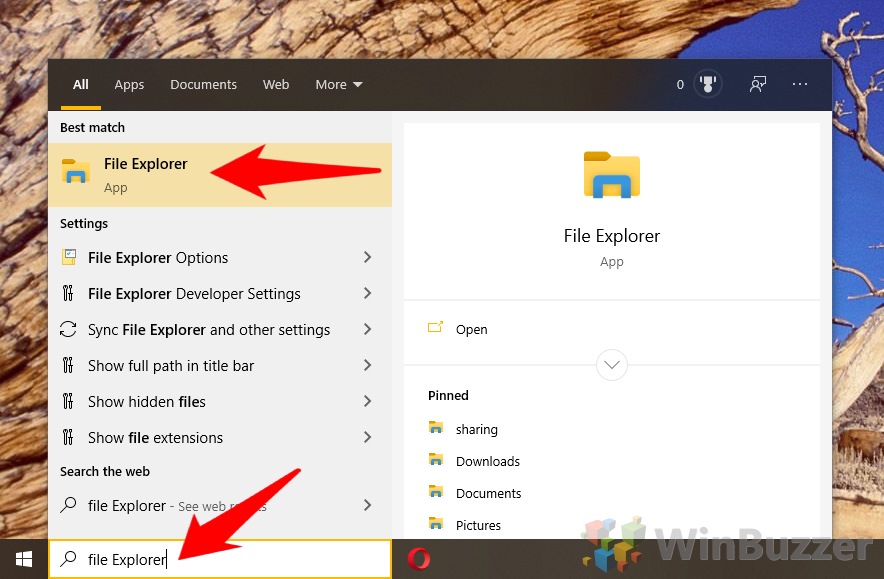
- Open File Explorer
Press the Windows key and type File Explorer. Click the first result under ‘Best match’.
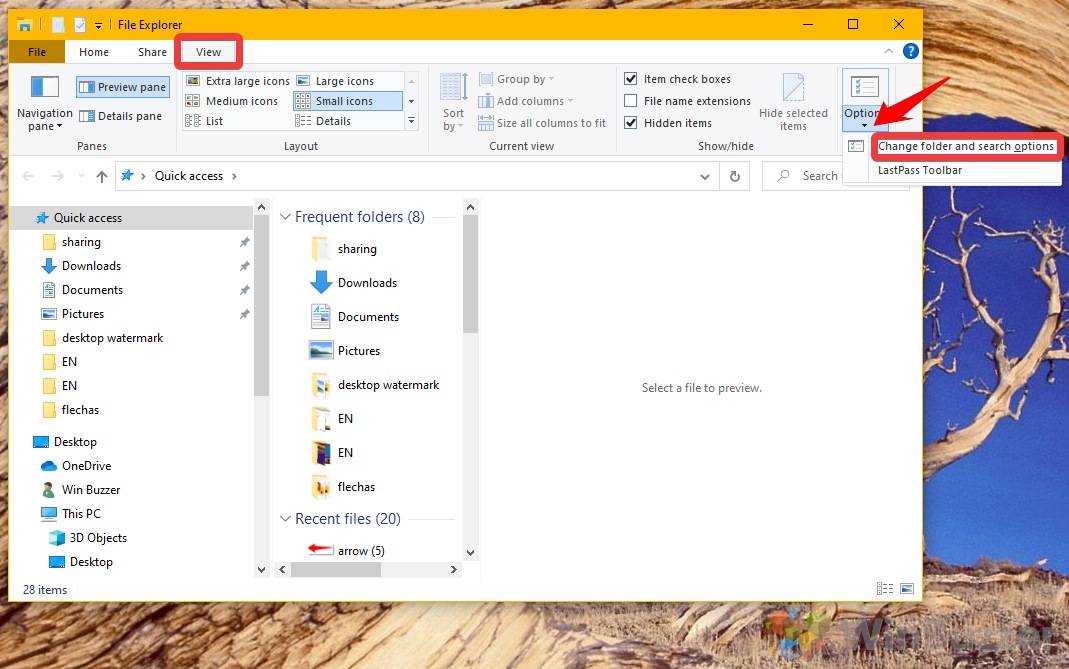
- Open File Explorer Options
Switch to the view tab. On the left-hand side, you’ll see the option to enable or remove the preview pane, while the top-right contains the “Options” button. Click the arrow underneath “Options”, then click “Change folder and search options”.
- Disable Windows 10 Preview Thumbnails
Switch to the “View” tab and tick/untick “Always show icons, never thumbnails”, and “Display file icon on thumbnails”. Click “OK”.
How to Disable or Enable Media Preview via Control Panel
Alternatively, you can adjust the setting for the local user in Control Panel if you’re more familiar.
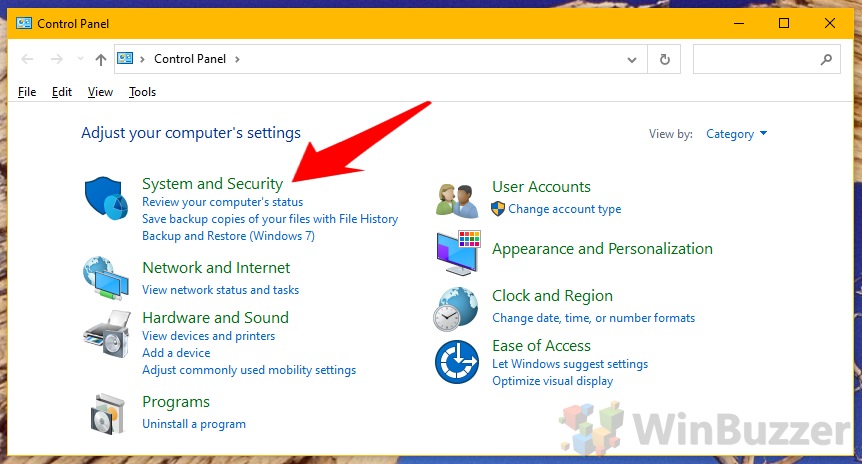
- Open Control Panel
Press the Start button and type “Control Panel”. Click the first result.
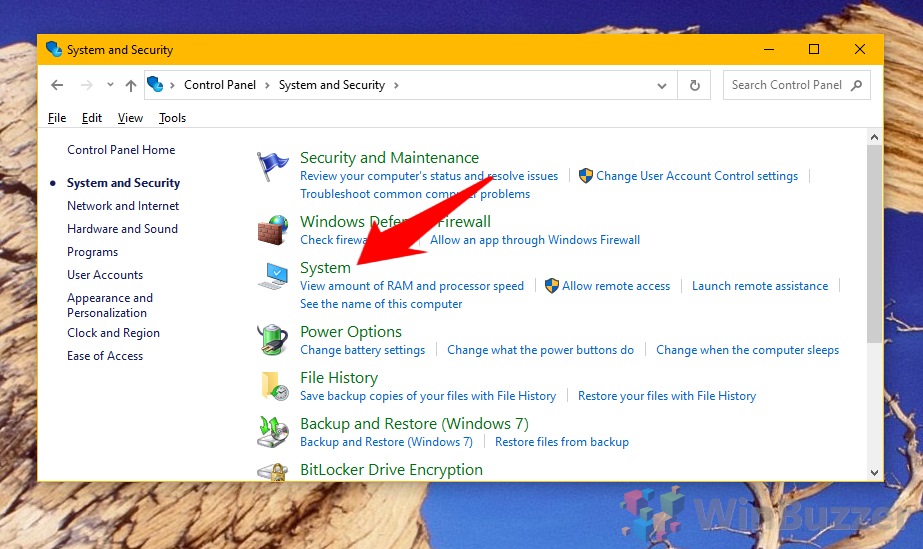
- Open “System & Security”
- Click “System”
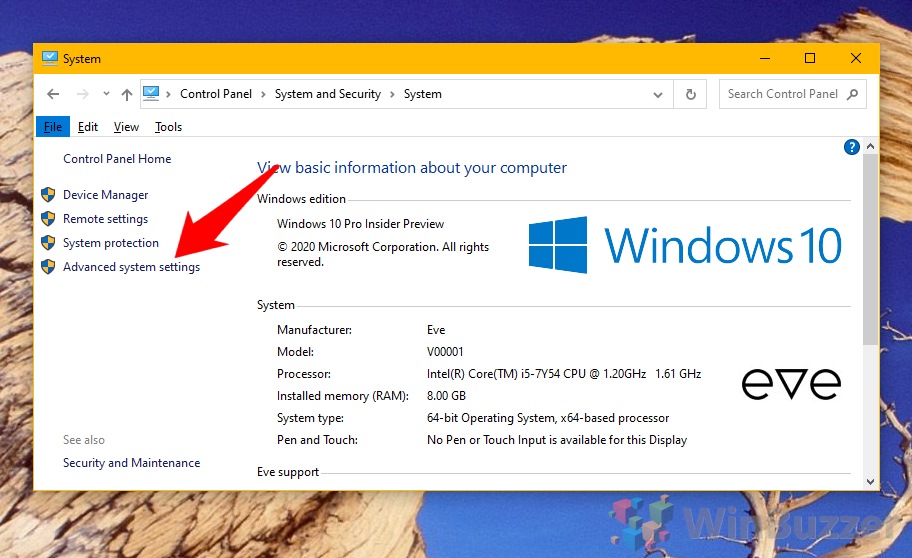
- Choose “Advanced system settings”
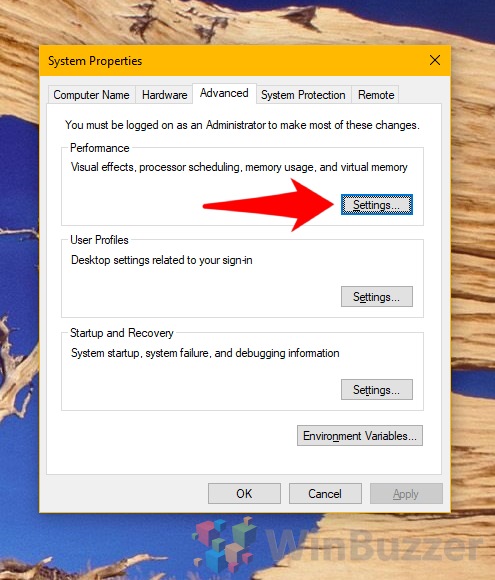
- Open performance setttings
Switch to the “Advanced” tab in System Properties and click “Settings…” under the “Performance” heading.
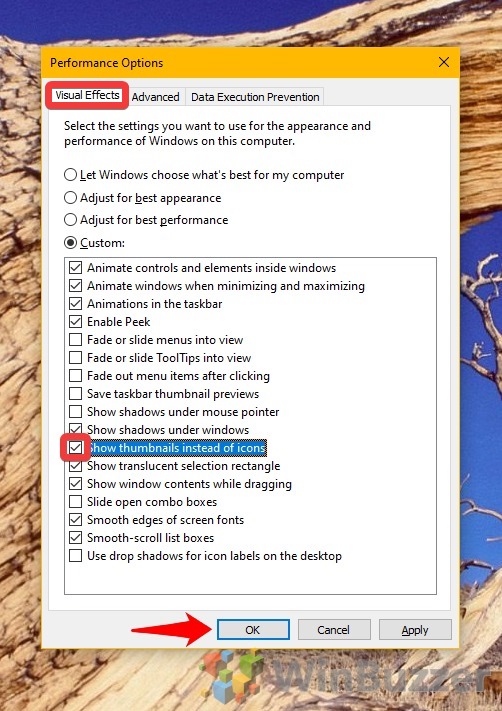
- Enable or disable File Explorer thumbnails
Click the “Visual Effects” tab and untick “Show thumbnails instead of icons” under the “Custom:” heading. Press “OK”.
How to Turn Thumbnails On or Off with Registry Editor
This will only affect your personal user account.
- Open the Registry Editor
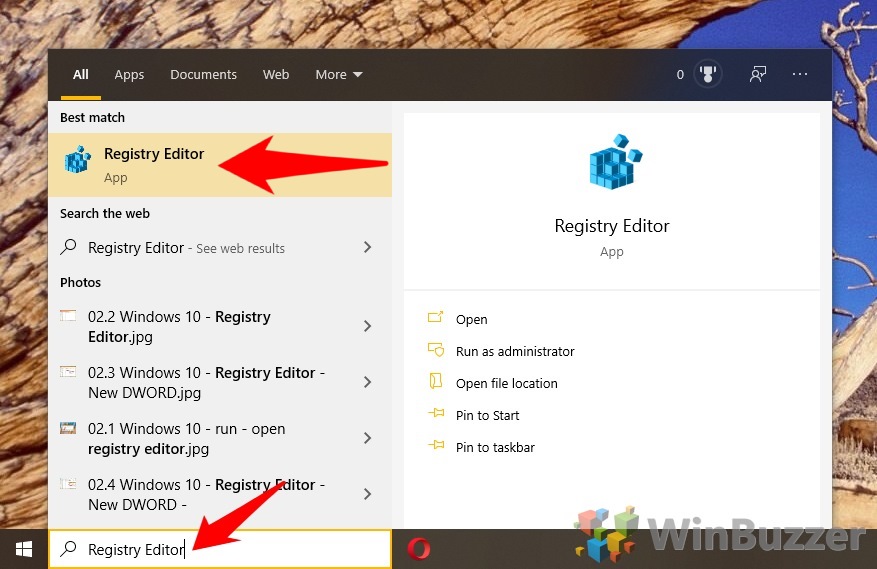
Press Start and type “Registry Editor”. Click the first result.
- Modify the registry
Navigate toHKEY_CURRENT_USER\SOFTWARE\Microsoft\Windows\CurrentVersion\Explorer\Advanced. Create a new DWORD (32-bit) by right-clicking the empty space in the right-hand pane. Name it “IconsOnly” and double-click to edit.
Set its Value to “0” to disable thumbnails and “1” to show thumbnails. Click “OK”.
How to Turn Thumbnails On/Off for All Users with Group Policy Editor
You can turn thumbnails off for everyone to save manual configuration on every account. This will overwrite changes made by previous methods.
- Open Group Policy Editor
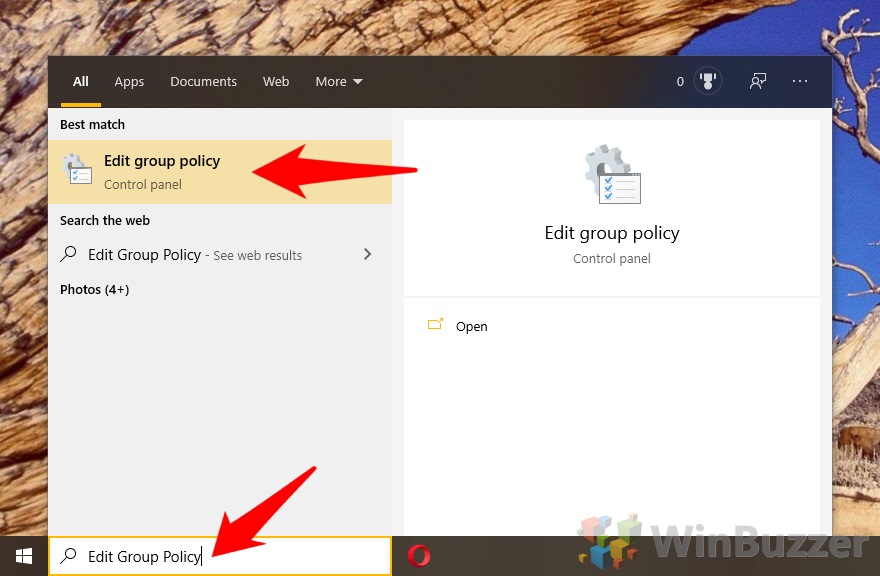
Press the Start button and type “Edit Group Policy”. Click the first result.
- Open thumbnail properties
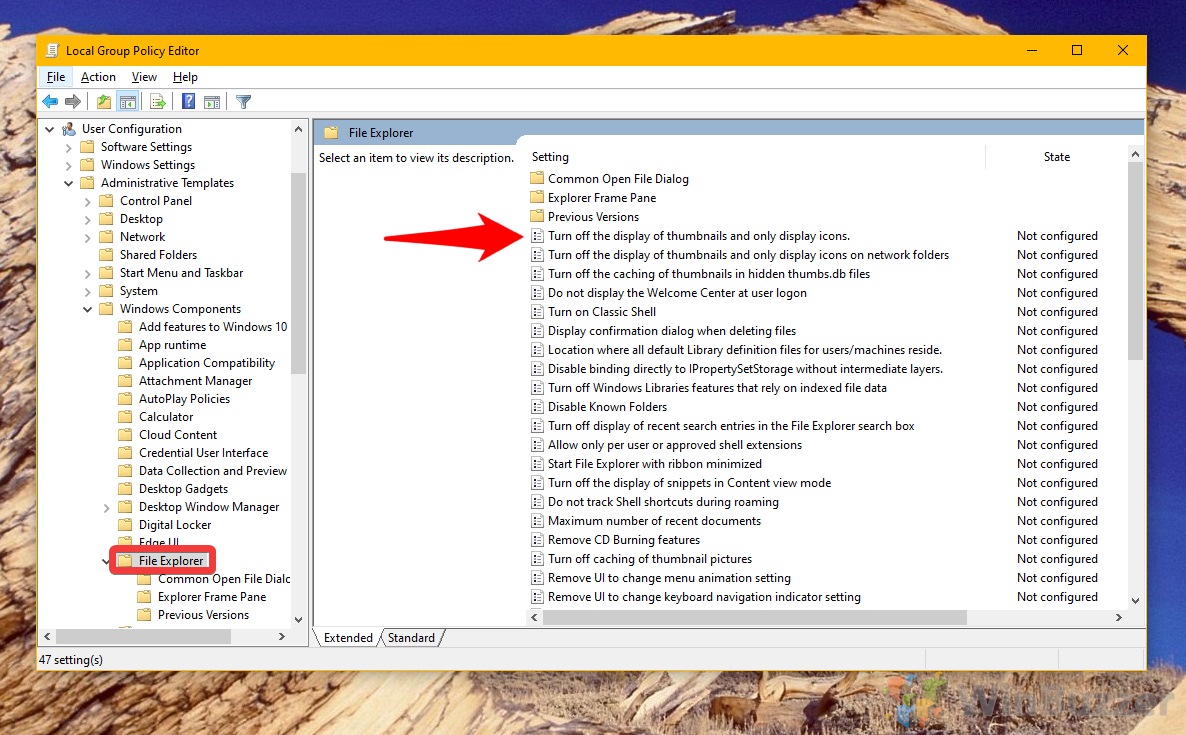
In the left sidebar, navigate to “User Configuration > Administrative Templates > Windows components > File Explorer”. Double-click on “Turn off the display of thumbnails and only display icons”.
- Enable or Disable Thumbnail Previews
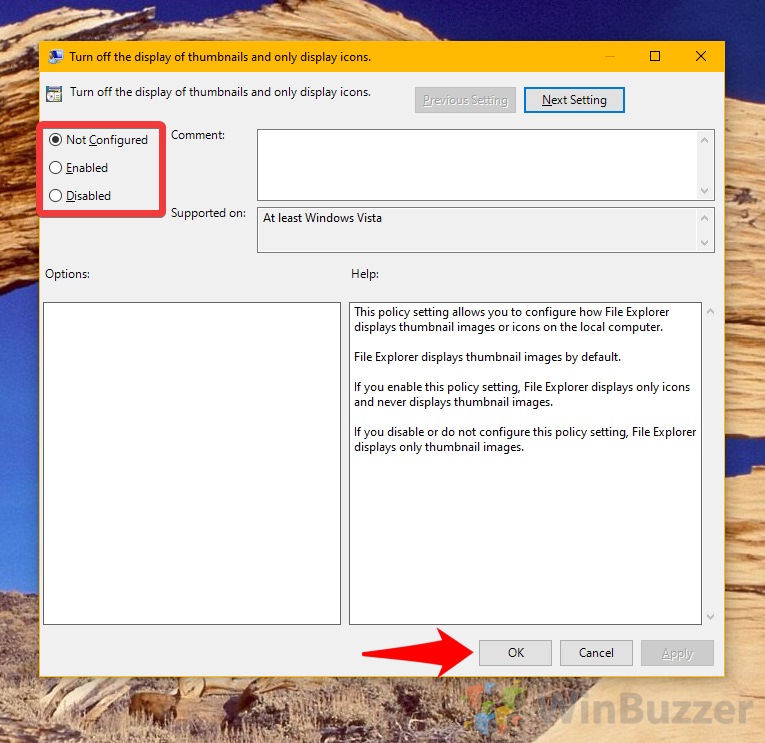
Set the option to “Enabled” to turn off preview thumbnails, “Disabled” to force them on, or “Not Configured” to follow user preferences.
