

When Windows 10 runs into serious problems, it’s not rare to run into startup problems. Corrupted Windows files, incorrect system configuration, driver failure, or registry tweaks can all cause this issue. Thankfully, this common problem has a common solution – the Windows 10 startup repair tool.
Using Windows startup repair can fix boot issues caused by the most prevalent issues. Though it may seem that all is lost when you run into startup problems, it’s important to try a Windows 10 boot repair so you can at least narrow down the source of the issue. If it doesn’t work, you may have to reinstall the OS or test your hardware.
Still, you can run the tool even if you don’t have access to the main OS or are stuck in a boot loop. Windows 10 boot repair only requires access to Advanced boot options, which we’ve covered in guides in the past. You can even run it from a bootable USB if your PC is really struggling. Let’s jump into the tutorial:
How to Fix Boot Issues with Startup Repair on Windows 10
As mentioned earlier, Startup repair is one of the Advanced Startup options available for system repair in Windows 10. The easiest way to get there when you’re having boot issues is via USB installation media. You can find a guide for that here. Once you’re in advanced startup options, you can continue with this guide.
- Click “Troubleshoot”
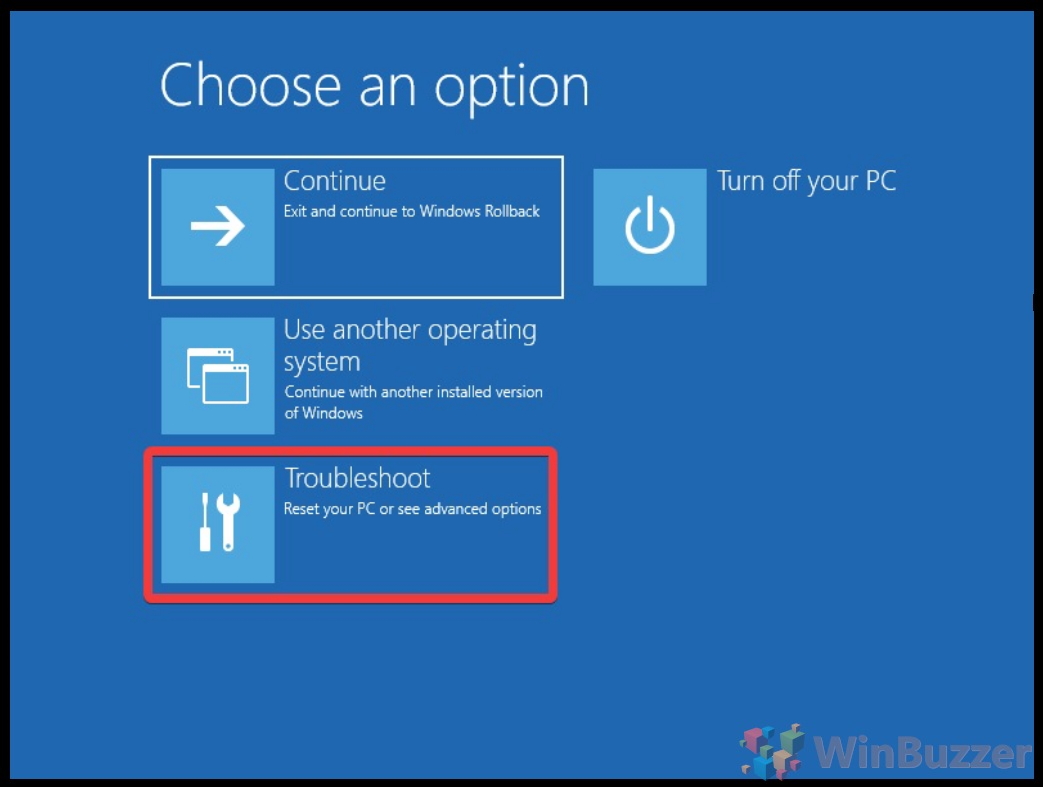
- Choose Advanced Startup Options

- Choose “Startup Repair” which is part of the Windows recovery environment

- Select your OS install

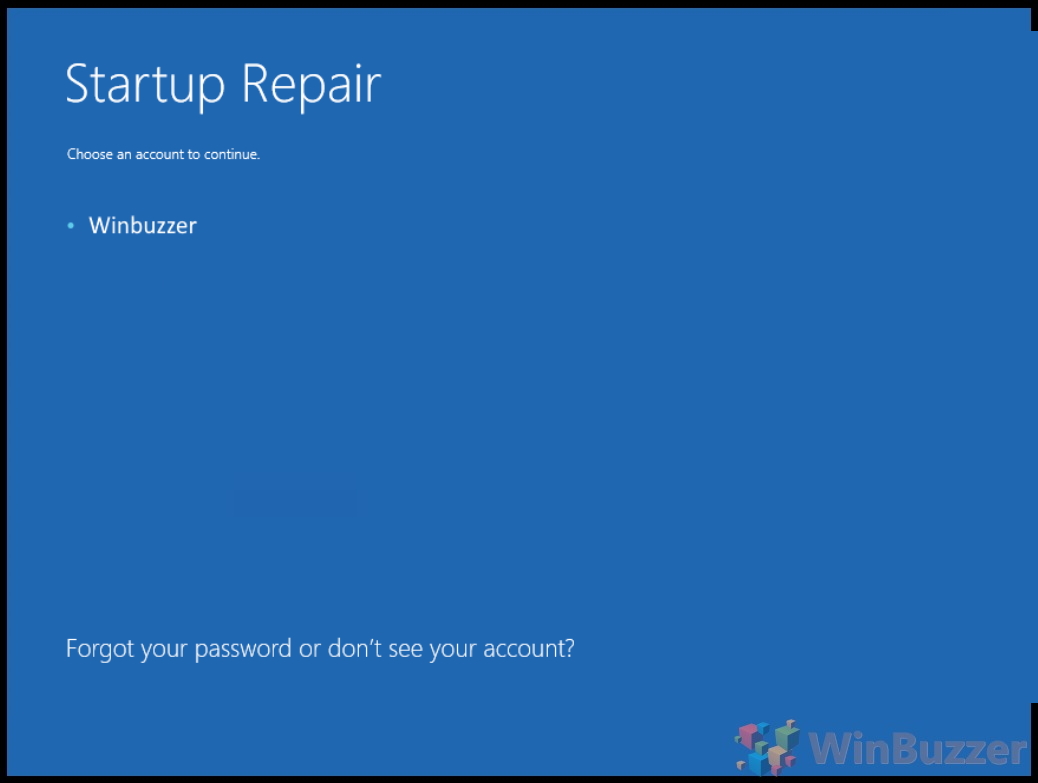
- Select an account
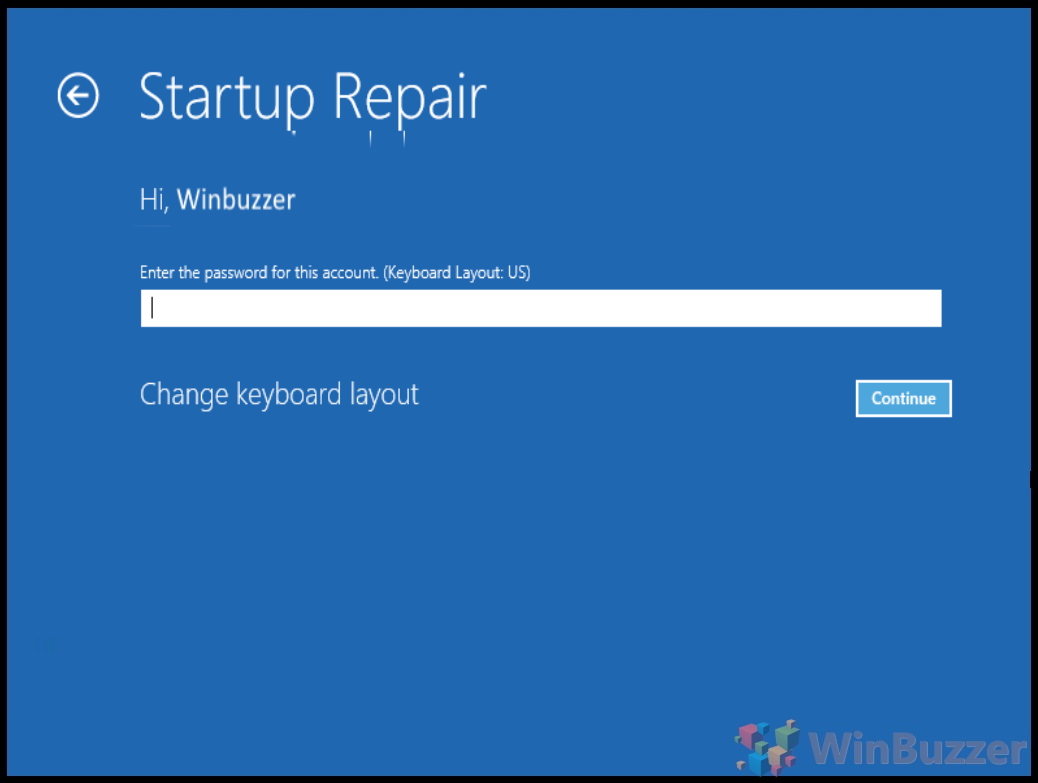
- Enter your account password
This security measure ensures someone can’t just come along as repair your PC at will.
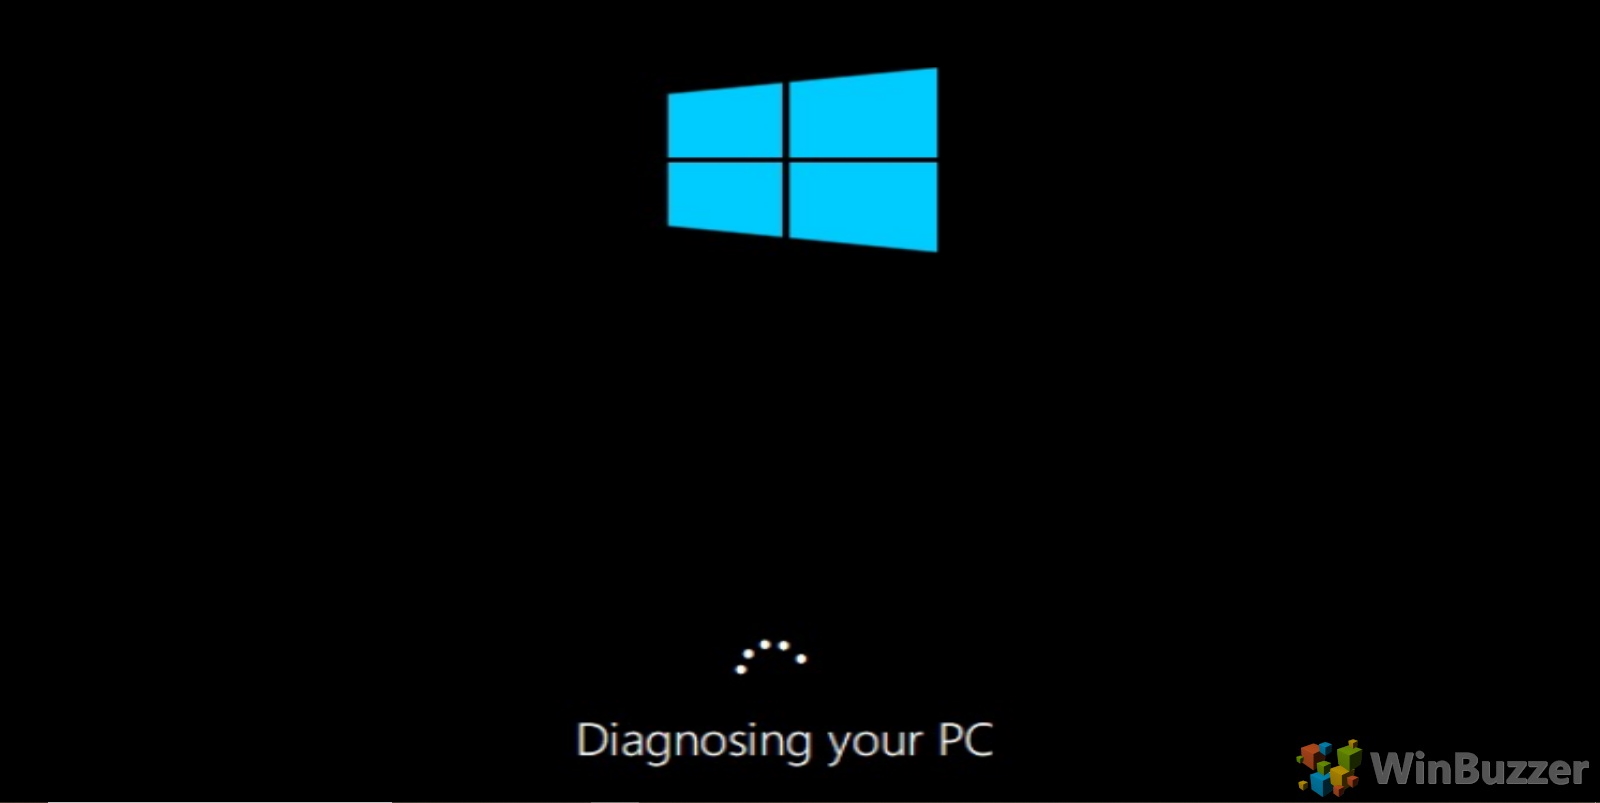
- Wait for the diagnosis and repair
Windows 10 Startup repair will now scan your PC for issues and automatically fix them it finds ones it can resolve.
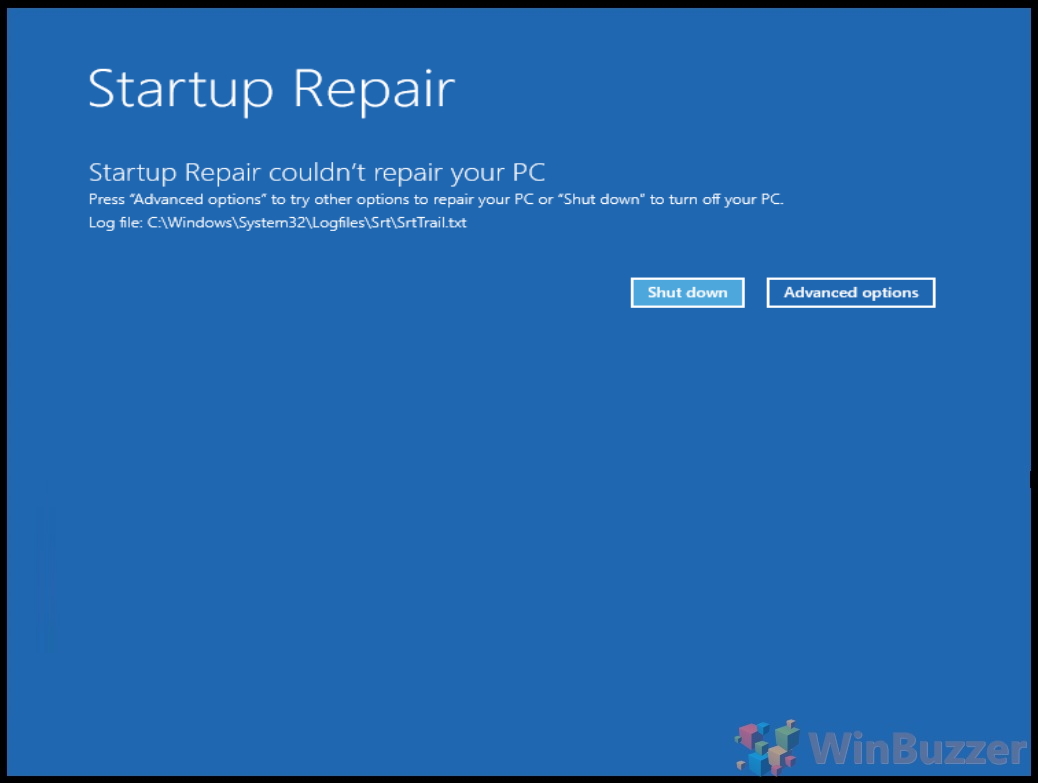
- If your PC can’t be automatically repaired:
If you don’t have any errors of it can’t find the problem you’ll be met with the screen below. You can check the log file, shut down your PC, or pursue other repair methods.
FAQ – Frequently Asked Questions on Windows 10 Startup Repair
Can Windows 10 Startup Repair fix issues caused by viruses or malware?
Startup Repair primarily addresses system and boot-related problems. It’s not designed to remove viruses or malware. For these issues, use dedicated antivirus software such as Microsoft Defender.
What should I do if Startup Repair repeatedly fails to fix the problem?
If Startup Repair fails repeatedly, consider performing a system restore, resetting Windows 10, or seeking professional technical support, as the issue might be more complex.
Can I use Startup Repair for problems unrelated to booting, like system crashes or performance issues?
No, Startup Repair is specifically designed for boot-related issues. For crashes or performance problems, other tools like Windows System File Checker or Performance Monitor are more appropriate.
How does Startup Repair differ from a clean Windows install?
Startup Repair attempts to fix boot issues without affecting personal files, whereas a clean install erases all data and reinstalls Windows, often resolving deeper issues.
Is it possible to use Startup Repair on a dual-boot system?
Yes, but it only repairs the Windows 10 boot environment. If the issue lies with another operating system in a dual-boot setup, you’ll need to use that system’s repair tools, like SFC or DISM.
How can I prevent issues that require Startup Repair in the future?
Regular system updates, avoiding untrusted software, and maintaining good system hygiene can reduce the likelihood of issues requiring Startup Repair.
What are the common signs that indicate the need for Startup Repair?
Common signs include the inability to boot into Windows, frequent blue screen errors during startup, and error messages related to boot files.
Can Startup Repair resolve issues with Windows updates?
If a Windows update causes boot problems, Startup Repair can potentially resolve these issues by repairing the boot environment.
Will using Startup Repair affect my installed programs or system settings?
Startup Repair focuses on boot files and typically doesn’t affect installed programs or most system settings.
How do I access the log file after a Startup Repair attempt?
After a Startup Repair attempt, you can access the log file (SrtTrail.txt) in the folder C:\Windows\System32\LogFiles\SRT\ for detailed information about the repair process.
Can Startup Repair fix boot issues on an SSD?
Yes, Startup Repair works with both HDDs and SSDs, addressing boot-related issues irrespective of the storage type.
What if Startup Repair asks for a recovery key for BitLocker?
If your drive is encrypted with BitLocker, you’ll need the recovery key to proceed with Startup Repair. This key is usually stored in your Microsoft account or on a printout.
Is there a way to manually intervene or customize the Startup Repair process?
Startup Repair is largely automated. Manual intervention is limited and typically not recommended for users without advanced technical knowledge.
Can Startup Repair fix boot issues after changing hardware components?
It can resolve some boot issues related to hardware changes, but if the problem is due to driver conflicts or firmware issues, additional steps may be required.
What to do if I encounter an error message stating ‘Startup Repair couldn’t repair your PC’?
If this message appears, you can view the log file for specifics, try other advanced options like System Restore, or consider a fresh Windows installation.


