It’s 2020, and that means screen savers are pretty much a thing of the past. You no longer walk past stationary PCs to see a DVD logo, matrix code, or tangled tubes. But what if you still own a CRT or want the nostalgia factor? Well, Windows 10 still lets you set and change a screen saver, but it tucks the option away behind several menus.
What is a screen saver?
A screen saver is a moving image that displays once your PC is idle for a while. They were invented back in the day of CRT monitors to solve a very real problem. Much like the AMOLED screens in phones today, leaving a static image on the screen for too long could cause burn-in – a ghost image that remains on the display at all times, distracting the user.
A screen saver is a way to ensure the image on the screen is constantly changing. Even when a user is away from the desk, pixels will bounce around with whatever animated wallpaper they’ve chosen.
As a result, screen savers have little use in modern LCDs and that’s why Microsoft makes it so difficult to change screen saver settings or find Windows 10’s screensaver locations. For reference, you can find them in C:\Windows\System32, and that’s also where you should place ones you save from places like Screensavers Planet. We’re going to show you how to set a custom screensaver and relive the early 2000s.
How to Set a Screen Saver and Change Screen Saver Settings in Windows 10
You can still add a custom screen saver in Windows 10, it’s just buried in the new settings menu.
- Open Settings
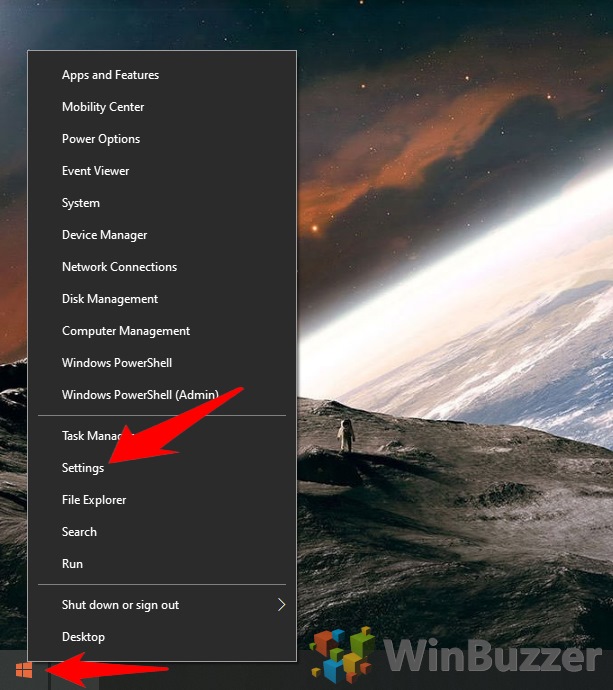
Press “Windows + X” to open the fly-out menu and click “Settings”.
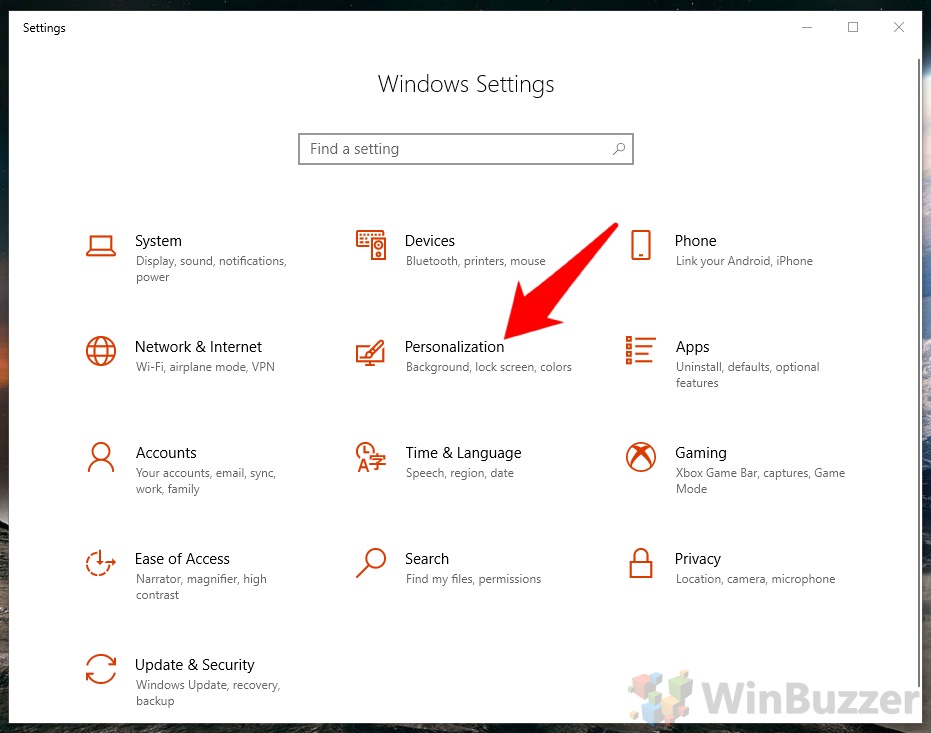
- Click “Personalization”
- Open Screen saver settings
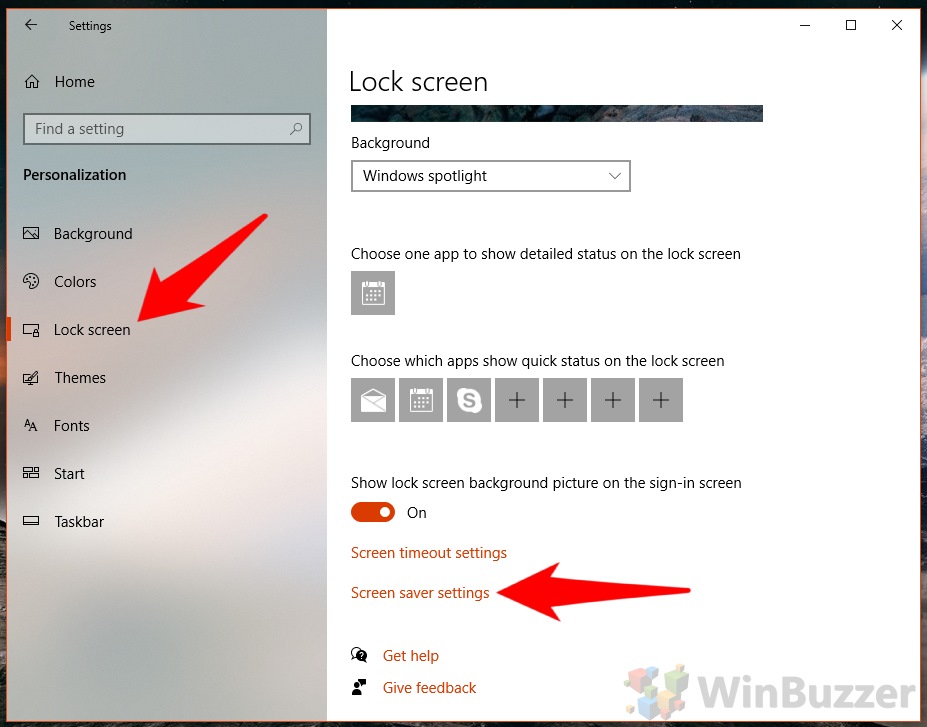
In Personalization settings, click on “Lock screen”, then “Screen saver settings”.
- Choose your screen saver
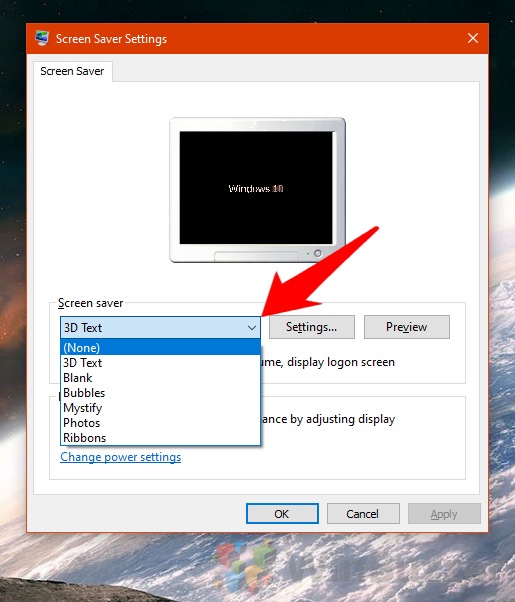
You can select the screen saver of your choice via the drop-down menu in screen saver settings. If you downloaded a custom screen saver, you can also select it here if you’ve placed it in yourC:\Windows\System32folder.
- Create a custom screensaver by adjusting the settings
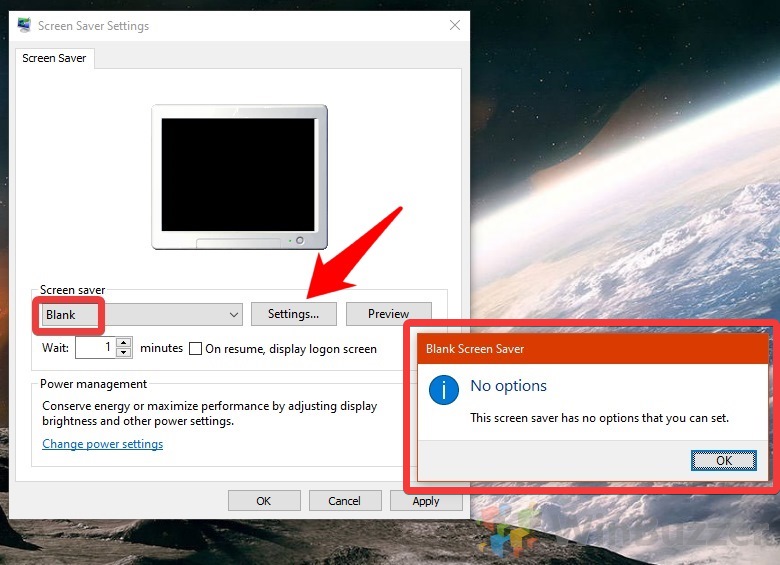
Depending on the screen saver, there may be room for more customization. Clicking the “Settings…” button leads you to a screen where you can change things like text, rotation type, resolution, surface style, and more. Once you’re done customizing, press “OK”.
- Some screen savers can’t be customized
If you get a “No options” error, that’s because the screen saver you have selected can’t be modified. If that’s the case, just press “OK”.
- Preview your changes
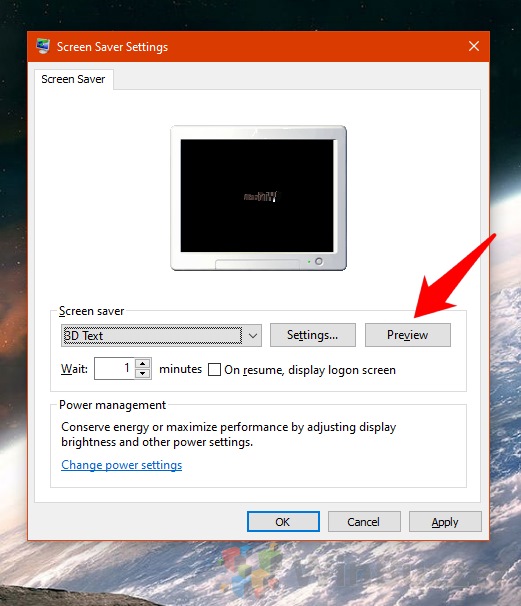
You can preview the screensaver or any changes you made with the “Preview” button.
- Adjust the timeout period
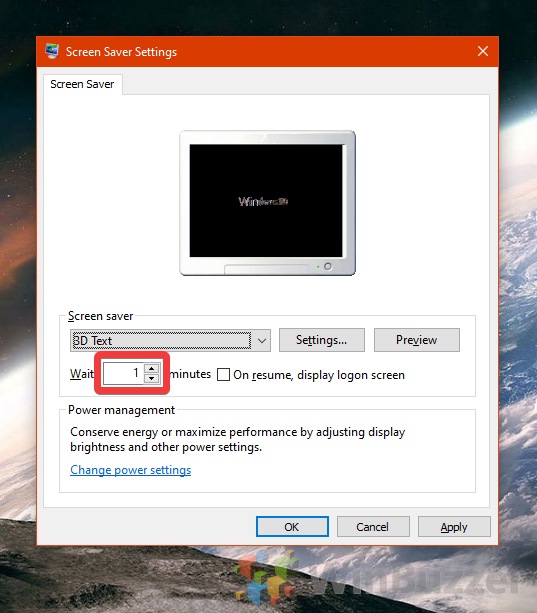
Change the “Wait” value to adjust the number of inactive minutes before you PC starts its Windows 10 screen saver.
- Enable or Disable the logon screen option
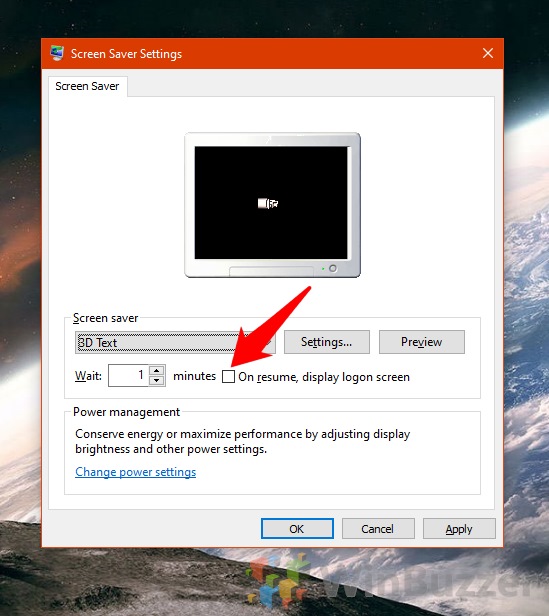
You can choose whether you see the logon screen on return to your PC or if it just goes straight back to the desktop. The former is better for security.

