Core isolation Memory integrity is a relatively recent entry to Windows 10’s security features that can really save your hide. Through the use of virtualization, it can block malicious actors when they try to tamper with high-level system processes. Unfortunately, those who upgraded from Windows 8.1 or 7 may note that they have to enable core isolation memory integrity manually.
Those without Memory integrity disabled can run into errors like ‘Standard hardware security not supported” and “Windows Core isolation not available” when trying to enable it or perform various tasks. We’re going to show you how to enable memory integrity the right way or disable it if you’re running into issues. First, though, a bit about how the technology works and why you’d want to turn it on or off.
What is Core Isolation Memory Integrity?
Virtualization-based security was initially exclusive to Windows 10 Enterprise editions, but come April 2018 Microsoft had seen the error of its way. Windows has long been seen as less secure than competing OSes like macOS and Linux, and support on the hardware side for virtualization was becoming quite common.
Using Intel VT-x, (or AMD-V if you have a Ryzen chip), Core isolation Memory integrity creates a bubble of system memory that’s separate from the rest of the computer. It uses this to run processes it really doesn’t want attackers tampering with, such as security software and important system processes. This means that even if you have a nasty malware infection it won’t be able to touch the most important parts of your system.
As you can imagine, this is a very nice safety net, but the problems arise for those who use virtual machines. As the system’s virtualization is already being ‘used up’ by memory isolation, users will run into errors. As a result, though Core isolation as a whole is often enabled Windows 10 systems, its Memory integrity portion is usually disabled by default on upgrades. On top of this, it has a tendency to disable itself again if it runs into a driver that doesn’t support it.
Now that we’ve covered the use cases of memory integrity, let’s move on to how to turn it on or off. First, though, you should make sure you have Intel VT-x or AMD-V turned on in your PCs BIOS:

How to Enable or Disable Core Isolation Memory Integrity via Windows Security
Unsurprisingly, the easiest route to disable or enable Core isolation Memory integrity is through Microsoft’s security suite, Windows Security.
- Open Windows Security
Press “Start” and type “Windows Security”. Click the first result under ‘best match’.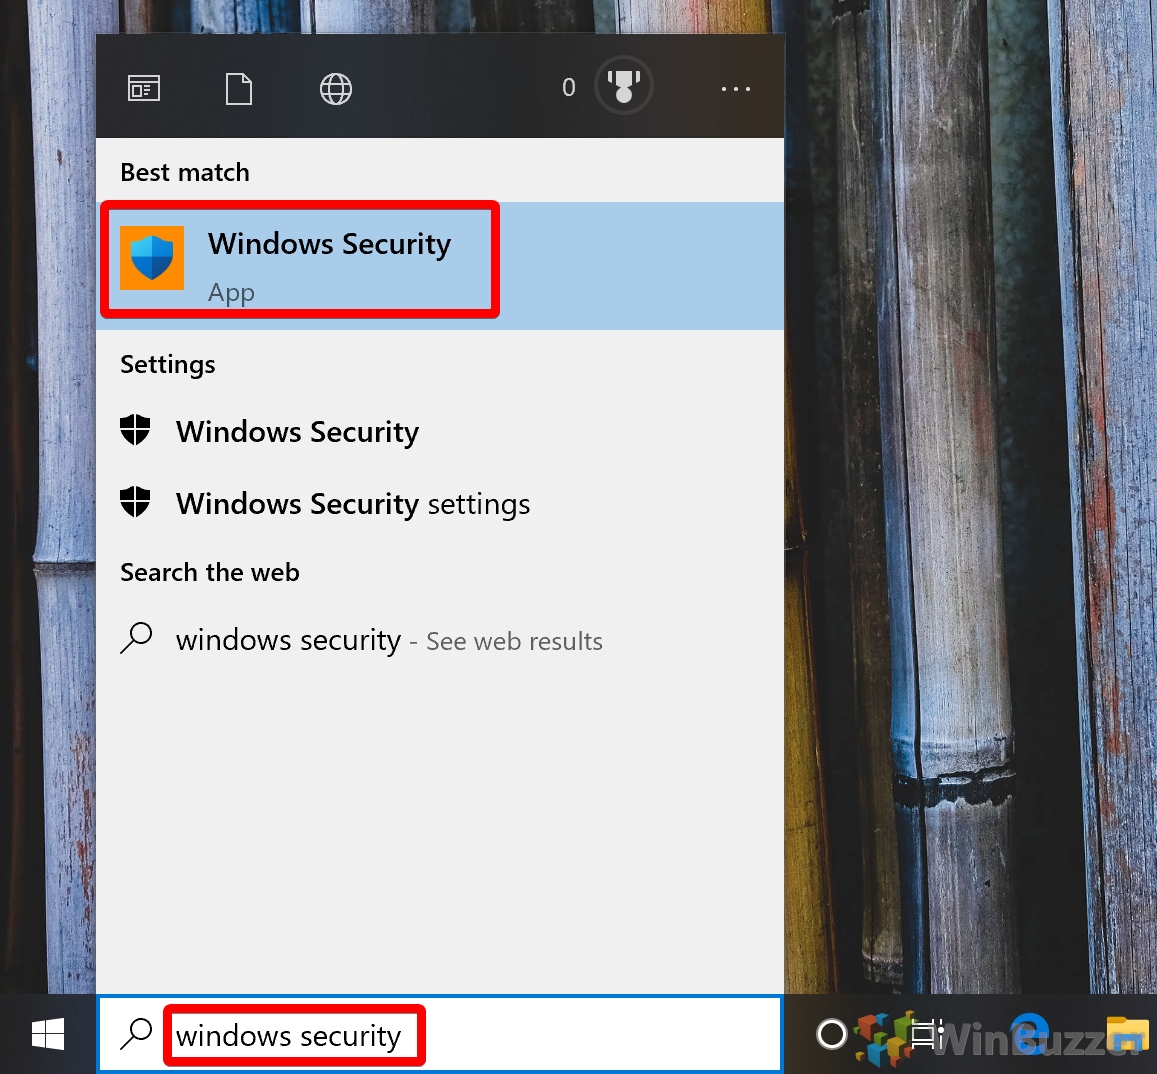
- Open Core isolation details
You can find Core isolation details by clicking on “Device Security” in the left sidebar and then clicking “Core isolation details” under the “Core isolation” heading.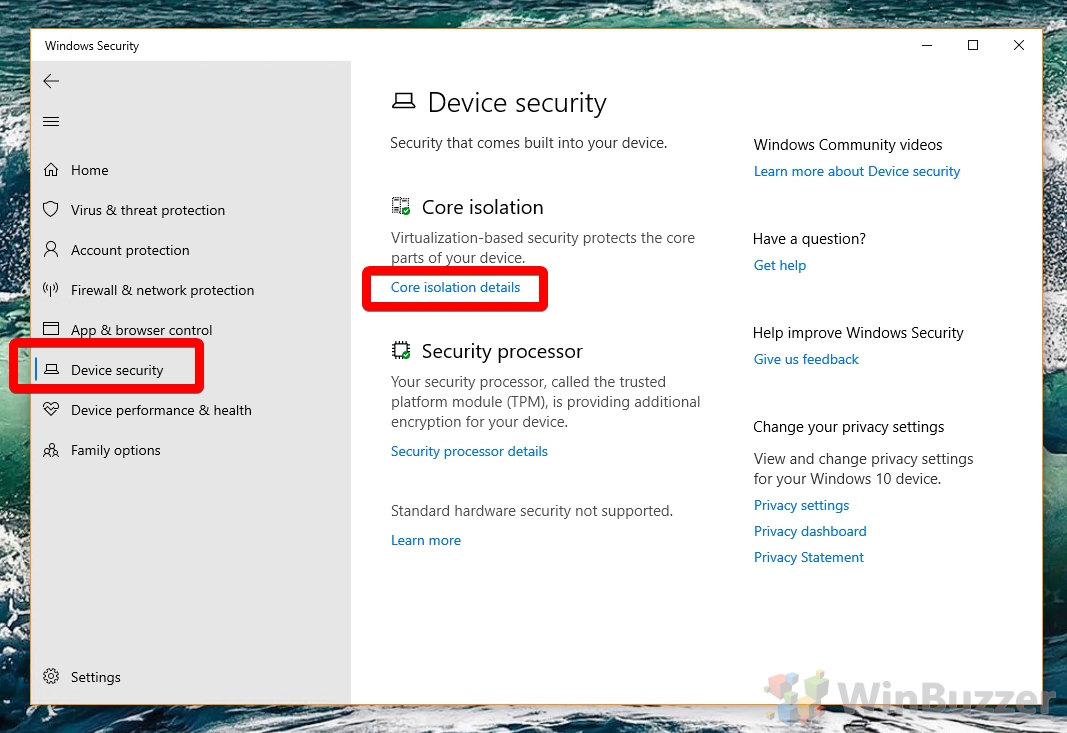
- Turn off Core isolation Memory integrity
Under the “Memory integrity” heading, switch the toggle to “Off”.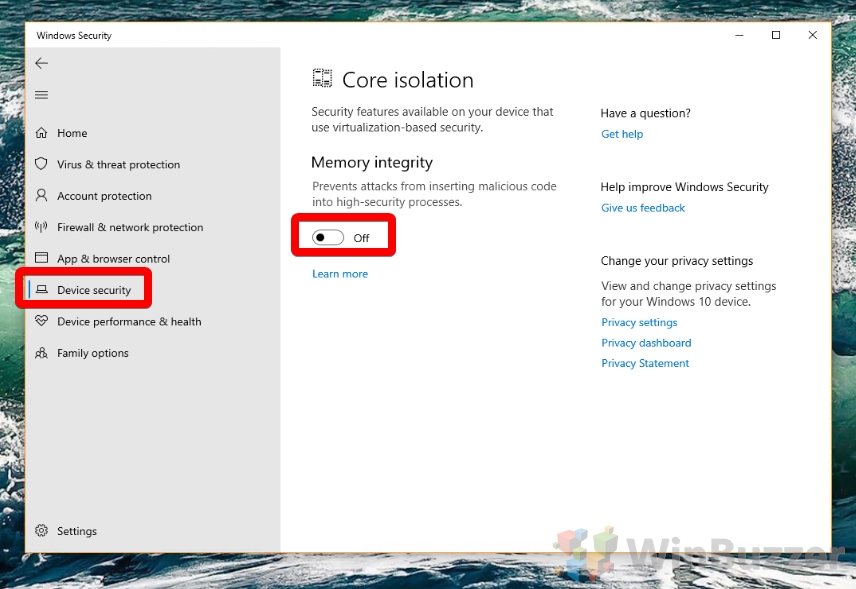
- Enable Core isolation Memory integrity
Alternatively, you can press the toggle to turn Core isolation Memory integrity on.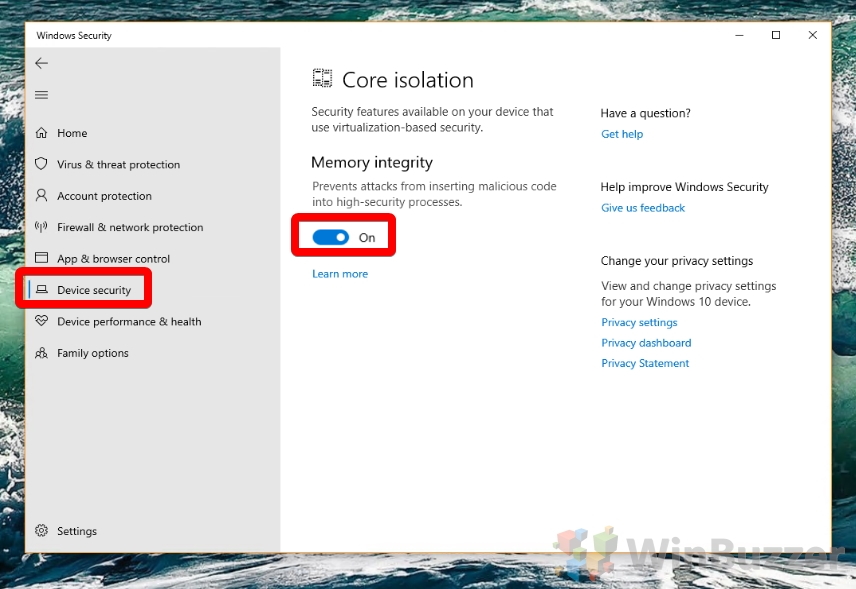
- Accept the UAC prompt
You’ll need to provide administrator permissions to modify such a security feature. Press “Yes” to the User Account Control confirmation.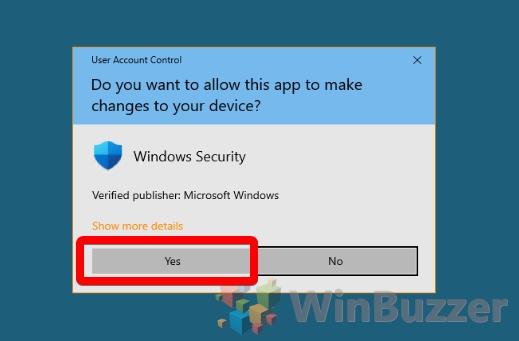
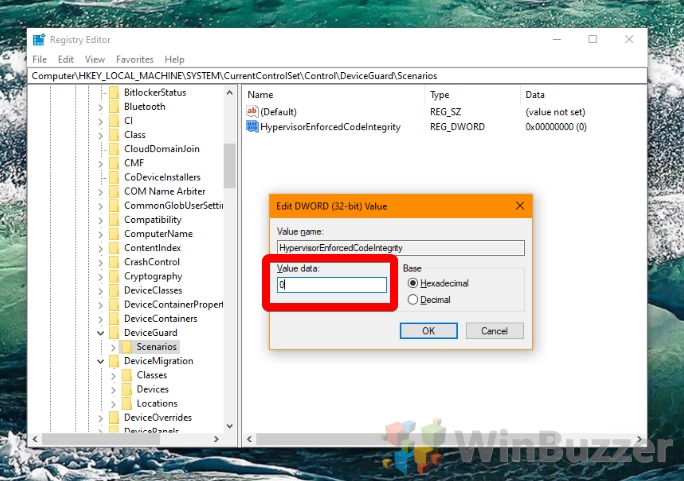
How to Disable or Enable Core isolation via Registry Editor
If you enabled Core isolation Memory integrity but find it keeps turning itself back off, you may have better luck with the Registry Editor. Just be sure to make a back up first.
- Open Registry Editor
Press the Windows key and type “Regedit”. Click the first result under ‘best match’.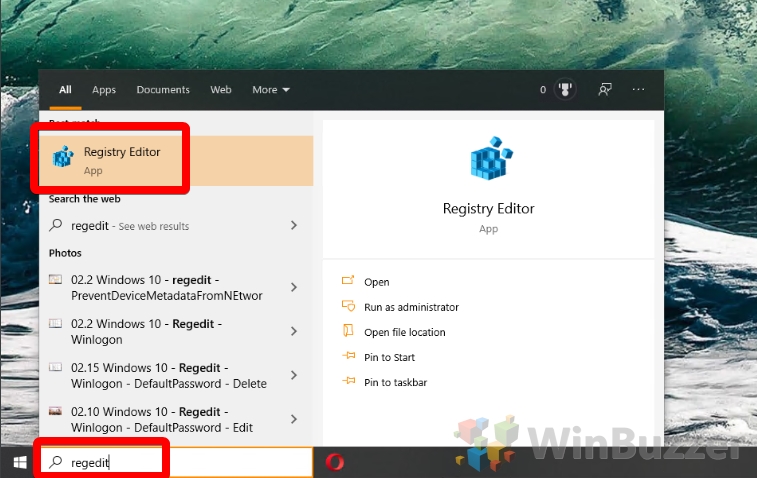
- Create a new DWORD
In the registry editor, navigate to the keyComputer\HKEY_LOCAL_MACHINE\SYSTEM\CurrentControlSet\Control\DeviceGuard\ScenariosRight-click the blank space in the main panel and choose “New > DWORD (32-bit) Value”.
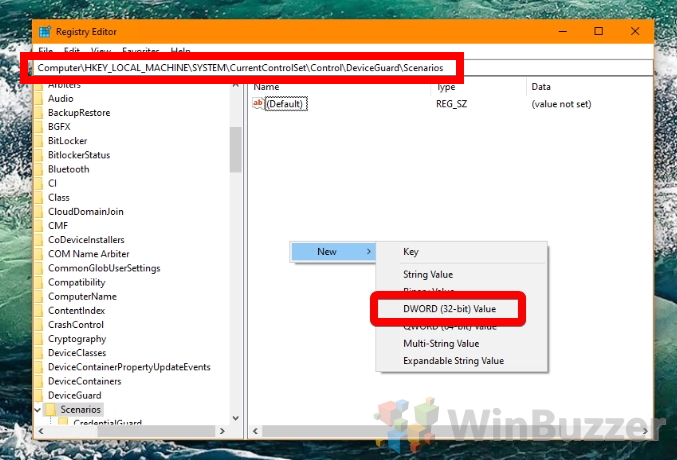
- Name the DWORD
The DWORD must be called “HypervisorEnforcedCodeIntegrity”.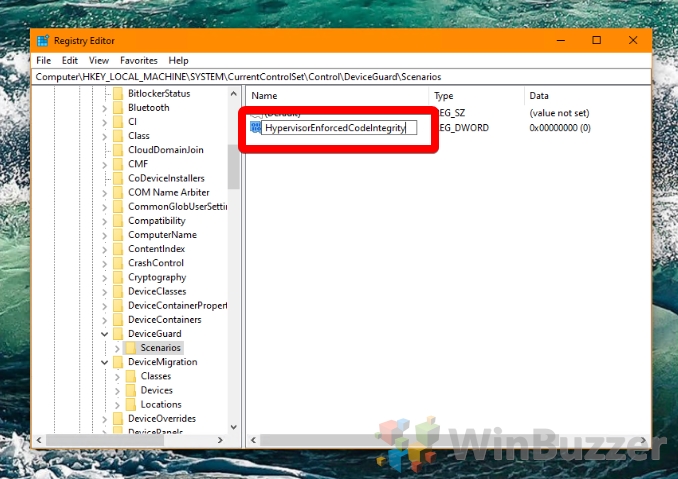
- Edit the DWORD
Double-click your new DWORD to enter the editing interface. To disable Core isolation Memory integrity, enter “0”, and to enable it, type “1”. Press “OK”.