Windows 10’s automatic driver installation is incredibly useful – until it isn’t. If the OS automatically detects the incorrect driver, it can be a real pain to get it to accept a different one, and this can be incredibly frustrating.
Generally, turning off this feature isn’t recommended, but disabling automatic driver installation for a short period is just fine if you have a particularly stubborn device. Before we get started with a tutorial, though, it’s worth noting the different types of updates Windows makes to your devices.
The one we’re all familiar with is a simple driver update. These let your hardware communicate with your computer. Without a driver, it won’t function correctly, and with generic drivers, it may not function optimally. However, Windows also downloads driver information. Product names, model numbers, and other details help the user find what they’re looking for in Device Manager.
We’re going to show you how to enable or disable automatic driver installation but bear in mind that it will switch off both of these update types. If you leave it off, you’ll also be missing out on the information required to discern devices from each other. Let’s get started:
How to Enable or Disable Automatic Driver Installation in the Windows 10 Control Panel
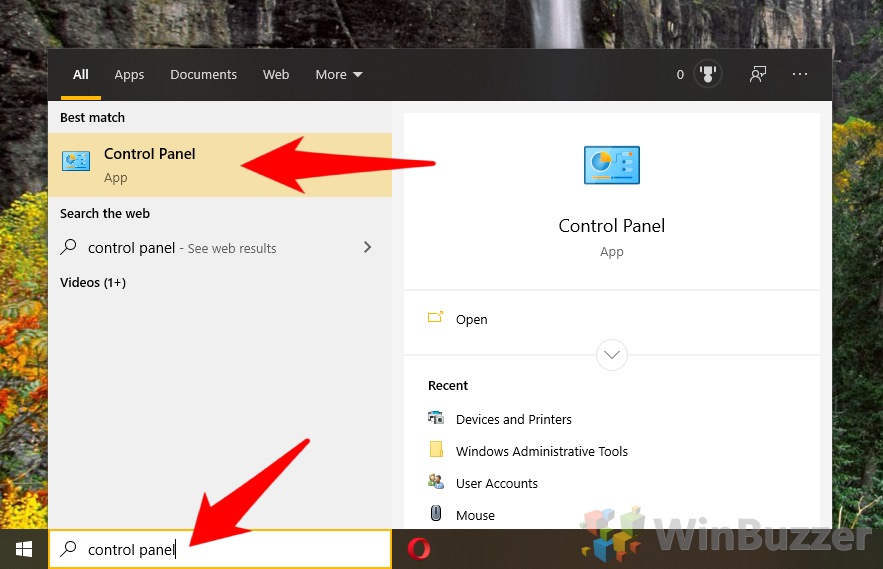
- Open the Control Panel
Press “Start” and type “Control Panel”. Click the first result under ‘best match’.
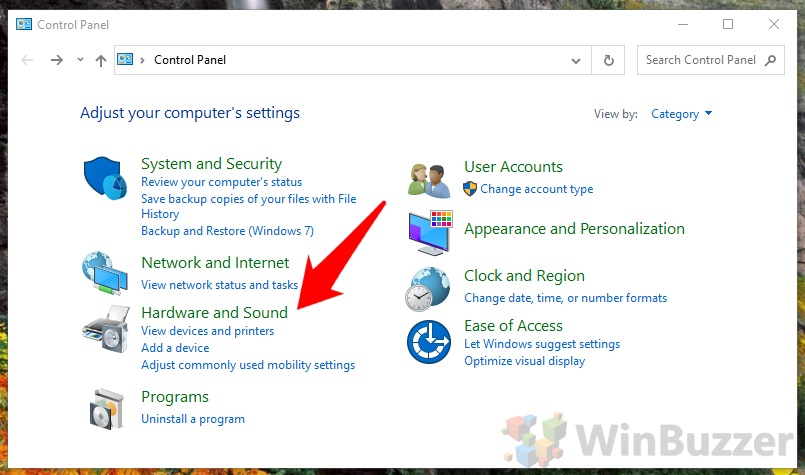
- Open Hardware and Sound
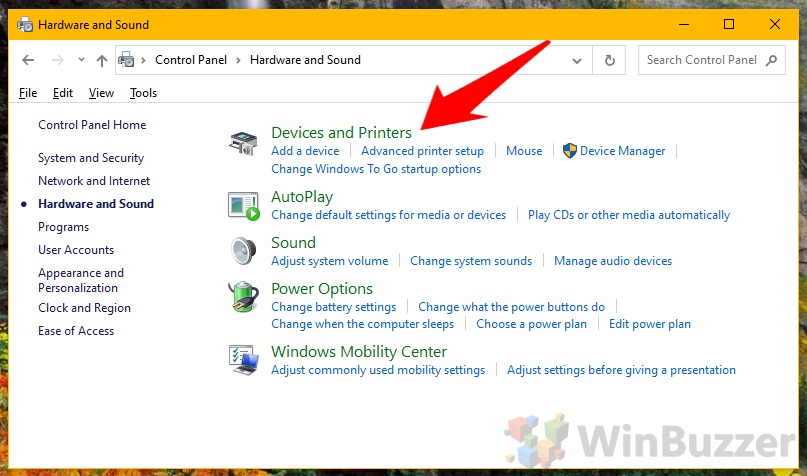
- Open Devices and Printers
- Open Device Installation Settings
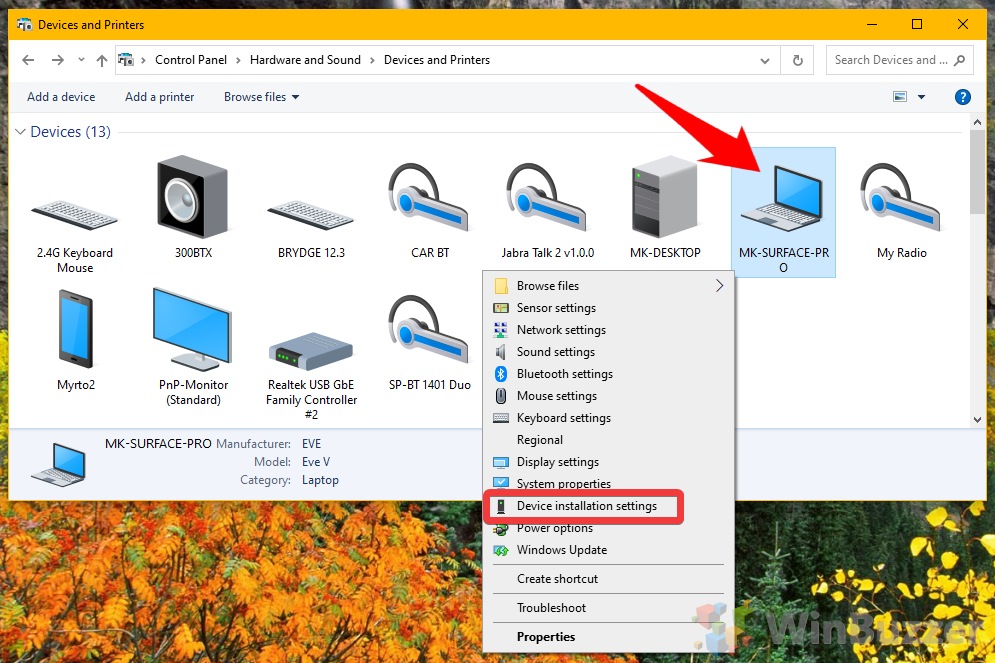
In the Devices and Printers window, right-click on the icon for your PC and click “Device installation settings”.
- Disable automatic driver installation
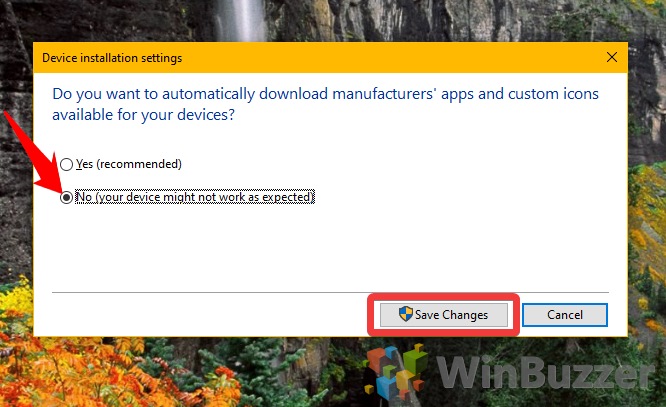
In the installation settings dialog, switch it to “Yes” to enable or “No” if you’d like to disable automatic drivers installation.
How to Turn off Automatic Installation via the Registry
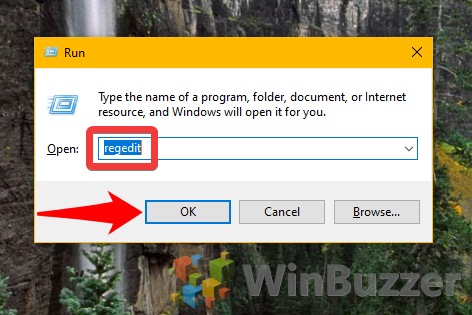
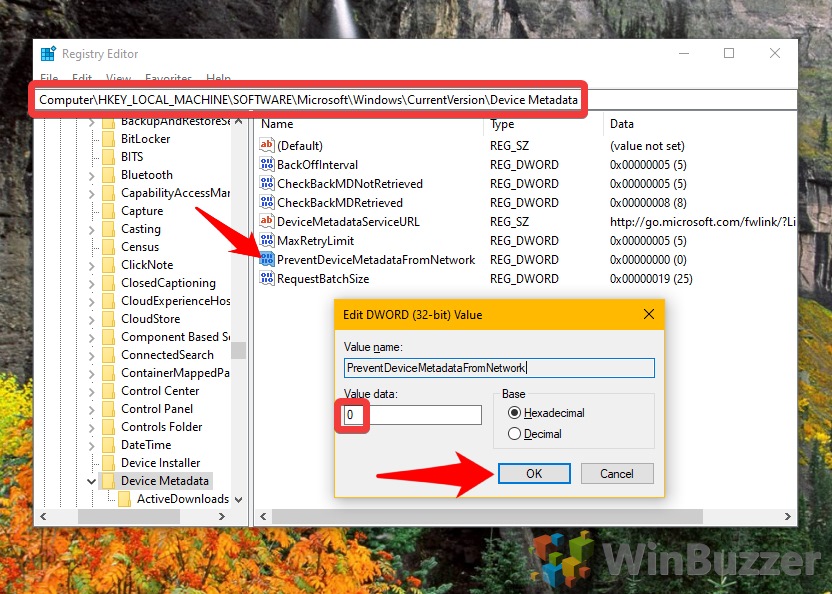
Alternatively to the first method and maybe faster, you can also disable driver driver updates in the Windows 10 registry.
