

Though many VPN providers have their own apps, you can in many cases connect to a VPN in Windows 10 without any third-party software. This is ideal if you have a self-hosted VPN or if you’re using a PC with restricted permissions. We’re going to show you how to connect to a VPN in Windows 10, and will also cover configuration and setup. First, though, a little about what a VPN is.
What is a VPN?
A VPN, or Virtual Private Network, is a secure, encrypted tunnel through which all of your PCs traffic is transmitted. It does so by using servers located elsewhere – either those of a VPN provider or one you’ve set up yourself at home.
The benefits of this are twofold: firstly, traffic transmitted from you on a network comes out of your computer as meaningless encrypted letters and numbers. This means that if you’re on a public Wi-Fi network such as hotel, nobody can snoop on your activity. VPN encryption is so strong that it’s basically impossible for someone to decrypt it.
A VPN also hides your PCs unique IP address, which can be used to locate you, from your ISP and other users and services on the internet. Because of this, it can also be used to spoof your location.
You can connect to some VPNs with Windows 10’s in-built functionality, but it depends on the protocol used. Increasingly, providers are using a protocol called OpenVPN, which makes improvements in several areas. However, Windows’ service will work just fine with those that provide options for L2TP/IPSec, SSTP, IKEv2, and PPTP. Let’s jump into how to set up and configure one of those VPNs in Windows 10:
How to Set Up and Configure a VPN
You can configure your VPN connection in Windows 10 in just a few minutes:
- Open Settings
Press the Windows key to open the Start Menu and click the settings cog on the left-hand side.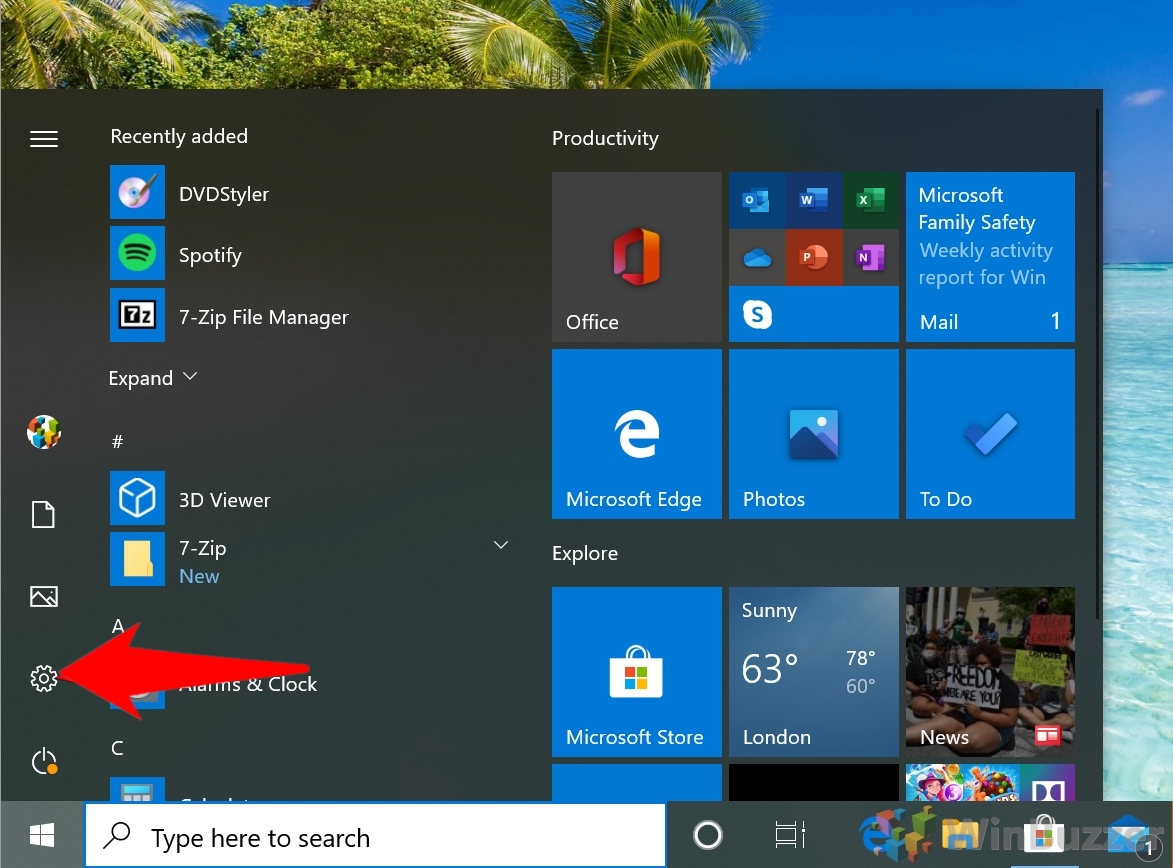
- Open Network & Internet settings
In the Settings window, click on the “Network & Internet” heading.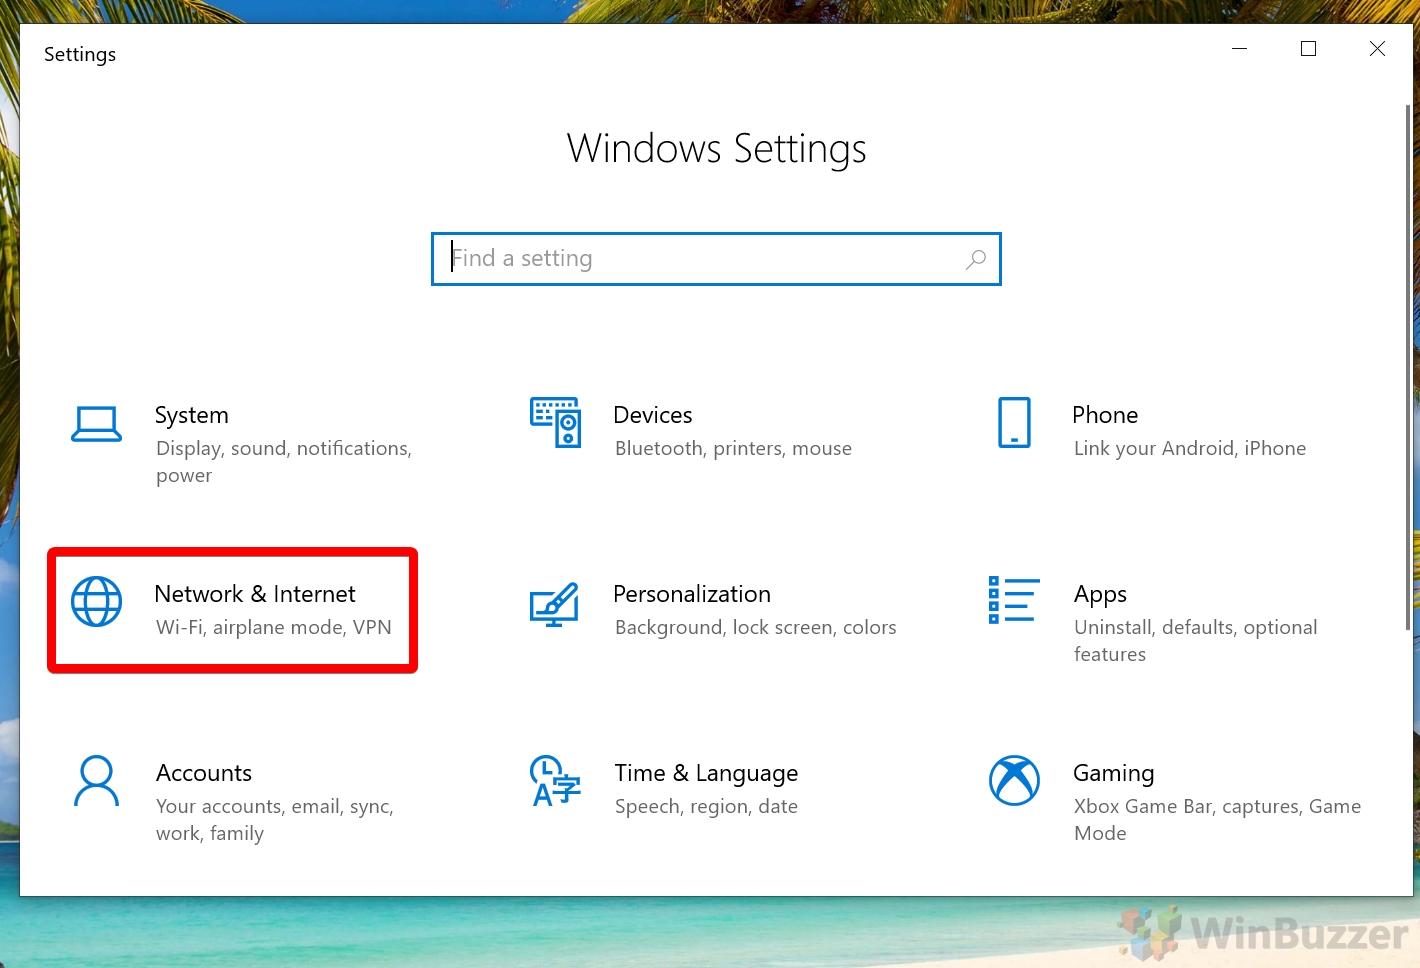
- Add a new VPN connection
In the sidebar, click on the “VPN” heading, then in the main window, “Add a VPN connection”.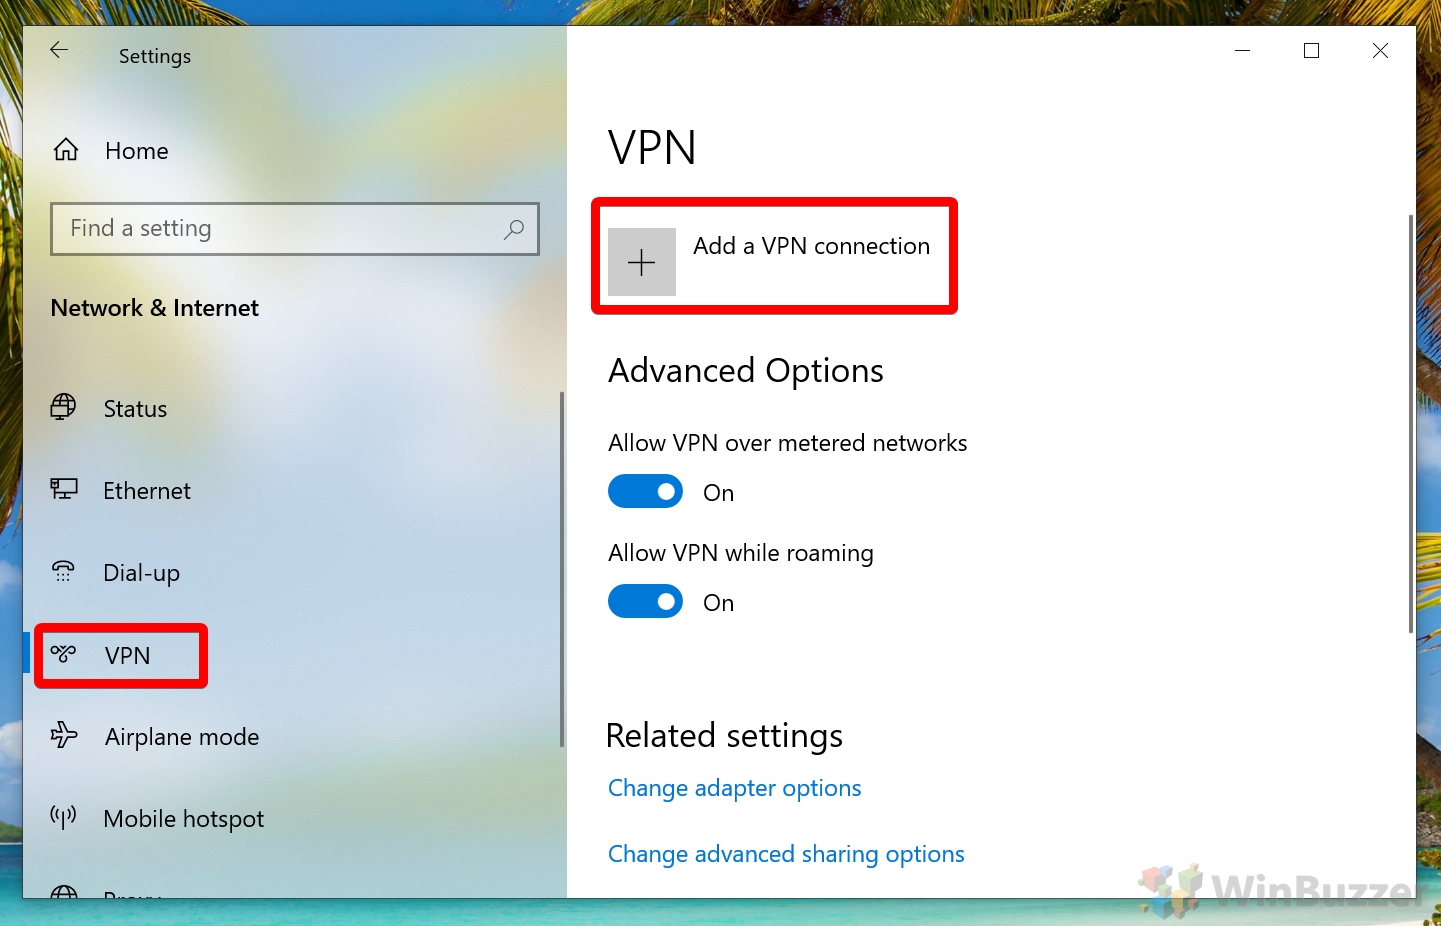
- Choose the VPN provider
Under the “VPN provider” category, select “Windows (built-in)”.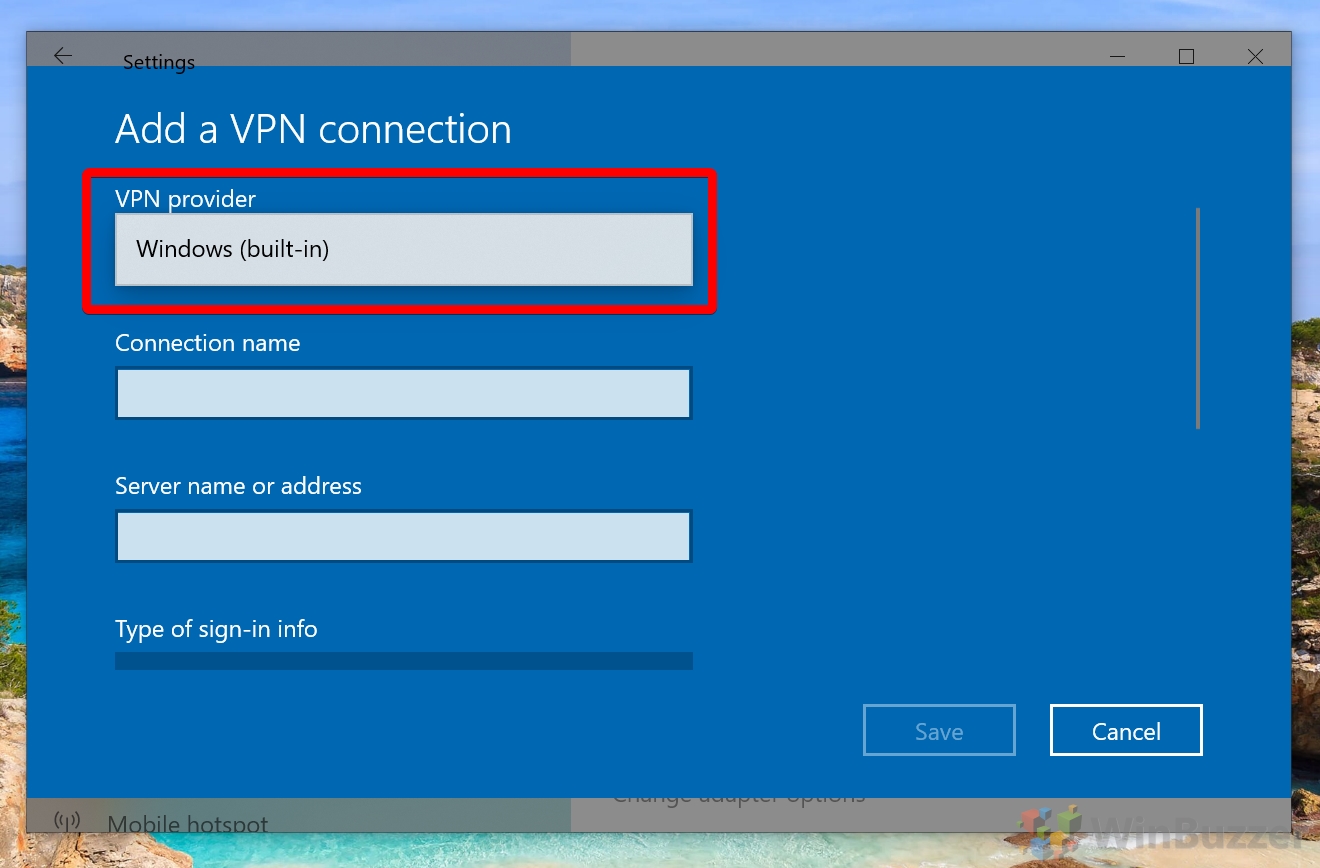
- Name the connection
This is entirely for your convenience and doesn’t have to line up with the provider.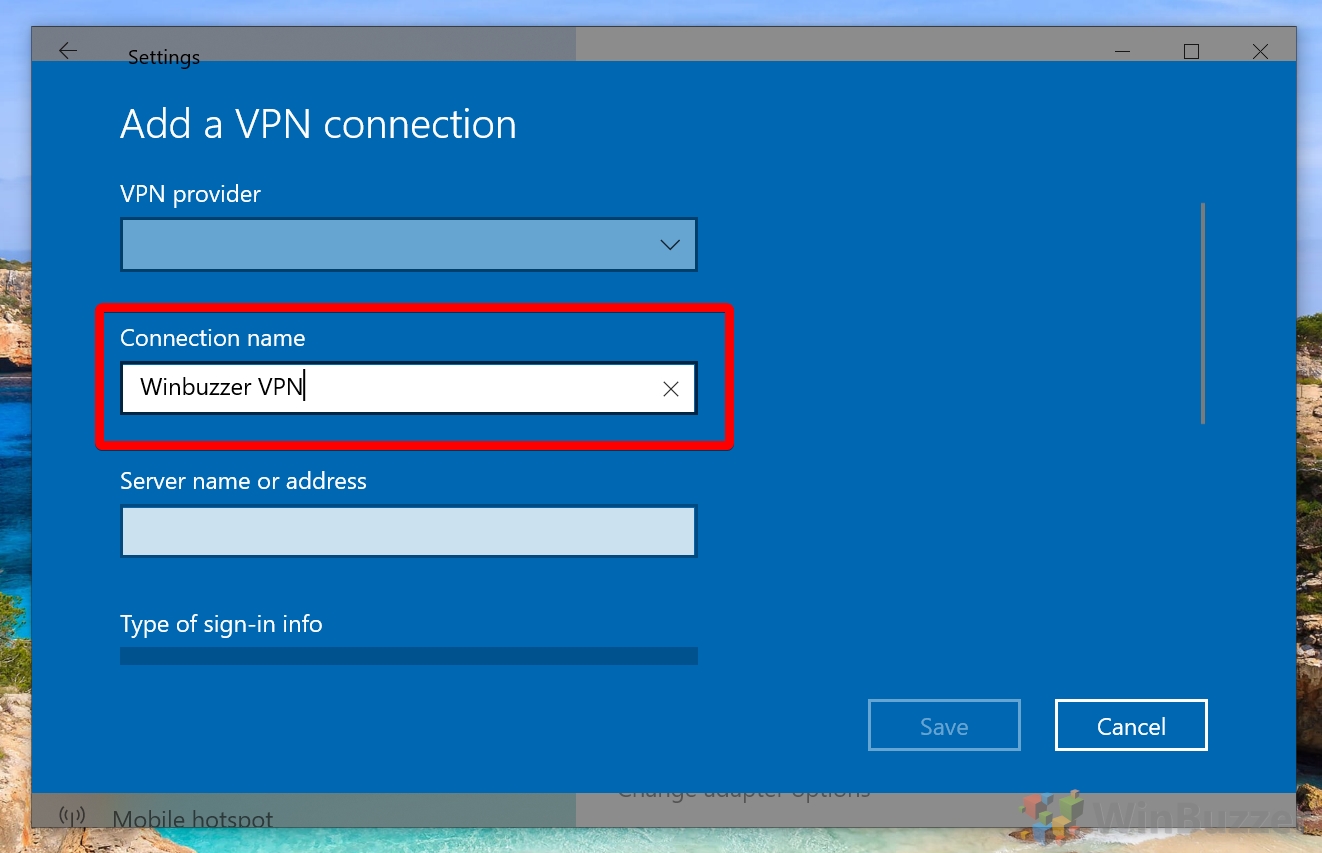
- Type the server name or IP address
This information should be available in your VPN provider’s control panel, provided they support the relevant protocols.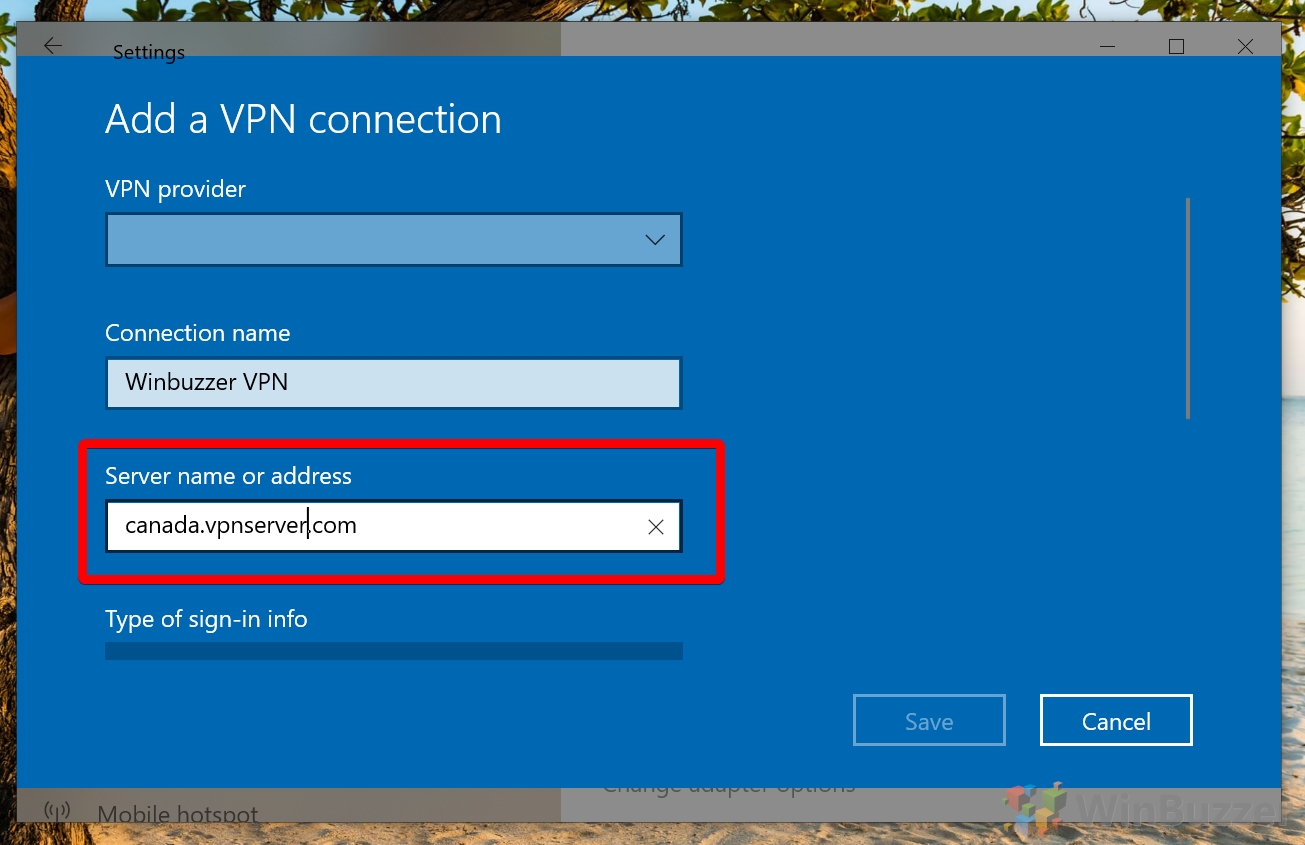
- Choose the VPN protocol
Under “VPN type” choose your provider’s protocol, or select “Automatic” if you aren’t sure.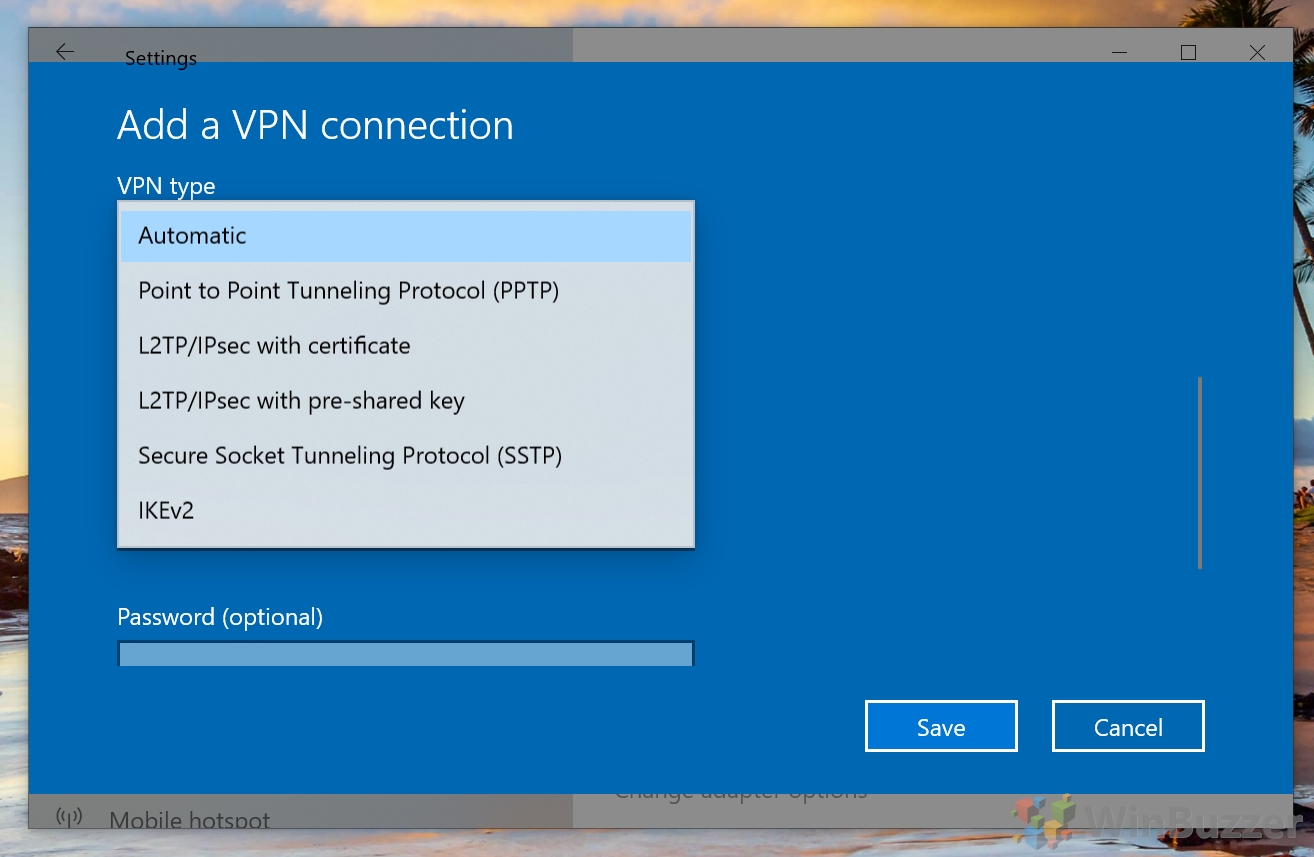
- Choose your credential type
Under “Type of sign-in info”, choose your authentication method. The most common is a username and password.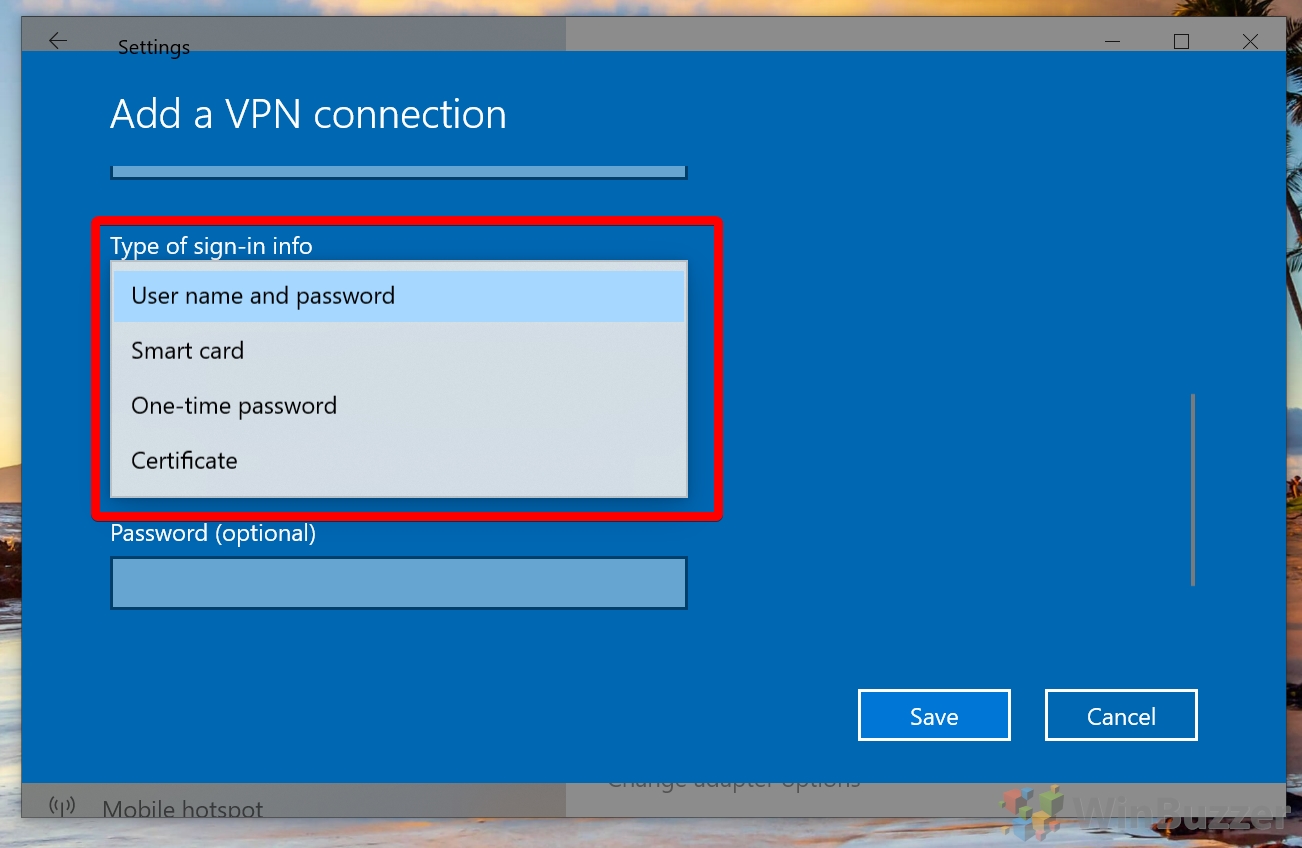
- Enter your credentials
In the next boxes, enter your credentials, whether they’re a username and password, smart card, OTP, or certificate. Once you’re done, press “Save”.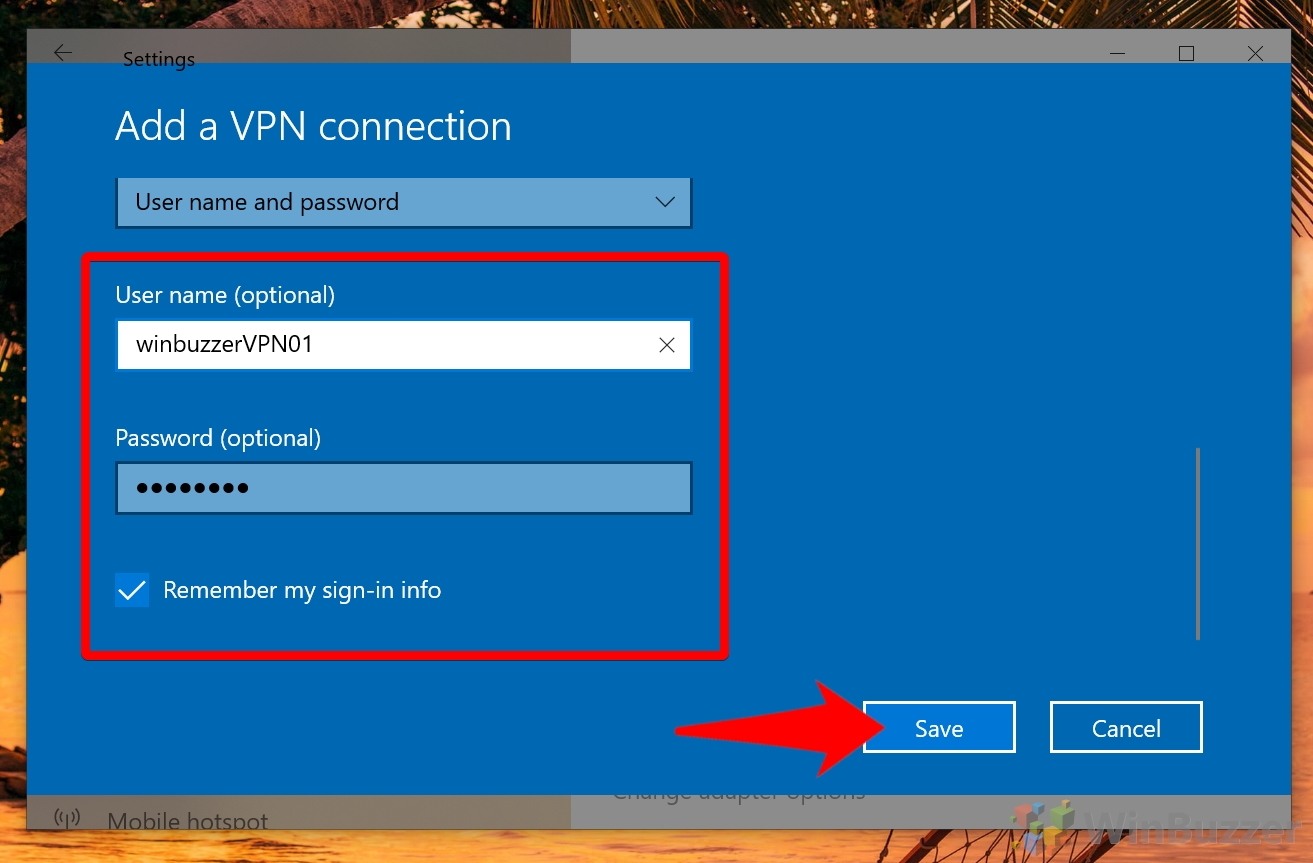
How to Connect to a VPN on Windows 10
It’s quite trivial to connect to and use your VPN once it’s configured.
- Connect to your VPN
You can connect to your VPN via the Settings menu shown previously, which is found under “Settings > Network & Internet > VPN”. Just click the VPN and press “Connect”.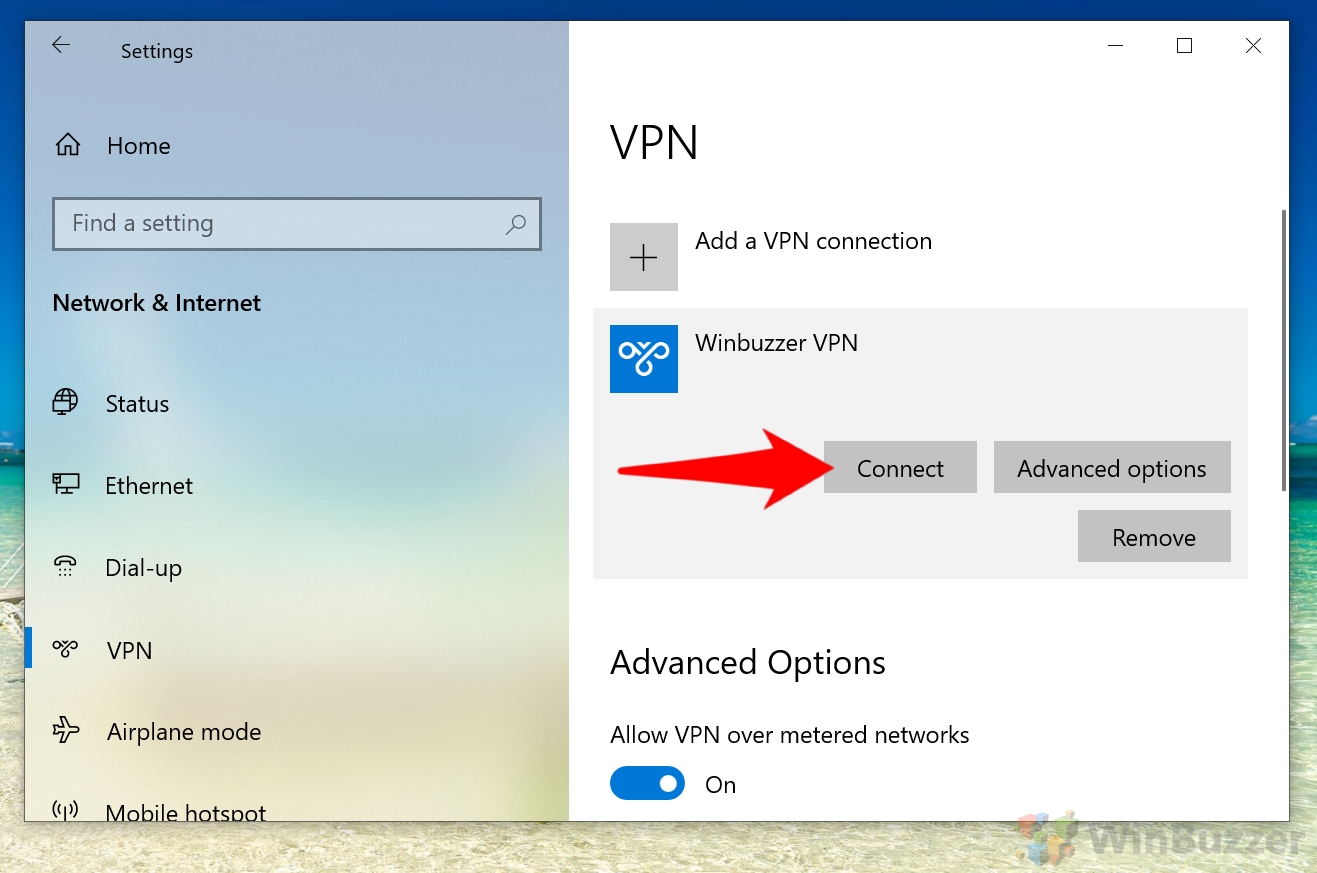
- Disconnect from the VPN
You can disconnect from your VPN in a similar manner. In the VPN settings window, click “Disconnect”.
- Edit your advanced options
There are a few more settings you can configure once your VPN is set up. To access these, click “Advanced options”, next to the Connect/Disconnect button.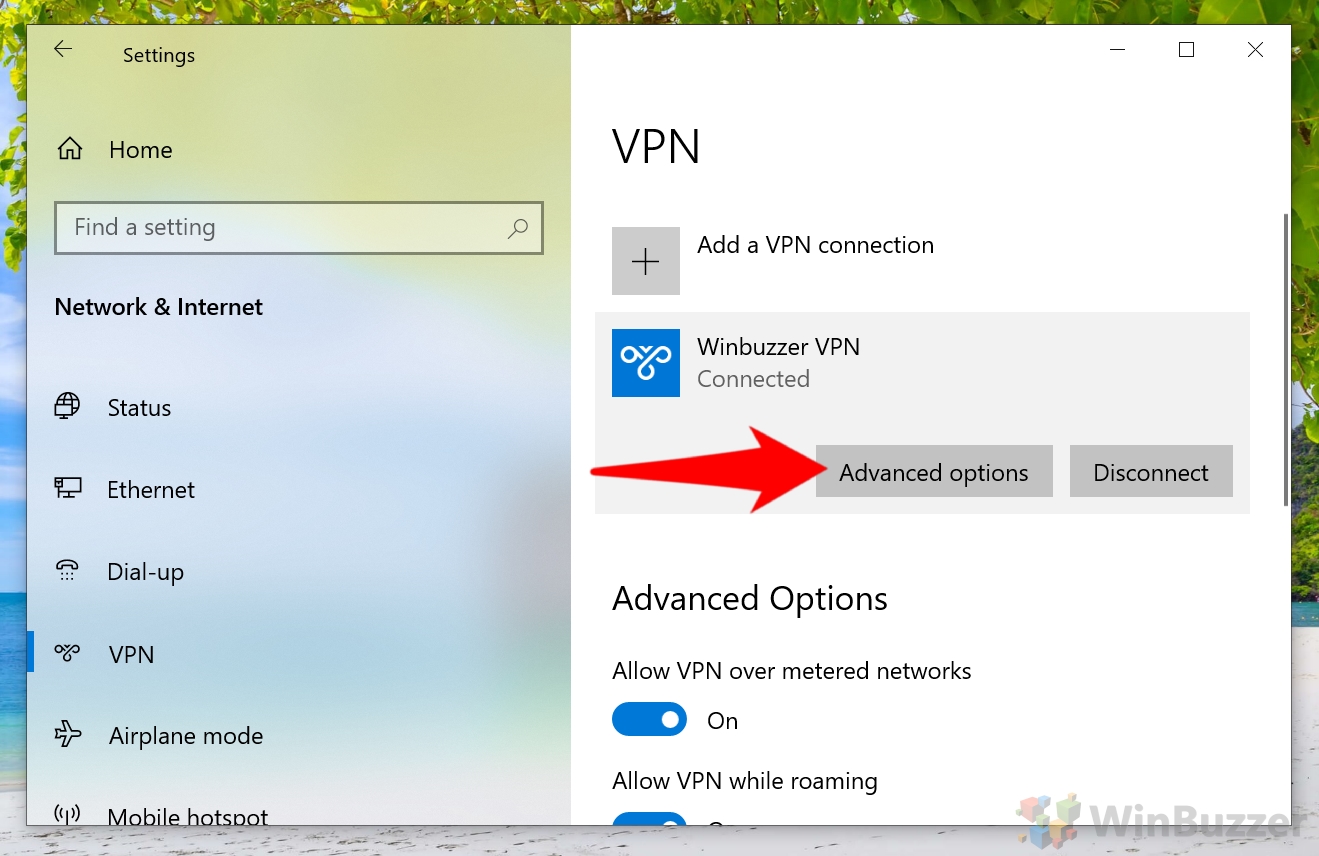
- Change your network profile or any connection properties
VPNs in Windows 10 have two profiles: Public and Private. On the public setting, your PC is hidden from other devices on the network and you can’t use it for printer and file sharing. This is what you should use if you’re at a hotel, resturant, or other public location. The private setting is designed for a network that only houses those you trust, and will let you access printer and file sharing if you wish. Underneath these settings, you can also configure your firewall, and lower down you can edit any of the information you entered during the setup.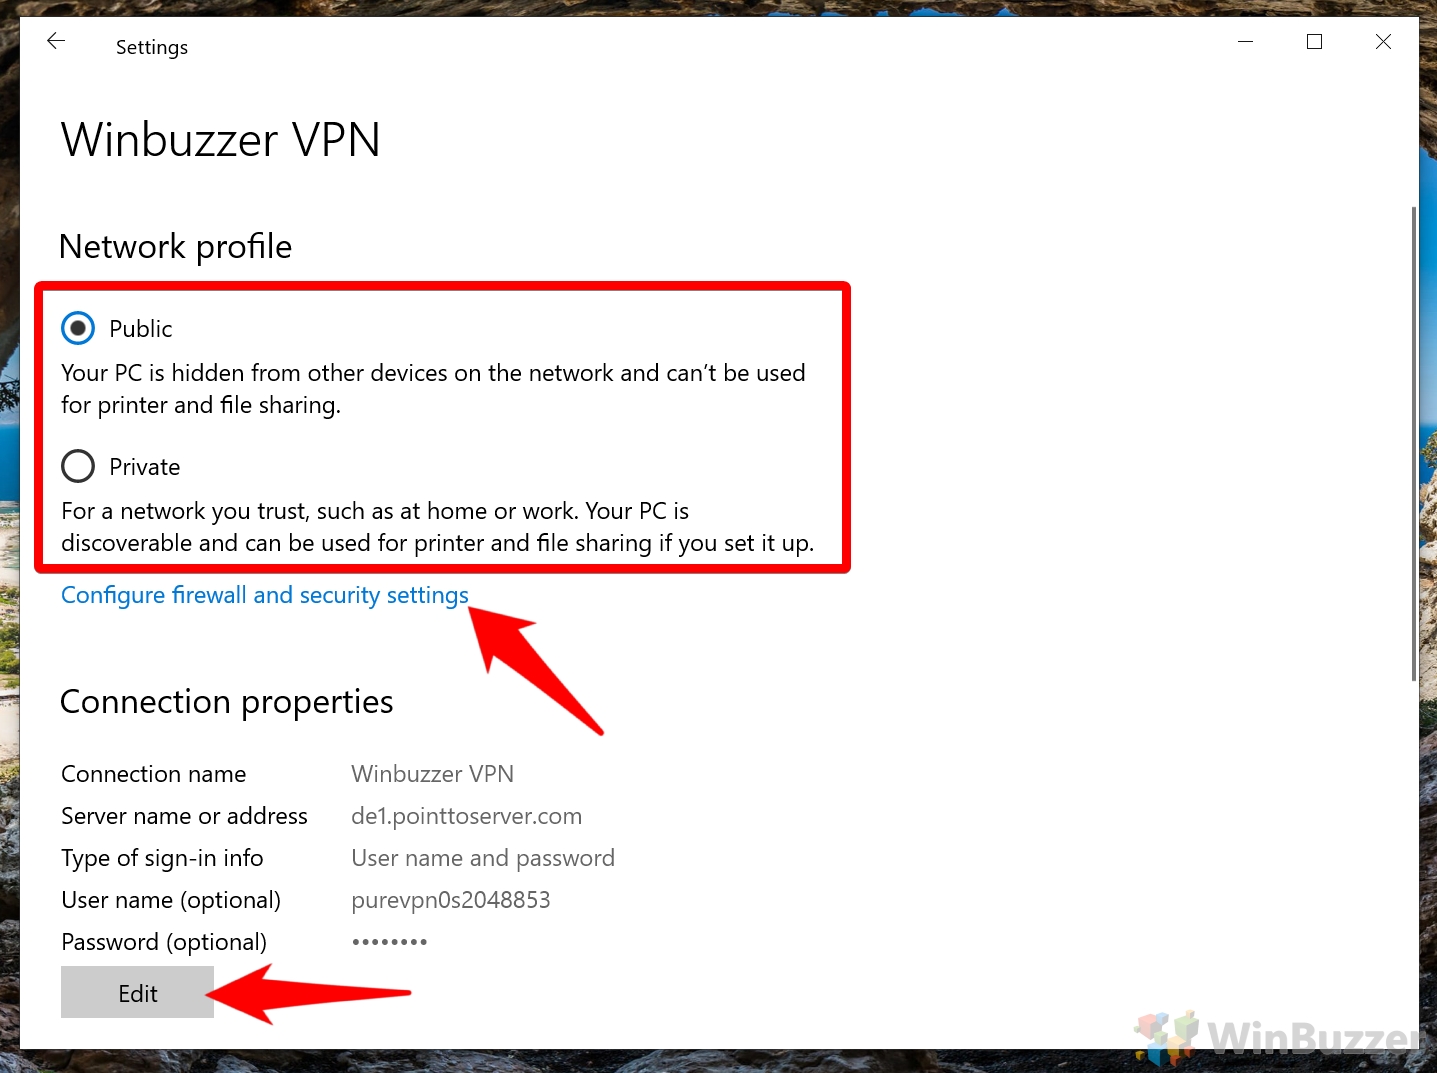
- Connect and Disconnect via the Taskbar
To connect and disconnect faster, you can click the network button on your taskbar and choose “Disconnect”.


