

Though Windows Defender tries to perform scans when it won’t have an impact on performance, it isn’t’ always successful. This has led to some turning it off entirely, which is naturally not recommended. However, you can use the task scheduler to run a scheduled Windows Defender scan at a time of your choosing.
Typically, Windows Maintenance runs a scan, which can include security, around 2 am. If you’re sleeping, it can wake up your PC to do so, but night owls may find that interferes with their usage. Though Windows security scans use fewer resources than many other solutions, it’s still heavy on the disk, which can mean slow loading or transferring.
Some have the opposite problem. As Windows Defender tries to schedule scans for when the PC isn’t in use, it can be several days before it gets a chance. If you’re the type of person who needs a guaranteed check every day, a Windows Defender scheduled scan is your only real choice.
Let’s jump into exactly how to do that so you can keep your system safe:
How to Perform a Windows Defender Scheduled Scan
Scheduling a Windows Defender scan doesn’t take long, but it does require the use of Task Scheduler, a useful tool that some may be unfamiliar with.
- Open Task Scheduler
Press the Windows key and type “Task Scheduler”. Click on the result under the “Best match” heading.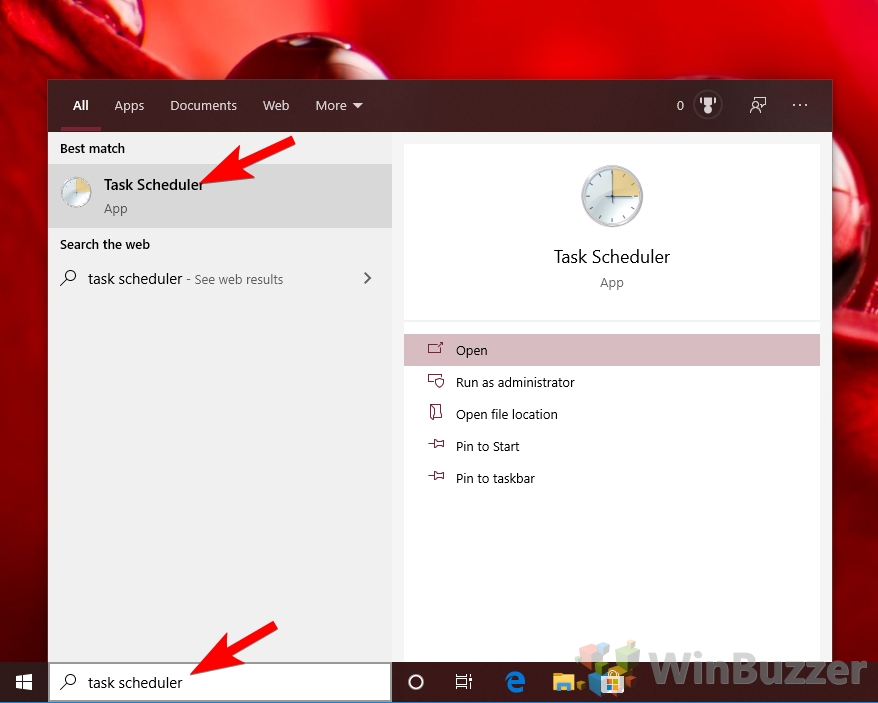
- Find Windows Defender Task options
In the Task Scheduler app, explore the sidebar until you find the folder named “Windows Defender”. It should be under “Task Scheduler Library > Microsoft > Windows”. Click on the folder to view the details.
- Open the Windows Defender Scheduled Scan Action pane
In the main window, click on “Windows Defender Scheduled Scan”. This will open an “Actions” pane, where you can click on “Properties”.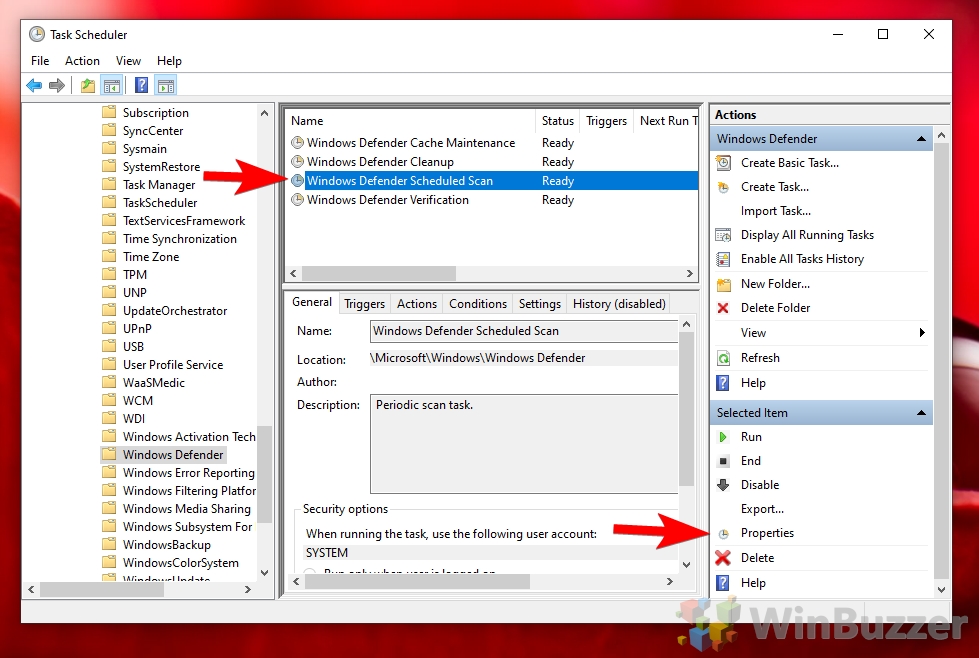
- Create a new Trigger
Switch to the “Triggers” tab and click “New…”.
- Set the time, date, and frequency of your scan
Here you can adjust your Windows defender scheduled scan settings. Make sure “Begin the task” is set to “On a schedule”, and choose a time, date, and frequency that works for you. Lastly, tick “Enabled” and press “OK”.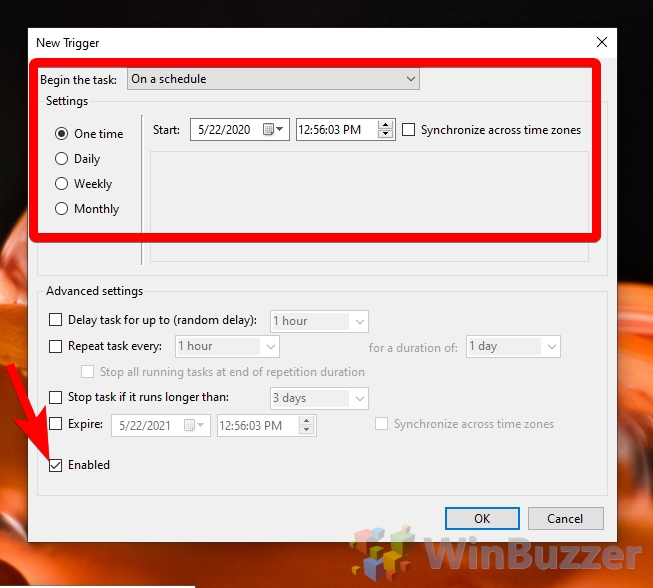
- Open the conditions menu
Back in the main scheduled scan view, use the top bar to switch to the “Conditions” tab.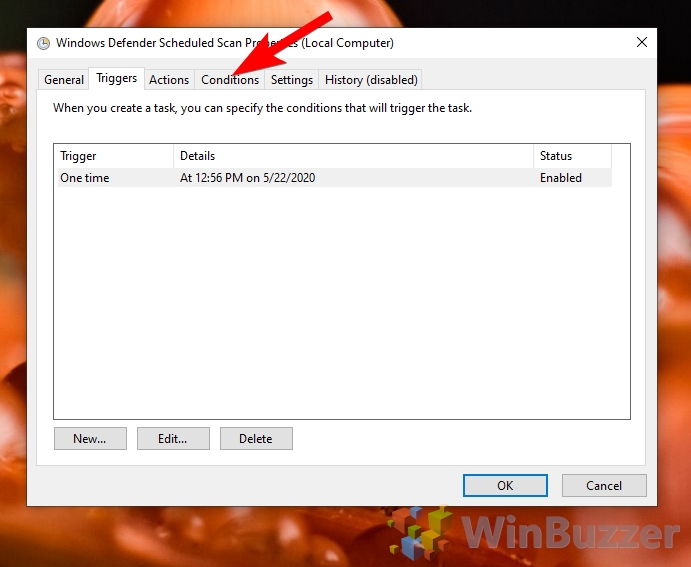
- Adjust your power settings
Under the “Power” subheading, tick “Start the task only if the computer is on AC power” and “Stop if the computer switches to battery power”. This will ensure Windows Defender doesn’t drain your laptop’s battery while you’re out and about.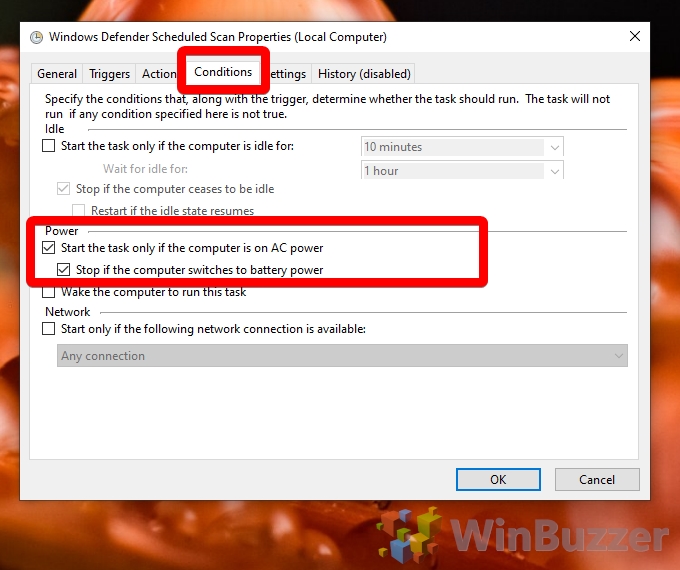
Press “OK” and close out of Task Scheduler. Make sure you’re around the first time it’s supposed to trigger to make sure it runs.


