

When something goes wrong with your Windows 10 PC, the first point of call should be to perform a system restore. Though a previously created restore point, you can bring your computer back to a previous point and likely fix many of its issues in the process.
A Windows 10 system restore can be helpful if you run into a faulty update or driver, or if you made incorrect changes to the registry. However, it’s worth pointing out that a system restore won’t affect your documents, pictures, videos, or anything else in the %UserProfile% folder.
As a result, the tool is not suitable for rolling back changes to an Office document, for example, and it isn’t a suitable solution to get rid of malware. Though it may help to remove some malicious files, they can easily persist in the folders that aren’t changed.
Whatever your use, we’re going to show you How to create a restore point in Windows 10 and how to perform a system restore from boot/Windows 10 recovery and via the usual desktop interface. Let’s get started:
How to Automatically Create Restore Points in Windows 10
You can create a restore point in Windows 10 manually or automatically. We’re going to cover the latter first.
- Open system restore
Press the Windows key and type “system restore”. Click the first result under ‘Best match’.


- Configure system restore settings
In the “System Protection” tab, chose the drive press “Configure…”.
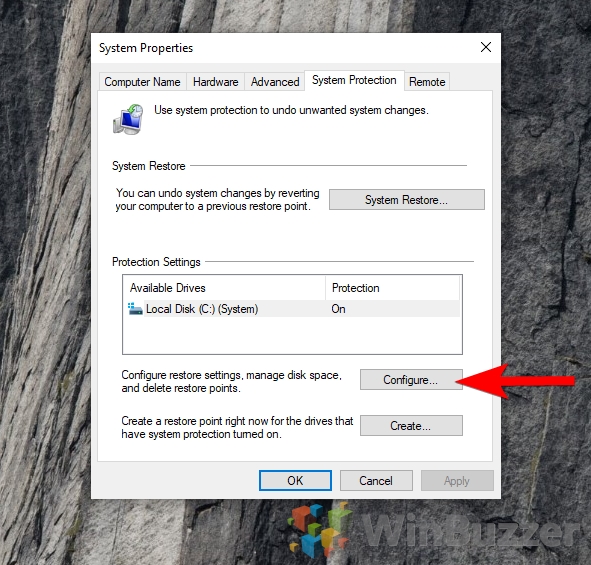
- Adjust your space allocation
Move the “Max Usage” slider until it’s at an amount you’re comfortable with. This largely depends on how much space you have to spare on your drive. As a rule of thumb, I wouldn’t go much over 10% of your drive space.

Press “OK”. Your Windows 10 will now automatically create system restore points after an update or other major changes.
How to Manually Create Restore Points in Windows 10
Often, you make changes to your system that Windows 10 doesn’t deem worthy of an automatic restore point. This is when a manual entry comes in handy.
- Open system restore settings
Press the Windows key and type “system restore”. Click the first result under ‘Best match’.
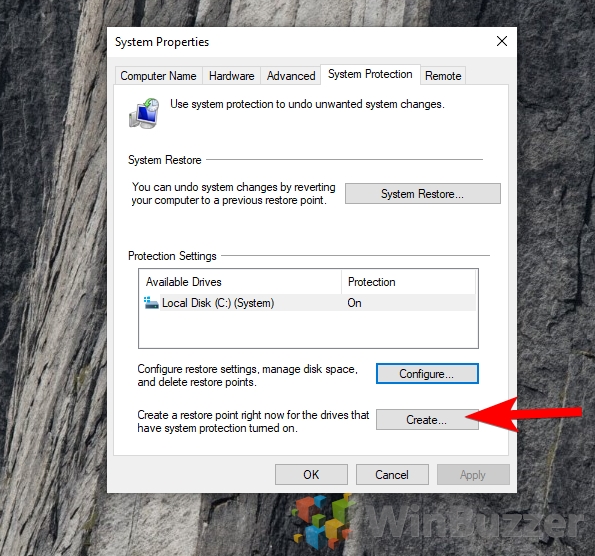
- Initiate restore point creation
In the “System Protection” tab, click “Create…”.
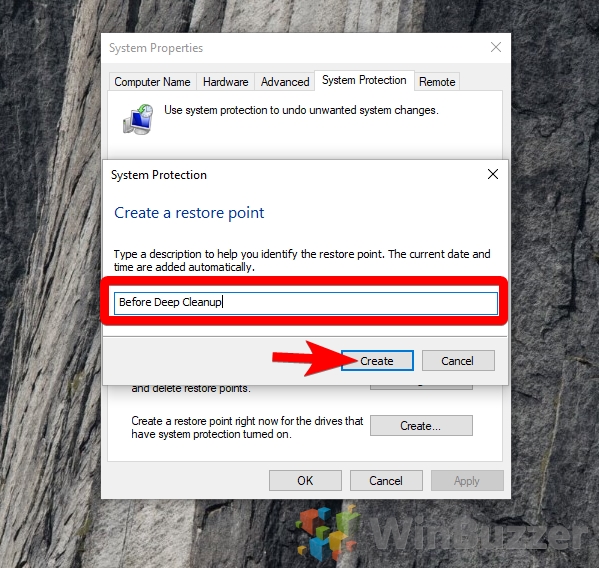
- Name your restore point
In the ‘Create a restore point’ window, type a description. It may be tempting, but don’t call it “asdf”. Names should be descriptive so you can remember exactly why you made it. Windows saves the date and time automatically, so there’s no need to add that. Press “Create”.
How to Use System Restore to Return to a Previous Restore Point
The easiest way to restore from a point is via the system properites interface when already signed in.
- Open System Protection
Press the Windows key and type “system restore”. Click the first result under ‘Best match’.
- Open “System Restore…”
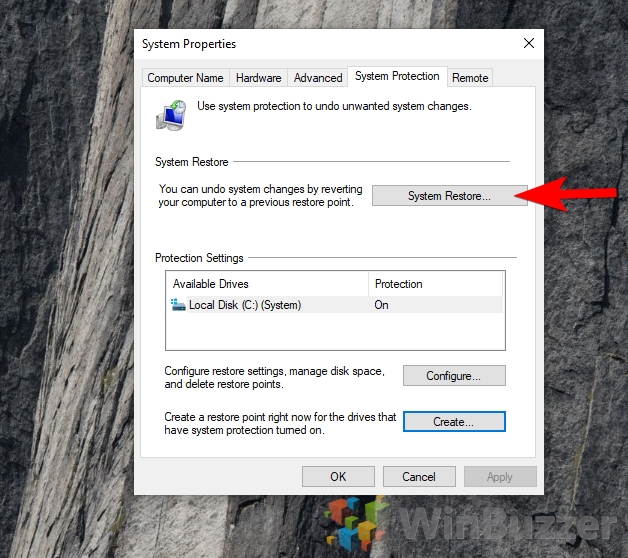
- Click “Next”

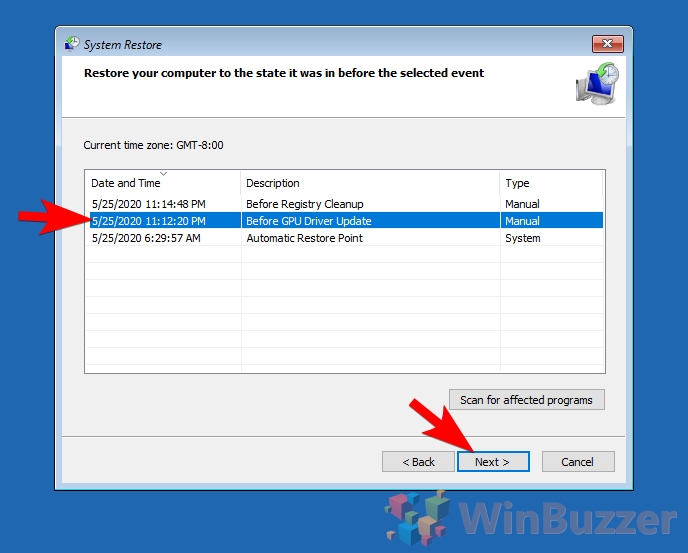
- Select your restore point
The system restore wizard will now show a list of recent restore points. If you labeled correctly, it should be simple enough to find the one you’re looking for. Otherwise, go by the date and time on the left-hand column. Click on the correct Windows 10 restore point and choose “Scan for affected programs”.
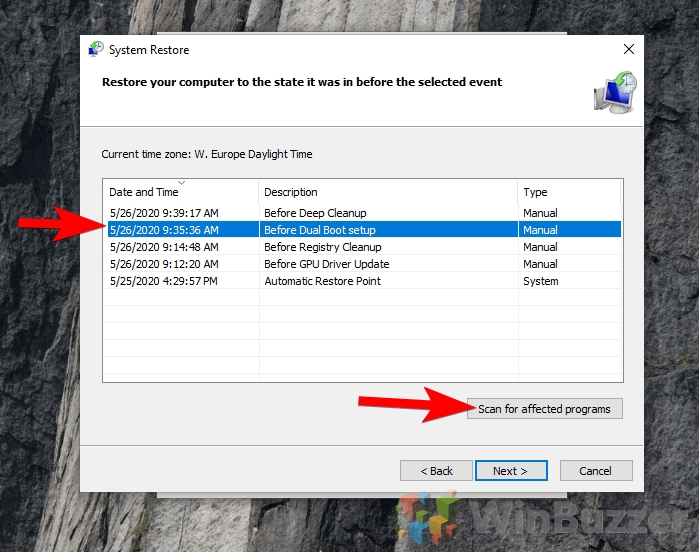
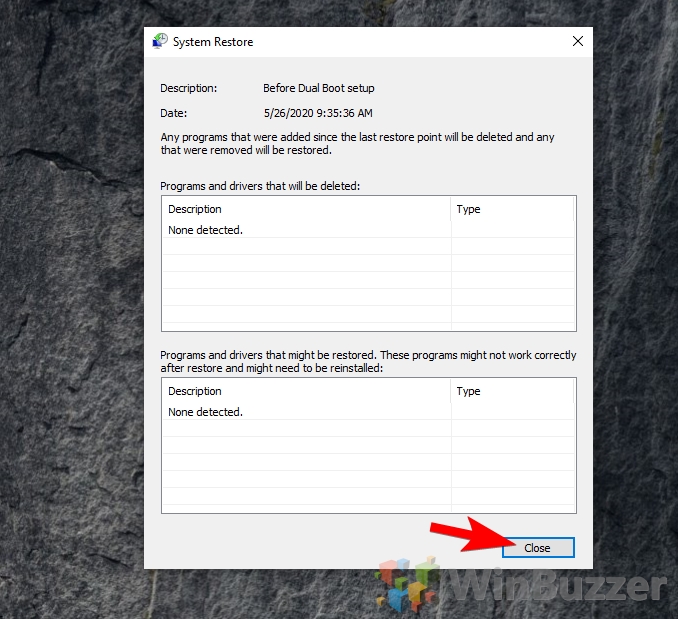
- Check the affected programs list
Windows will now return a list of programs and drivers, including those that will be deleted and restored. If necessary, make a back up of the applications and remember that even restored ones may not function correctly. When you’re done, hit “Close”.
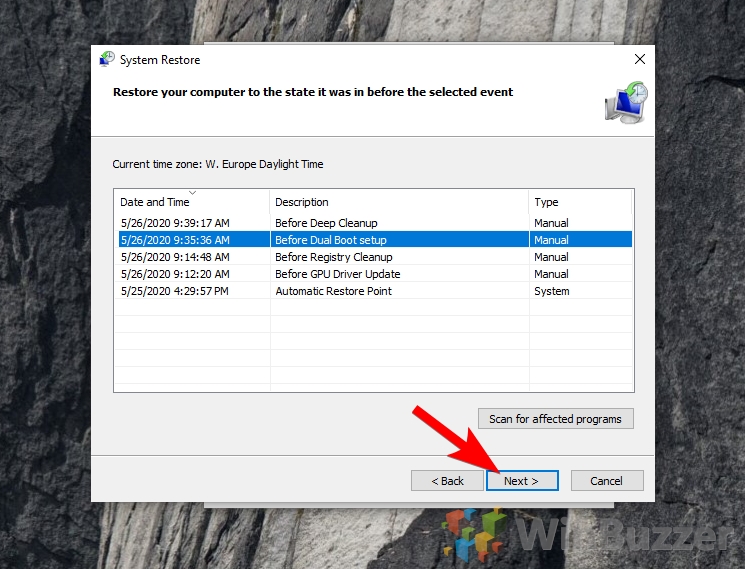
- Continue the restore process
Once you’ve made any necessary backups, press “Next” in the system restore wizard.
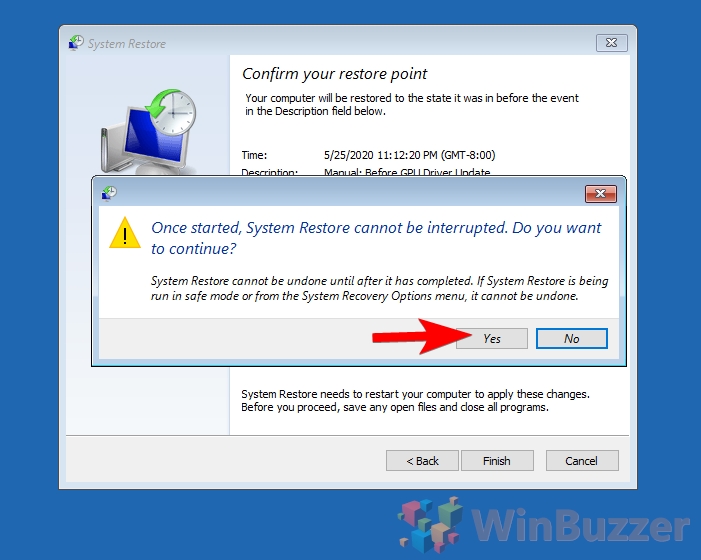
- Press “Finish” to initiate restore point recovery

- Confirm warning message
You’ll now be asked if you’re sure you want to perform a restore. This is because the process can take some time and cannot be undone. If you move to an earlier point, you can’t retrieve your current data again. If you’re fine with that, click “Yes”.
 Windows 10 will now perform the restore, restarting several times. You must ensure your laptop is plugged into the mains at this point and do not turn it off even if it looks stuck.
How to load System Restore at Boot from Advanced Startup Options
If your PC is experiencing serious problems, there’s a good chance you won’t be able to log in to Windows at all. There’s no need to fret, as you can perform a system restore from boot.
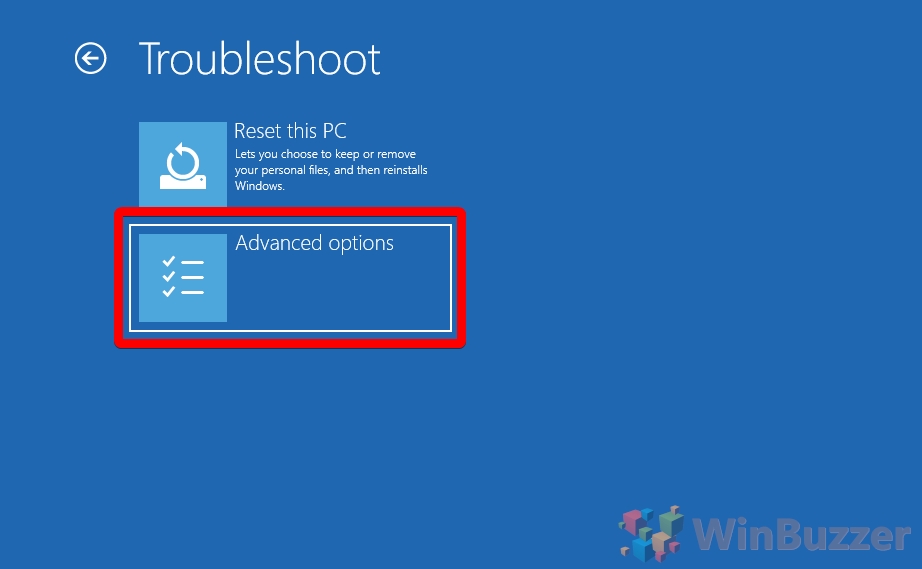
- Boot Windows 10 into Advanced Startup Options
When you boot your PC, enter Windows 10 recovery. If you’re unsure how to do so, refer to our guide here. Click “Troubleshoot”.

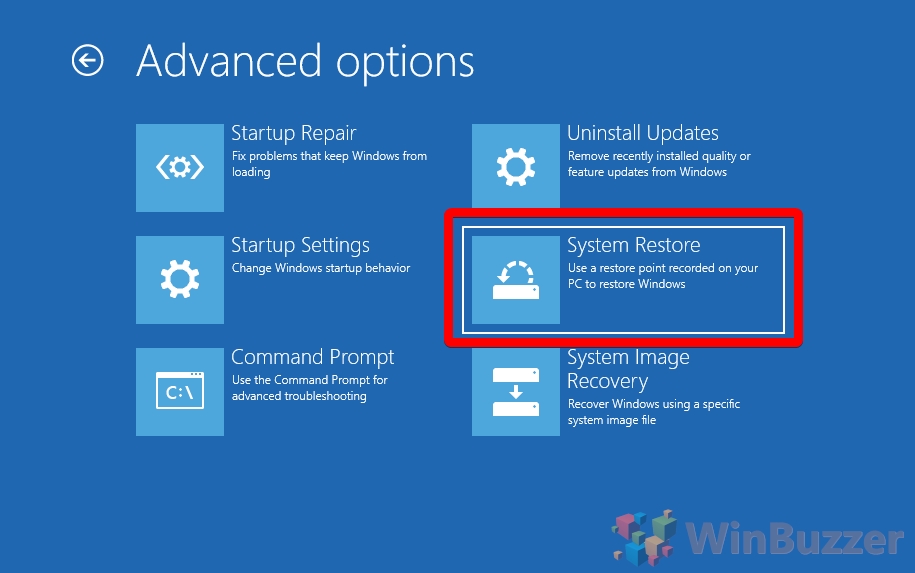
- Choose “Advanced options”
- Click “System Restore”
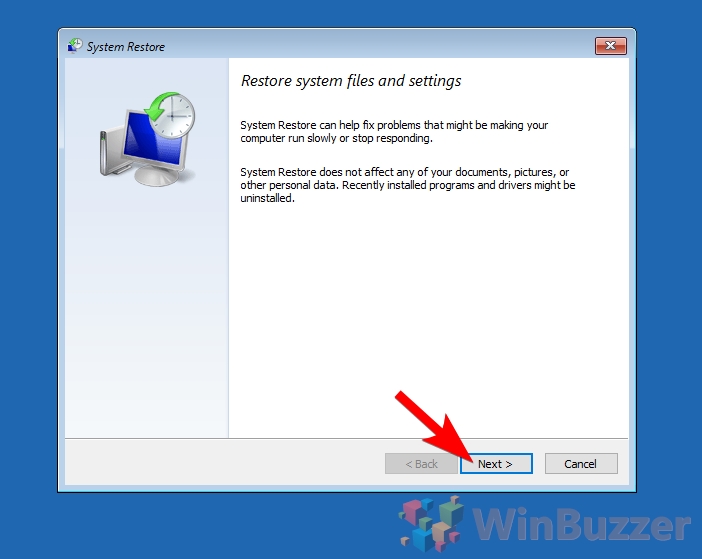
- Press “Next”
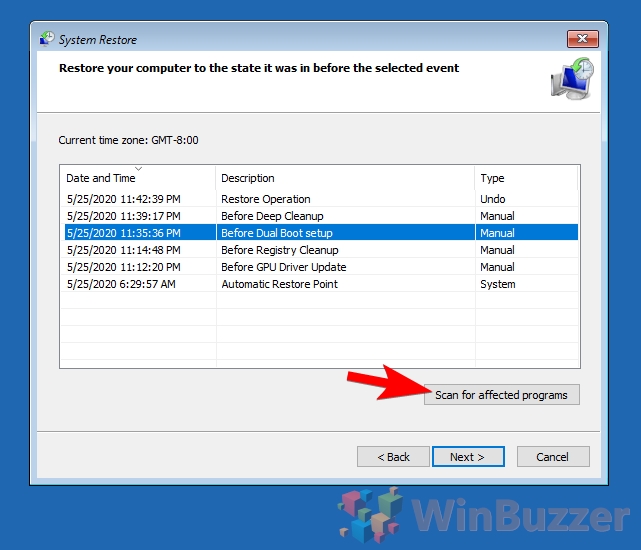
- Scan for affected programs
The system restore wizard will now show a list of recent restore points. If you labeled correctly, it should be simple enough to find the one you’re looking for. Otherwise, go by the date and time on the left-hand column. Click on the correct Windows 10 restore point and choose “Scan for affected programs”.
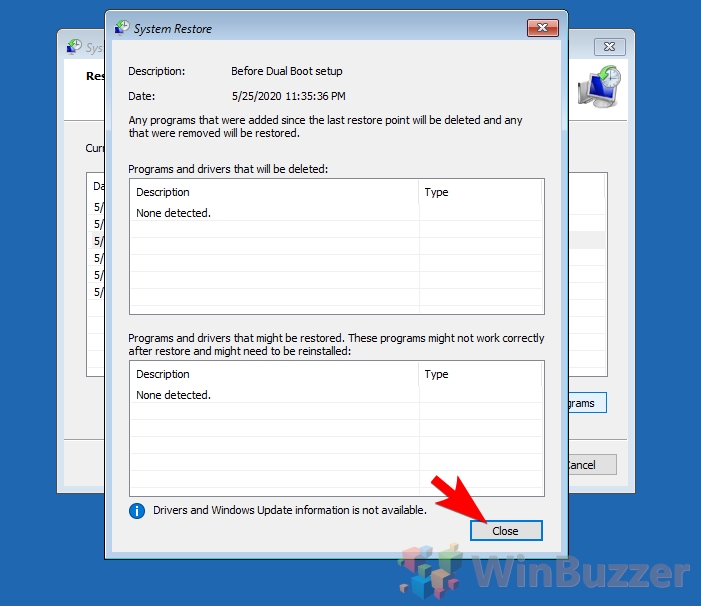
- Note any possible changes to installed programs and drivers
The tool will inform you of any programs and drivers that will be uninstalled or restored. Even if you can’t boot into your OS, you may be able to back up these files via the command line if you want to save the data. Once you’re happy, click “Close”.
- Choose your restore point
Back on Windows 10’s main system restore screen, click on your restore point and then on “Next”.
- Click “Finish” to initiate restore point recovery
Double-check the time and date, before pressing “Finish”.

- Confirm warning message
Once you perform a system restore from boot, there’s no going back. Data outside of your user folder will be permanently changed and you could lose progress if you aren’t vigilant. The process could also take some time, so ensure you’re on mains power and don’t turn off the PC even if it looks stuck.
- Wait for files to be restored

- Wait for the system to restart and configure

- Restart your PC
The system will now tell you that your restore is complete. Click “Restart” to complete the process and use your PC as normal.


