

By default, some of the cheapest Windows 10 notebooks, such as the Surface Go, start in Windows 10 S mode. This limited version of the OS doesn’t let you run classic Windows applications and has various other restrictions. As a result, most users will watch to switch out of Windows 10 in S mode as soon as possible.
Thankfully, Windows 10 S isn’t an entirely new OS. It’s essentially Microsoft’s latest operating system with some features unchecked to aid performance and security on low-end hardware. As a result, you can disable Windows 10 S mode very and move from Windows 10s to 10 Pro for free.
The process to disable S mode only takes a couple of minutes. However, it’s worth noting that this is a one-way toggle – once you switch out of S mode there’s no going back without a complete factory reinstall.
Windows 10 in S mode vs Windows 10 Pro
To help you decide, here are some of the differences between Windows 10 S and Windows 10 Pro:
| Windows 10 Pro S | Windows 10 Pro | |
|---|---|---|
| Non-Store applications | x | |
| Domain Join on-premises | x | |
| Azure AD Domain join | x | |
| Windows Store Apps | x | x |
| OneDrive setup and sync | x | x |
| Microsoft-verified security | x | |
| Smooth low-end performance | x | |
| Choice of browser | Microsoft Edge | Any |
| Faster boot times | x |
Switching out of S mode gives you more control over your OS, but that comes with security and performance implications. You should only enable it if you need to perform a task or install an application that isn’t otherwise supported. Let’s get started with the tutorial:
How to Disable S Mode and Upgrade to Windows 10 Pro
Time needed: 2 minutes
Windows 10 S mode deactivation takes only a few minutes and a settings toggle and opens hundreds of possibilities.
- Open system setttings
Press “Windows + I” to open the settings application and click on “System”.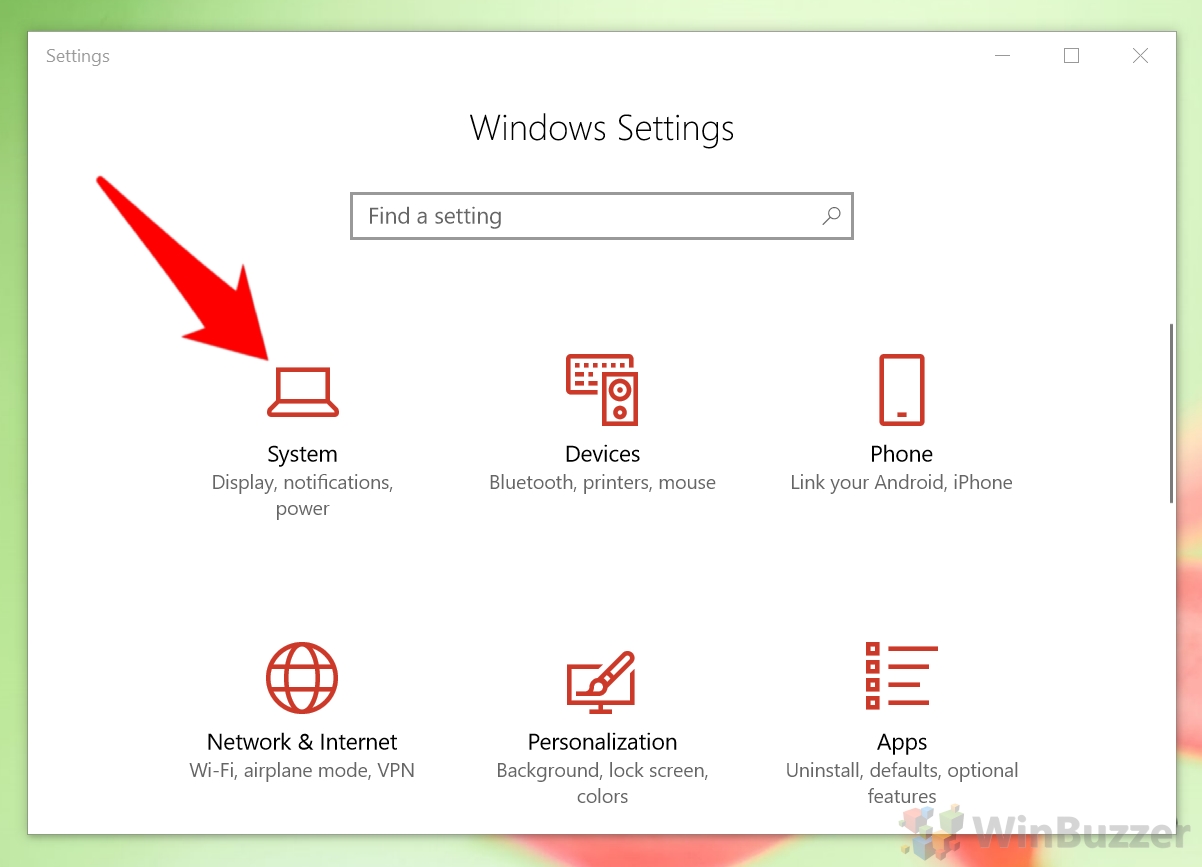
- Check your OS edition
Verify that you have Windows 10 S by clicking “About” in the sidebar and checking the “Edition” subheading under “Windows specifications”. Then, click “Change product key or switch to Windows 10 Pro”.
- Open the Windows Store
In the next window, check the “Activation” subheading for the “Go to Store” button. Click it.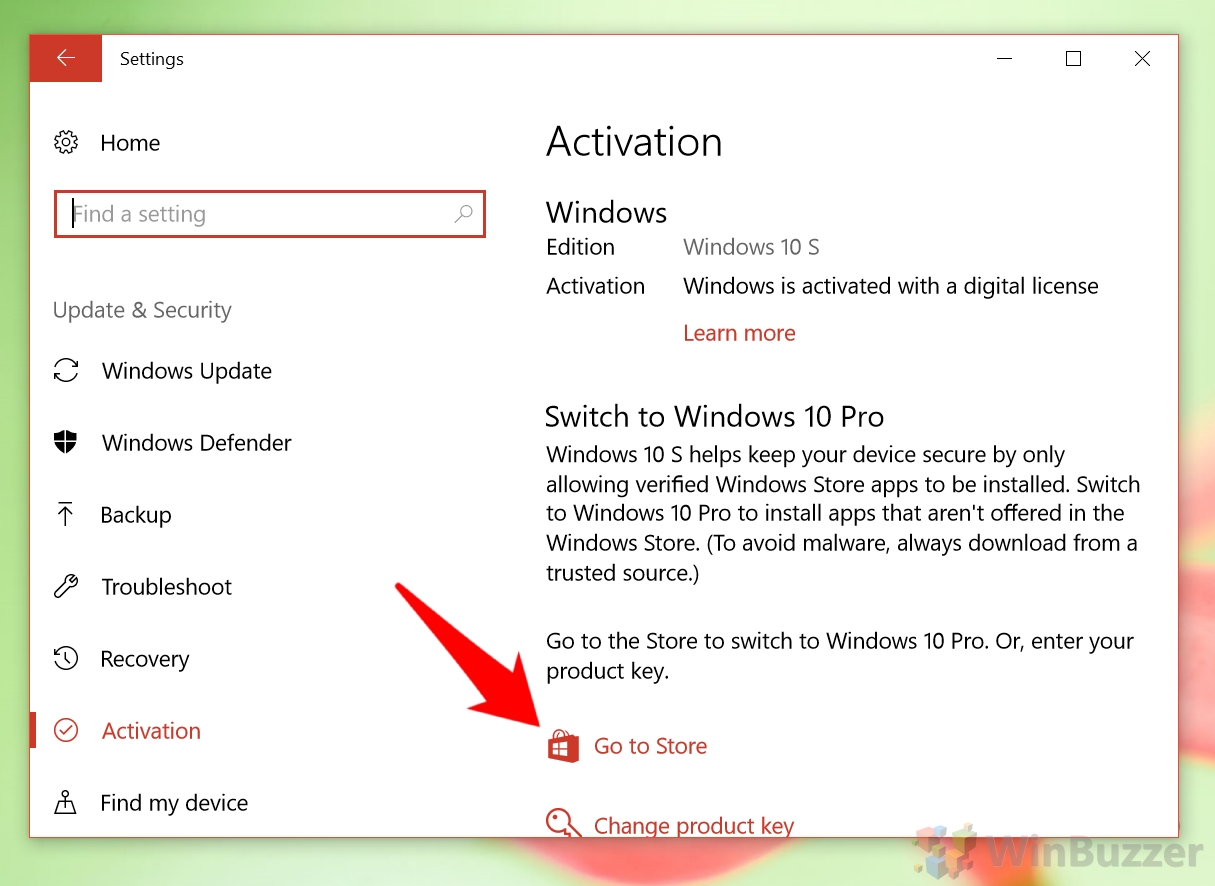
- Switch from Windows 10 S to Pro
The store will open a ‘Switch to Windows 10 Pro’ page, which will list the differences between the two versions. If happy, press the “Get” button and install Windows 10 Pro. This should be completely free. Within after a couple of restarts, your Surface Go will be running an untethered OS.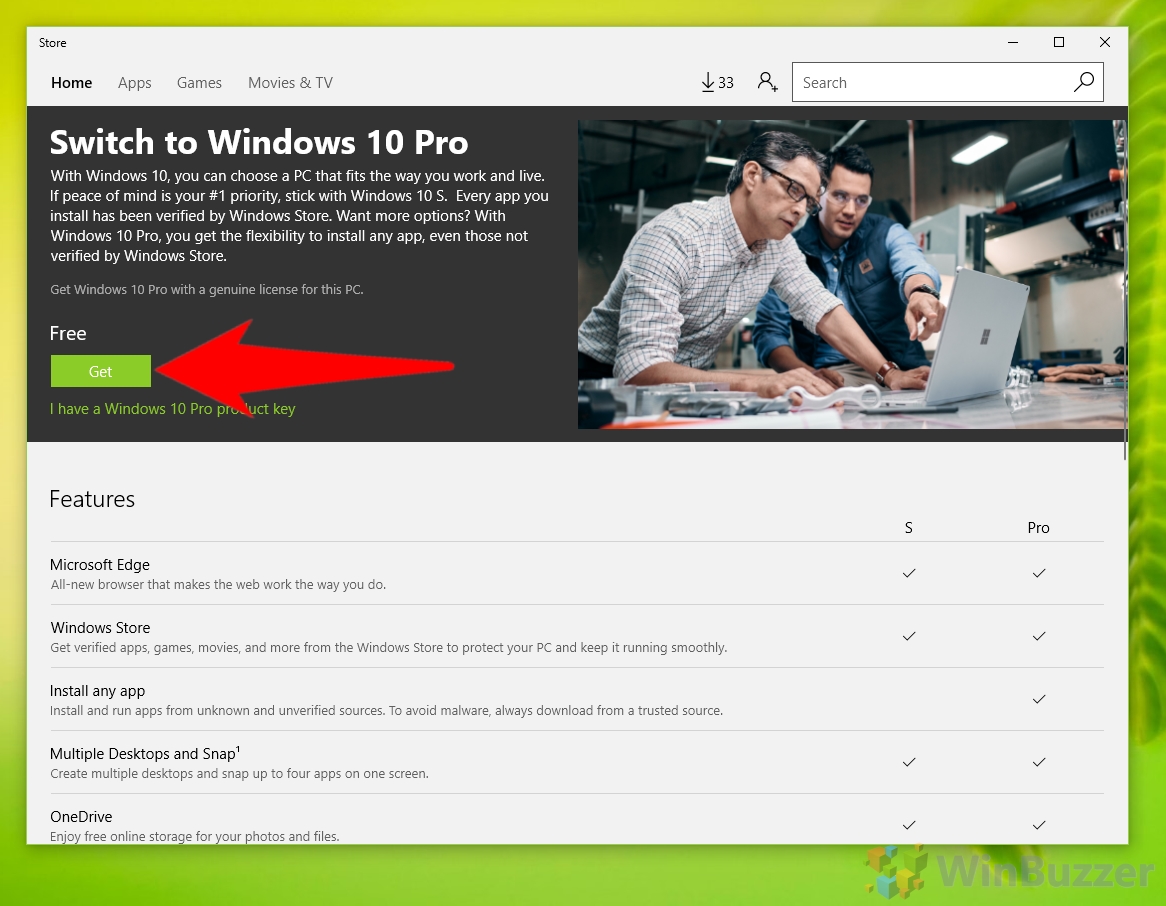
Last Updated on July 10, 2020 9:43 pm CEST by Markus Kasanmascheff


