

Even the best PCs can become sluggish if they run out of memory. Users often find that they have high RAM usage even when idle or that their applications aren’t performing as they expect. The purpose of this guide is to help you free up RAM and get your system functioning as normal. We’ll also be teaching you to create your own RAM cleaner for Windows 10 so you don’t have to rely on third-party tools.
First, though, a little about why clearing RAM will speed up Windows 10. Random Access Memory is essentially really fast storage that’s used to hold information about the active programs and processes on your PC. When you get low on virtual memory, your PC starts to use the pagefile instead, which is stored on your usual hard drive and is much slower. If you know how to reduce RAM usage, you can prevent this happening or remedy it after the fact.
There are numerous factors that can cause high ram usage in Windows 10, and most are preventable. Users with slowdowns often have a large number of programs launching at startup, known resource hogs, or malware. Some are less obvious and controllable, however. Memory leaks due to a poorly coded game or program can suck up your RAM over time until you experience a crash. A RAM cleaner for Windows 10 can mitigate this, but it won’t fix the root cause – that’s on the developer.
With this guide, we’re first going to show you how to reduce RAM usage and then move onto more complex ways to boost RAM. Let’s jump into it:
How to Free Up RAM with Windows 10 Task Manager
Time needed: 3 minutes
On Windows 10, the easiest way to clear RAM without restarting is via a familiar tool, Task Manager. You can use Microsoft’s tool to search for hungry programs and end them.
- Open Task Manager
You can start Task Manager with the hotkey “CTRL + SHIFT + ESC”. If it’s your first time, you’ll get only a simple list, so be sure to click “More details” to see everything we need.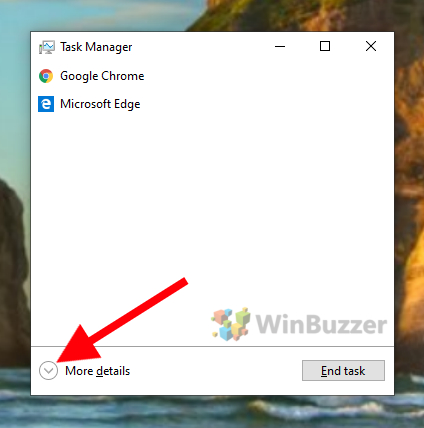
- Check for applications with high memory use
We can free up RAM by closing unused programs that have high memory use. Click the “Memory” heading twice to sort the list by RAM usage. From there, it should be simple to find the hungry processes and click “End task” to get rid of them.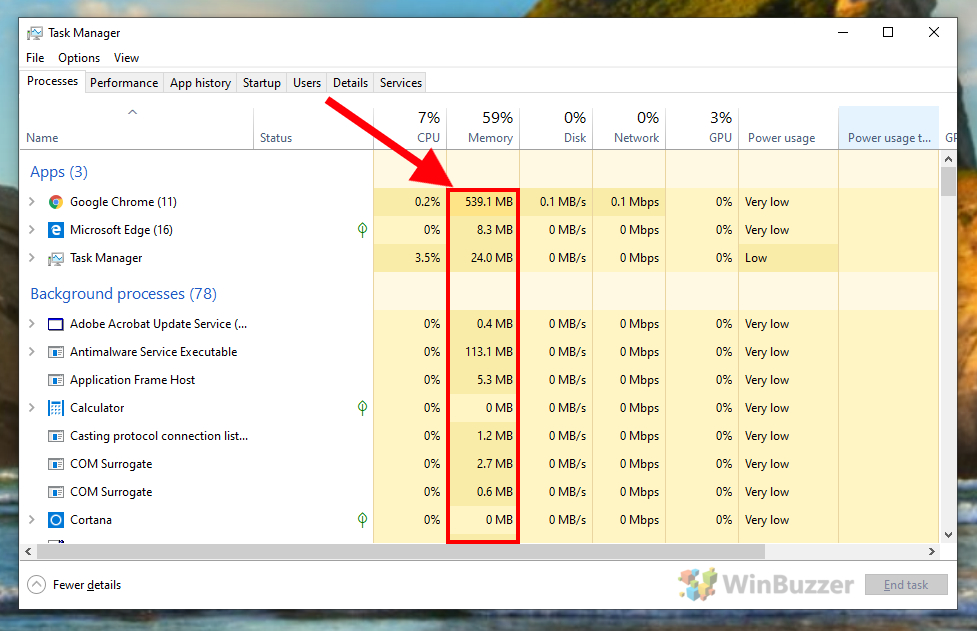
- View program sub-processes
Sometimes, it’s a program you’re actively using that’s hogging your system resources. In these cases, you can speed up your computer by identifying the specific sub-tasks that are problem points. In the Task Manager window, click the small arrow to the left of the task to maximize it.
- Close hungry sub-tasks, browser tabs, and extensions
In this view, look for the parts of the application that are using the most memory. For example, you may notice that you have a lot of tabs open in Chrome or Edge. Sometimes, a single webpage can use a lot of RAM if it’s optimized poorly. In other applications, you may see that project files you aren’t actively working on are using resources. You can use “End task” to close these.
How to Create a Custom RAM Cleaner for Windows 10 to Mitigate Memory Leaks
Time needed: 5 minutes
There are endless Windows 10 RAM cleaner programs that claim to speed up your computer. In some cases, these do work, but for the most part, you can create similar functionality yourself for free. We’re going to create a script that clears your reserved memory, which is often gobbled up by programs with memory leaks.
- Open Notepad
Search for Notepad in the Windows 10 search menu and start it with a click.
- Enter the script text
Paste the following into your text file:FreeMem = Space(1000000000).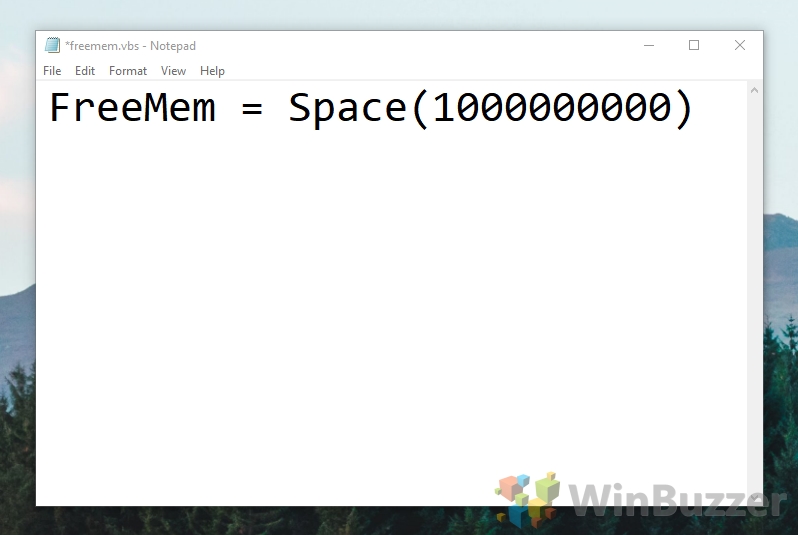
As you probably gathered, the 1000000000 stands for the amount of RAM in bytes you wish to clear. In our case, it’s 1GB. You can set this to 2000000000 to free 2GB of RAM
at once, 4000000000 to free 4GB of RAM or even higher, if your specs allow for this.
But as the command can run several times in a row its best to keep the number smaller. Otherwise, you could end up with more problems than you started with. As a rule of thumb we suggest not to never set the number higher than half of the built-in RAM of your system. - Name the file
In Notepad, click “File > Save as”. Choose a location for the file (desktop may be easiest) and name it “Memory Cleaner”, but don’t save it quite yet.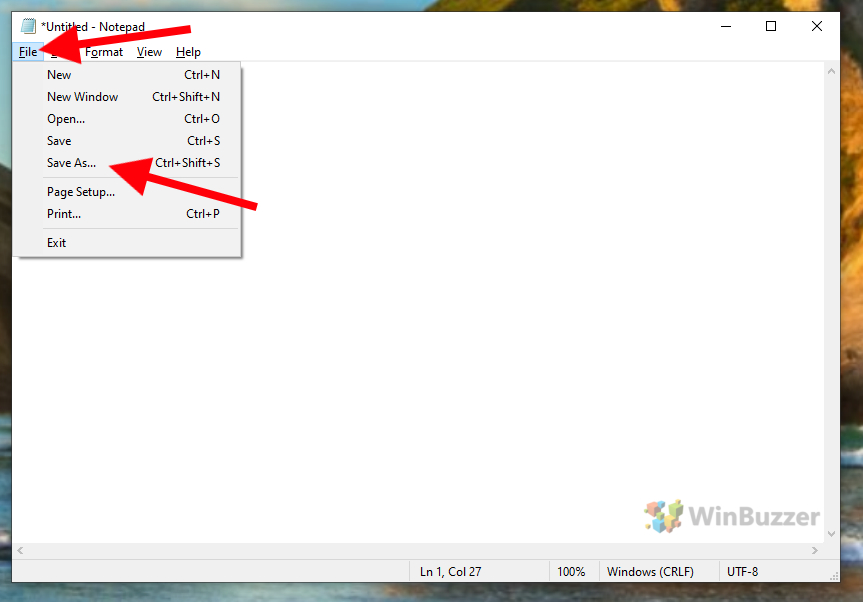
- Save the file as a Visual Basic Script
Our Windows 10 memory cleaner must have a .vbs file extension to be useful. Switch the “Save as type” dropdown to “All Files” and append “.vbs” to your file name.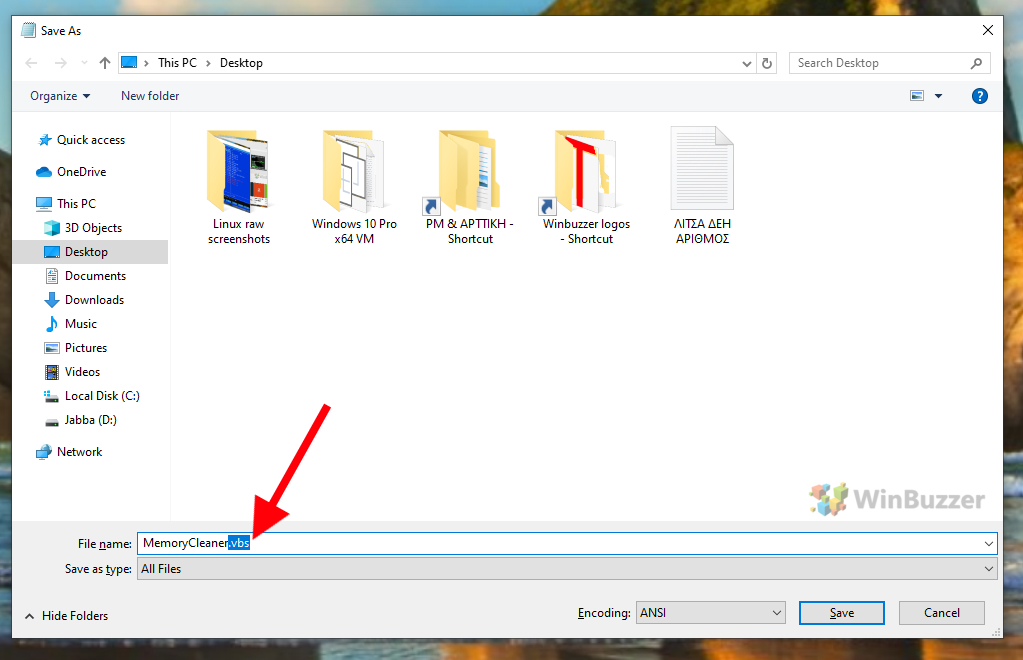
- Run the file and monitor your memory
Now that the file is saved, you can run it from your desktop at any time to clear your reserved memory.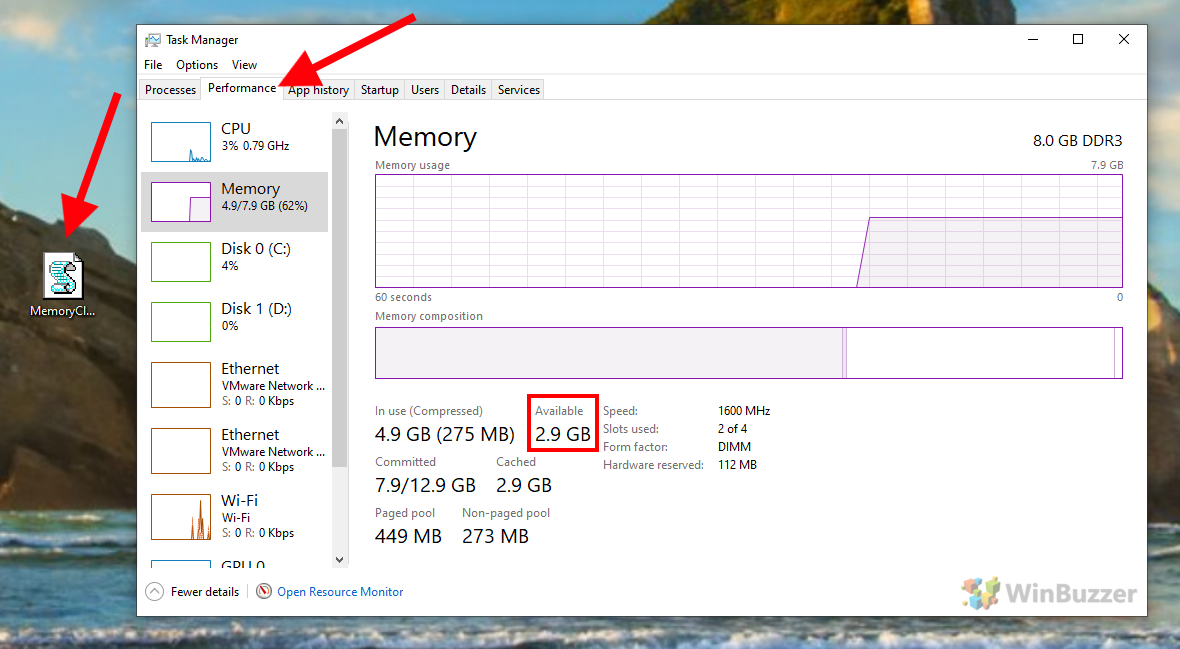
You can see the changes by heading to the Performance tab of Task Manager and selecting “Memory”. The “Available” value should change when you run the Windows 10 memory cleaner script.
Last Updated on December 3, 2020 11:14 pm CET by Markus Kasanmascheff


