Just like on your iPhone or Android smartphone, you can also share an internet connection on Windows 10. Microsoft’s platform works as a WiFi or Bluetooth hotspot to help you connect other devices. For example, you can create a wireless internet connection in Windows and allow other network users to access it.
There are numerous practical benefits of this feature. Perhaps you are in a location where access for multiple devices on a network is limited. Some hotels only allow for one device to connect to their Wi-Fi at a time through a captive-portal login. In these situations, you may need your Windows 10 PC to work but also your smartphone.
It is worth noting this is different from connecting a mobile hotspot to a Windows laptop. Instead, you are doing a reverse and turning your PC into a wireless hotspot (wireless access point).
When this happens, it is important to know how to create and share an internet connection as a hotspot in Windows 10. If you want to be more versatile than running a wired internet connection, generating an ad-hoc network in Windows turns your PC into a wireless hotspot.
Users were able to first create a WiFi hotspot for Windows 7 and Microsoft has carried the feature through generations to Windows 10.
The good news is Windows 10 has built-in hotspot software so you can create a free WiFi hotspot (wireless access point) for laptop devices. An ad-hoc network is easy to create on the platform by following the steps below:
How to create a Windows 10 Laptop hotspot
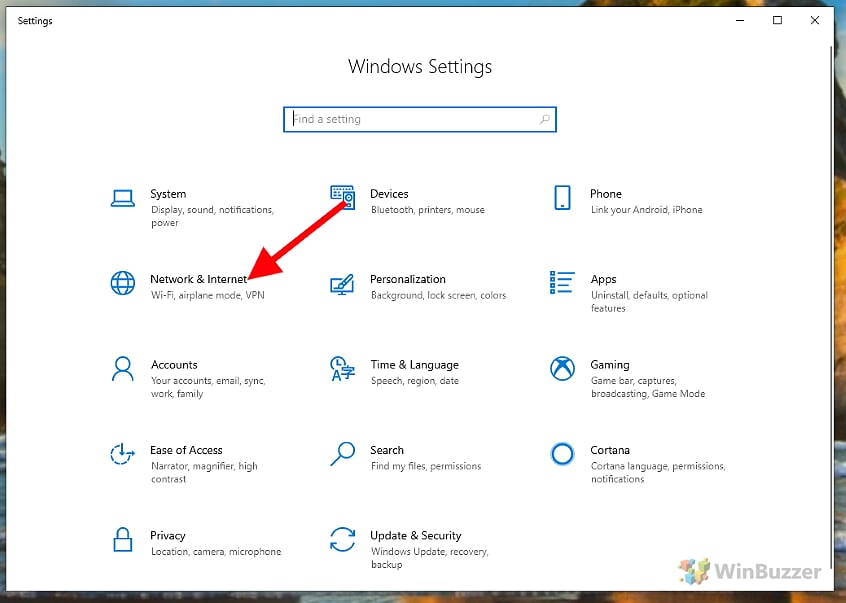
With the key combination “Windows + I” you first open the Windows 10 settings and switch to “Network and Internet“.
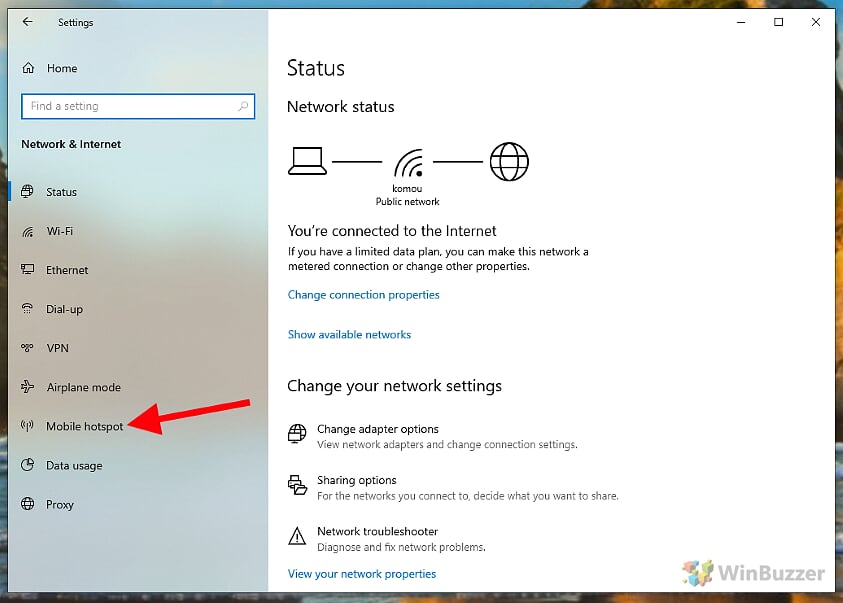
If your PC has a WLAN or Bluetooth adapter, you can then share your internet connection under “Mobile hotspot“.
To create the hotspot, activate the switch at the top, select your current Internet connection below and then whether you want to operate your hotspot with WiFi or Bluetooth. Since Bluetooth hotspots are much slower, you should prefer WiFi.
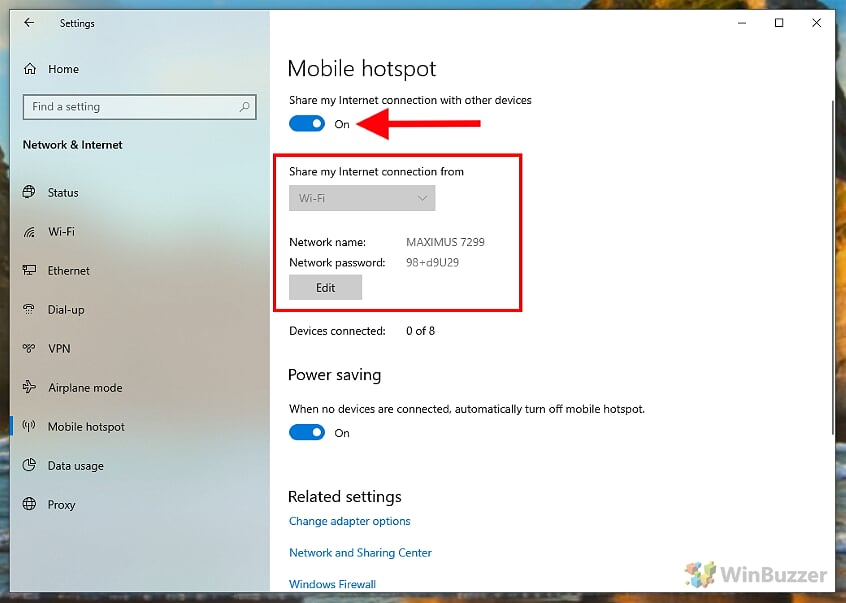
After clicking on “Edit” you can choose any name for the hotspot as well as a password with which access to your Windows 10 hotspot is protected.

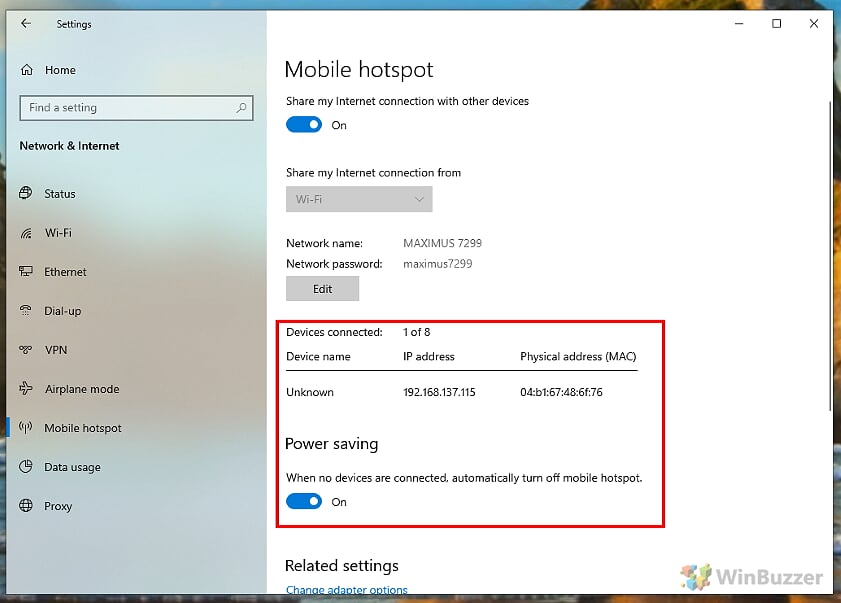
Windows 10 shows devices connected to the hotspot with their device name directly below. To save your battery if necessary, you can activate the energy-saving mode. The hotspot is then automatically deactivated as soon as all existing connections have been disconnected.