Windows 11 and Windows 10 are great at preventing viruses, trojans, ransomware, and other serious issues, but it can fail to stop adware and potentially unwanted programs in its default configuration. Thankfully, the Windows Defender has an adware blocker just for this, and it’s great at stopping unwanted changes to your system or annoying pop-ups. Less fortunately, it can’t be found in an options menu unless you have Windows 10 Enterprise.
So if not through a menu, how do you turn on the hidden Microsoft Defender adware blocker? The answer is through registry edits, which many aren’t confident with. Though you can get similar results with third-party software like Malwarebytes, the Windows Defender adware blocker is advanced, completely free, and can have less of a performance impact.
We’re going to show you how to turn the anti-malware feature on without messing up your system. First, however, you should turn on automatic registry backups. This is another feature that’s disabled by default, but it gives you an easy avenue back, should you need it. With that done, let’s get on with the guide.
⚠️ Please note: The process described below is the same in Windows 11 as it is in Windows 10. However, bear in mind that we’ll be using screenshots from Windows 10, so your UI may look a little different. We’ll point out any changes you need to be aware of as they come up.
How to Enable the Microsoft Defender Adware Blocker
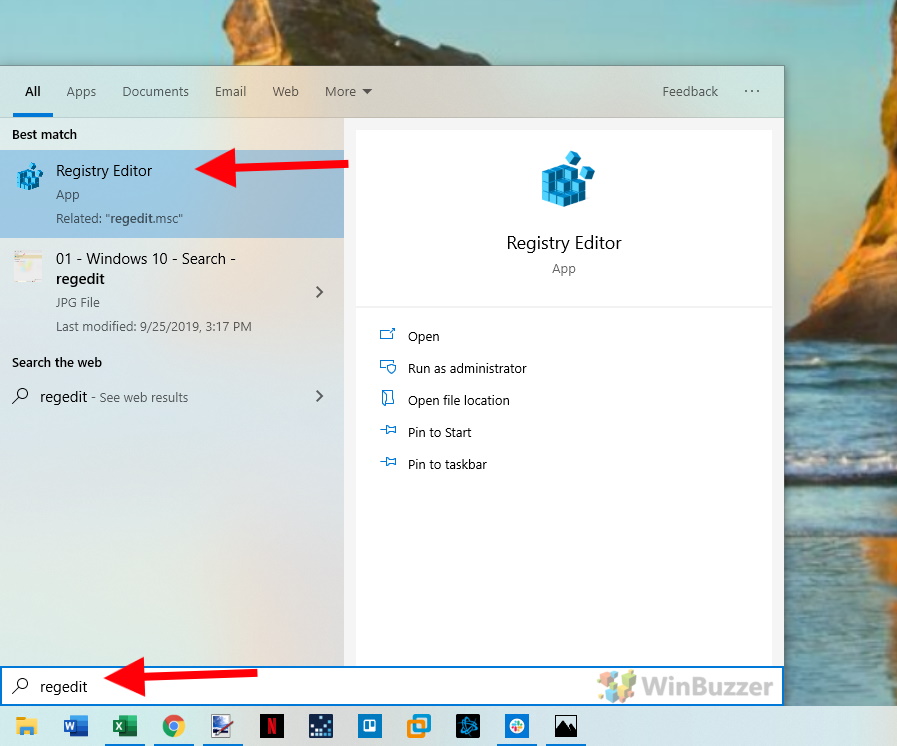
- Open “Regedit”
Press the Windows key and search for “regedit”. Click on “Registry Editor”.
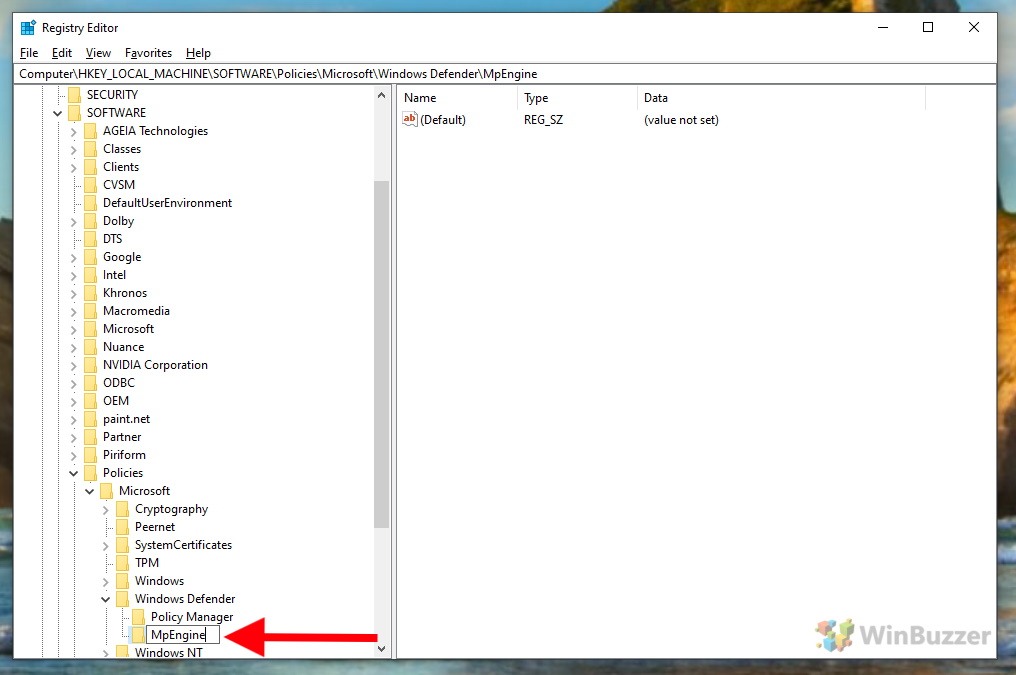
- Open the Windows Defender Registry key
Navigate toComputer\HKEY_LOCAL_MACHINE\SOFTWARE\Policies\Microsoft\Windows Defender, or paste it into the address bar.

-
Create a new Registry Key
Right-click and choose “New > Key”.

-
Name it “MpEngine”
-
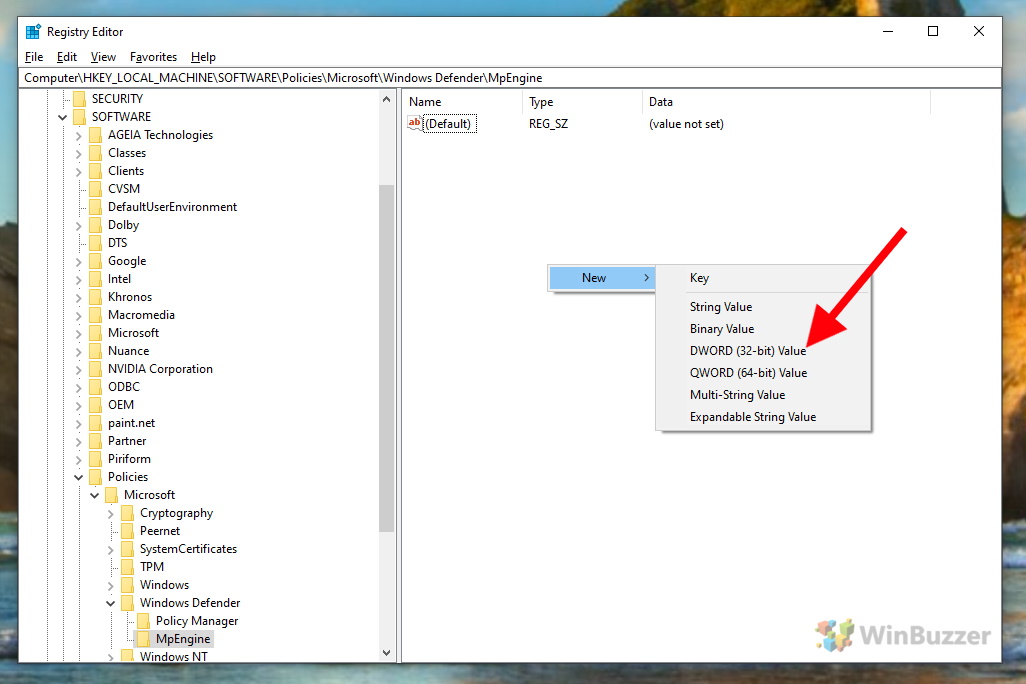
Create a “DWORD (32-bit) Value”
Right-click in “MpEngine” and select “New > DWORD (32-bit) Value”

-
Name the DWORD “MpEnablePlus”

-
Set the DWORD value
Double-click to open “MpEnablePlus” and set the “Value data” to “1“. Press “OK” to save.Microsoft Defender’s anti-adware feature is now enabled. Feel free to restart your PC to ensure the changes have taken effect.

FAQ – Frequently Asked Questions about Microsoft Defender / Windows Defender
Can Windows Defender remove adware?
Yes, Windows Defender can remove adware. Enabling the Microsoft Defender Adware Blocker, as described in the tutorial, enhances this capability.
Does Windows security protect against adware?
Windows Security does protect against adware, especially when the Microsoft Defender Adware Blocker is enabled, as shown in the tutorial.
Does Windows security remove malware?
Yes, Windows Security (Defender) is capable of removing many types of malware, including viruses, trojans, and ransomware.
Can antivirus remove adware?
Most antivirus programs, including Windows Defender, can remove adware. The effectiveness varies based on the antivirus’s capabilities and the specific adware.
Is Windows security enough for malware?
Windows Security is generally sufficient for most users. However, for enhanced protection, especially against adware, enabling additional features like the Defender Adware Blocker is recommended.
How do I completely remove adware?
To completely remove adware, use an antivirus like Windows Defender and enable additional features like the Adware Blocker. Regular system scans and cautious browsing can also help.
How can adware be stopped?
Adware can be stopped by using antivirus software, enabling features like the Microsoft Defender Adware Blocker, and practicing safe browsing habits.
Where is adware located?
Adware can be located in various places on a computer, including program files, system folders, and browser extensions. Regular scans by antivirus software can help detect it.
How do I find hidden adware?
Hidden adware can be found using antivirus software that scans and detects malicious software. Windows Defender, with its adware blocking feature enabled, can assist in this.
Can Windows Defender get rid of malware?
Yes, Windows Defender can get rid of many types of malware, including viruses, trojans, and ransomware.
How effective is Windows Defender against malware?
Windows Defender is quite effective against common malware. Its effectiveness is enhanced with regular updates and enabling additional features like the Adware Blocker.
Do I need anti-malware if I have Windows Defender?
For most users, Windows Defender is sufficient. However, in high-risk situations or for enhanced security, additional anti-malware software can be beneficial.
Can Windows Defender hide malware?
Windows Defender does not intentionally hide malware. However, some sophisticated malware can evade detection by most antivirus programs, including Windows Defender.
Do I need antivirus if I already have Windows Defender?
For most users, Windows Defender is adequate as an antivirus solution. Additional antivirus software may be considered for extra layers of security.
Am I safe with just Windows Defender?
Generally, yes, especially if you keep it updated and enable additional features like the Adware Blocker. However, always practice safe browsing and be cautious with downloads and email attachments.
Extra: How to Exclude a File or Folder from Microsoft Defender Scans
Microsoft Defender, formerly known as Windows Defender is incredibly useful for a free tool, providing Windows 10 users with competitive anti-virus technology and protecting against rootkits, ransomware, unwanted programs, and more. However, occasionally the program will keep flagging a file or folder that you know is safe. In these cases, it’s useful to know how to exclude a folder from Microsoft Defender scans.

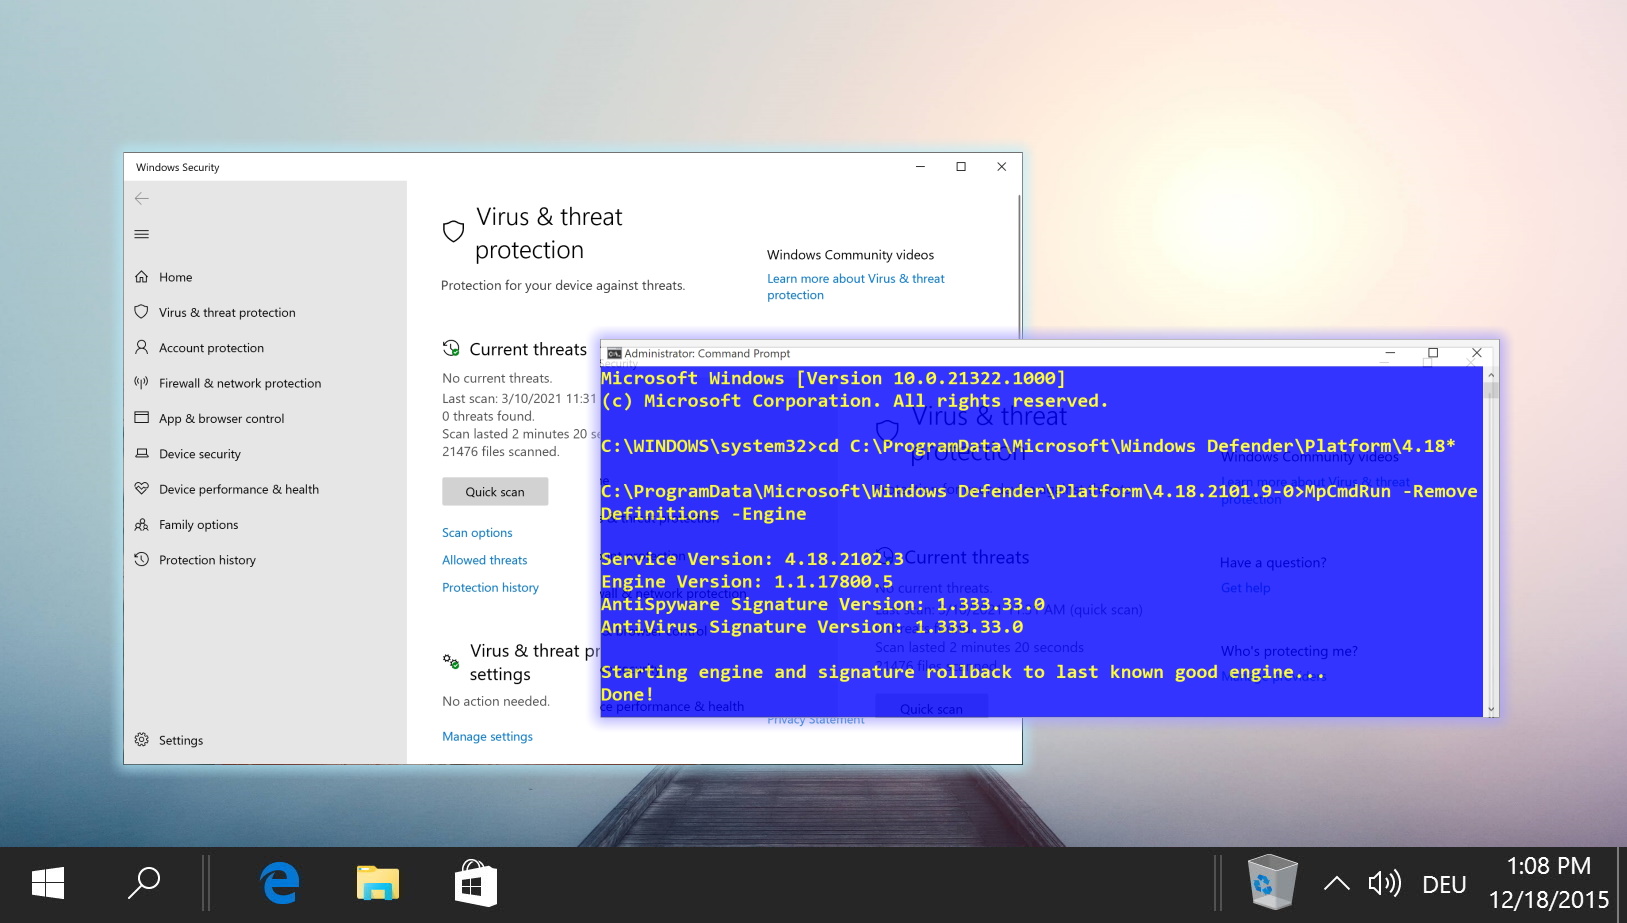
Extra: How to Run Microsoft Defender from the Command Line (CMD)
Knowing how to run Microsoft Defender (formerly Windows Defender) from the command line can be very useful. Perhaps you’ve been locked out of its UI due to malware, are trying to run a scan from recovery media, or are using a GUI-less Windows Server install. In any of these situations, knowing a scan command or two can save you a lot of trouble. In our other tutorial, we show you how to use Microsoft Defender via CMD commands.