

If you are the owner of a Surface Pro 4 or any kind of Windows 10 tablet or notebook, then you’re probably changing your power plans often. Making this procedure fast saves a lot of time and you can do that with PowerPlanSwitcher.
PowerPlanSwitcher is a Windows Store app that will help you change your power options in just a few moments. Created with a minimalistic approach and living in the System Tray of Windows 10, the app is styled according to the default Windows 10 flyout dialogs.
Before Windows 10, users could switch between power options just by right-clicking the battery icon in the System Tray. Unfortunately, Microsoft removed that feature from Windows 10, but thanks to PowerPlanSwitcher users can have a similar experience.
How to change Windows 10 power plans with PowerPlanSwitcher
Once you’ve installed the app, you can just click the plug icon and select your plan. Alternatively, you can enable shortcut hotkeys and access the available power plans by hitting Shift+Win+S.


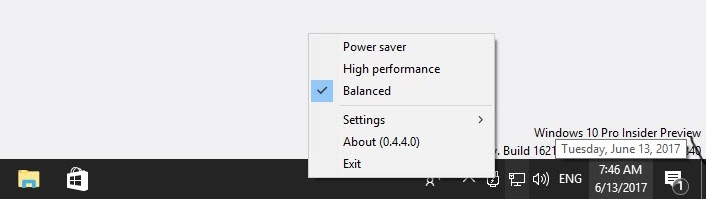
What is even more interesting is the fact that the app is compatible with custom power plans, so you can create your own power settings option and PowerPlanSwitcher will let you choose it.
You can download PowerPlanSwitcher from the Windows Store and start using it now, without cost. Here is what the app has to offer:
- “Windows 10 styled flyout that allows quick power plan schemas changing
- Ability to limit flyout only to Windows default power plan schemas
- Automatic schema switching when AC adapter gets (dis)connected (disabled by default)
- Launch on Windows startup
- Flyout shortcut (Shift+Win+L)
- Navigate flyout with keyboard
- Change all settings by right-clicking on tray icon”
Changing Windows 10 power options the classic way
In case you prefer to do that without an application, Windows 10 provides you with the ability to change and manage your power plans easily. Users have to navigate to Settings, then select System, and click on Power & Sleep on the sidebar.

To the bottom, under Related settings, click on Additional power settings. A new window will appear where you can select one of the classic Windows power plans: Balanced, High performance, or Power saver.

In addition, you can create your own plan by selecting Create a power plan from the sidebar to the left. Each power option lets you change its settings to match your needs at any given time.


