Back in July, Microsoft debuted Azure AD Identity Protection for customers in the US, and the capability has now been extended to European countries. Users who were already using Europe Geo identity protection will now benefit from full support.
However, the change comes with a caveat. Those already using Europe Geo will have to onboard again, and Microsoft will delete all of their previous data. This is an inconvenience, but the annoyance is offset somewhat by the introduction of some new features.
Azure AD Identity Protection Changes
The main change in this build is support Microsoft's “Users at risk” policy for customers using federation for authentication. For those unfamiliar, the User Risk Policy is a background process that collects data to help detect when accounts are taken.
Each time someone logs into their account, the pattern of user logins and other factors are analyzed to give a user risk score. If it's high, Microsoft challenges or blocks the attempt.
Starting today, this ability is now available to organizations using federated authentication. The admin can configure a User Risk Policy, and users will begin to be challenged when signing into Azure AD.
Microsoft notes that for this to work, the following requirements need to be met:
“1. Password writeback must be enabled for the federated domain, so that password change in the cloud can be written back on-premises.
2. An Azure AD Premium license must be assigned to the end-user.”
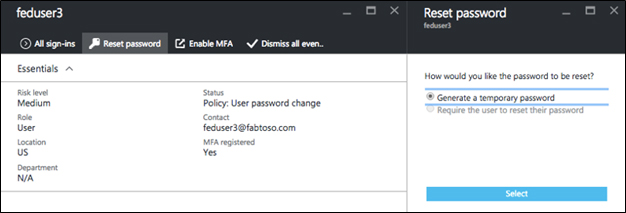
The ability to change passwords can also be taken away from the user and given to the admin instead. You can toggle this in the “reset password” tab, but once more you need an Azure AD Premium license.

Using Azure AD Identity Protection in Europe
Setting up Identity Protection in Europe is a simple process, but Microsoft provides a three-step guide nonetheless:
- “Sign-in to Azure Preview Portal with global admin credentials
- Navigate to the Azure Marketplace and search for “Azure AD Identity Protection”. Click on the Identity Protection tile and click ‘Create'
- You will be navigated to the Identity Protection onboarding blade. Click ‘Create' and sit back and relax while your Identity Protection service is set up. You are all done!”
We recommend that you read the blog post here for further detail.


