
Do you know you can Android apps with Windows 10? Although Microsoft has put Project Astoria on ice which should allow ported Android apps to run on Windows 10, you can still do it! There are even different ways to run Android apps or even a whole Android system with Windows 10. Here are the three best methods shown in detail in our multi-media tutorial.
All of these free methods below use virtualization techniques to fake an existing Android system running on Windows 10. This means, Android apps are not running natively on Windows 10, they are not executed directly like other Windows software.
But this doesn’t mean a big deal as modern computers are so powerful that they can handle the extra burden to virtualize other systems with ease. Depending on which Android apps you want to run with Windows, each of this methods has its pros and cons. Just check them out and choose what you like.
A) How to run Android apps on Windows 10 using Google Chrome and the ARC Welder plugin
B) How to run a full Android system as a virtual machine using VMware Workstation Player and Android x86
C) How to run Android Apps with Windows 10 using the free Bluestacks App Player
A) How to run Android apps on Windows 10 using Google Chrome and the ARC Welder plugin
This method runs Android apps using a plugin to Google´s Chrome browser. The apps are opened directly in a new window as if they were native Windows 10 apps. Below you have a full video tutorial for using Google Chrome and ARC Welder and after that a guide with every single step.
Installation
The Chrome plugin you need is called ARC Welder. Just follow the link on Google´s page about it which will bring you to the download page.
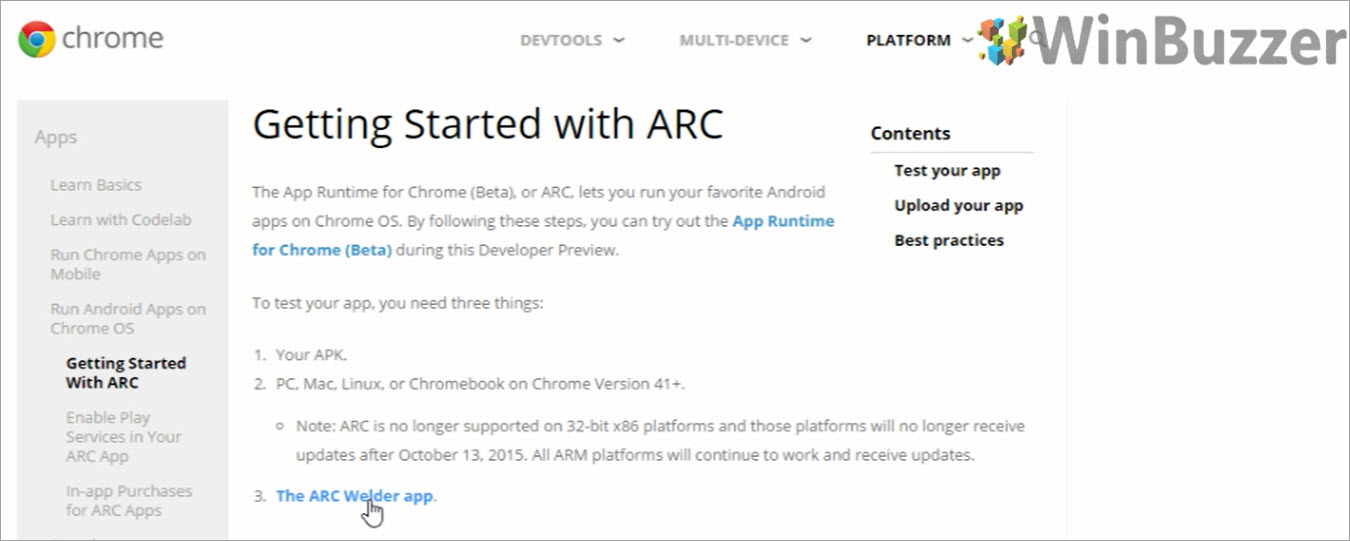
Then click Add to Chrome and confirm. This will download and install ARC Welder.

Starting ARC Welder
Once it´s finished you find the App in the Chrome App Launcher, you can also search for it directly with the Windows search.

That´s basically everything you need. When you have your APK files available, you are ready to go. If you don´t know how to get the APK files, here is a great tutorial from AndroidPIT.
Running Android apps with ARC Welder
To run an Android apps, just start ARC Welder and choose Add your APK to select its file.
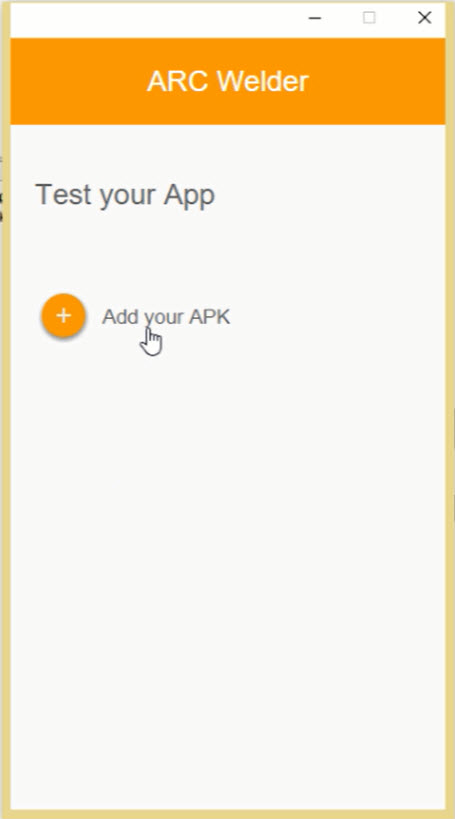
ARC Welder detects the App and offers some simple options like Orientation, Form Factor and Clipboard access.

Click on Launch App and it will start instantly in a new window.

Limitations
As ARC Welder does not provide a full Android system, some apps don´t work, especially those with special hardware requirements. Also you cannot save data and files when you switch apps. If you need that, the full Android emulators shown below will help you. But for some casual gaming, ARC Welder is just great and should work just fine with many apps.
B) How to run a full Android system as a virtual machine using VMware Workstation Player and Android x86
This method is using the free VMware Workstation Player which is a virtualization Software that can emulate a full PC on a running Windows system. Just download and install it.
What you also need is a freely available ISO File with Android x86. Android x86 is a port of Android which you can run on Intel hardware. In theory you could use this ISO-file to burn an installation CD and then to install Android as your main Operating System on a PC or even on a Mac.
Once you have VMware Player in front of you and the ISO file ready, you can begin the installation which should only take some minutes. Below you have a full video tutorial about how to use Android on Windows with VMware and after that a guide with every single step.
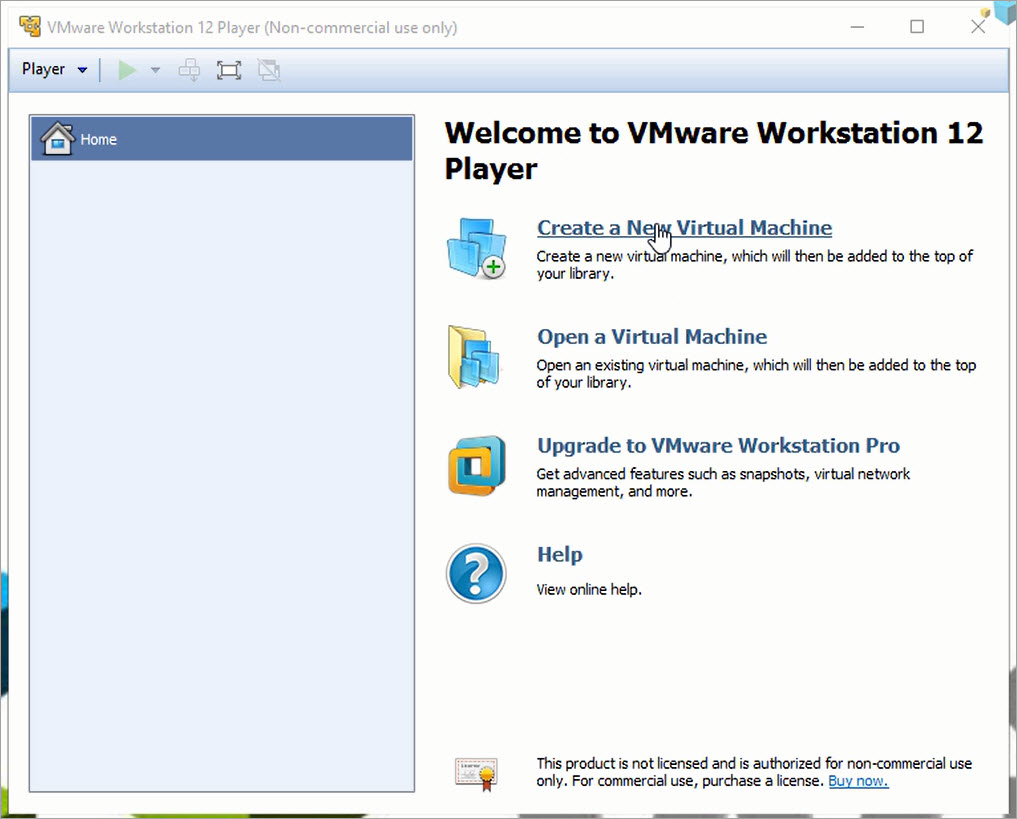
Creating a new Virtual Machine
Click on Create a New Virtual Machine.
Then Click on Browse, select the ISO file you have downloaded and choose Next.

Give your Machine a name and select the folder where you want to store your data.

Then you select the disk size you want your Android system to use. Select Store virtual disk as a single file – the second option is not needed for our case.

Then very Important: Uncheck Power on this virtual machine after creation. Before booting we need to make a fix that Android later will be able to connect to the internet, otherwise internet access will not work.

Click on Customize Hardware.

Here you give the Virtual Machine more Ram, 1Gb is great but you can be generous if you have a lot of ram.

Under Network Adapter you have to select Bridged and mark the checkbox right below. That´s it for the hardware settings, you can now close them and click on finish.

Fixing the network settings to provide Internet access
Now you go to the folder you selected for your Virtual Machine. Here you find the VMware virtual machine configuration file. You can identify this file easily by the three overlapping rectangles of its icon. Open this file with a text editor like the standard Windows notepad.

In the editor, locate the entry “ethernet0.virtualdev” and replace e1000 with vlance. Then you can save the file and go back to VMware.

Installing Android x86 in VMware
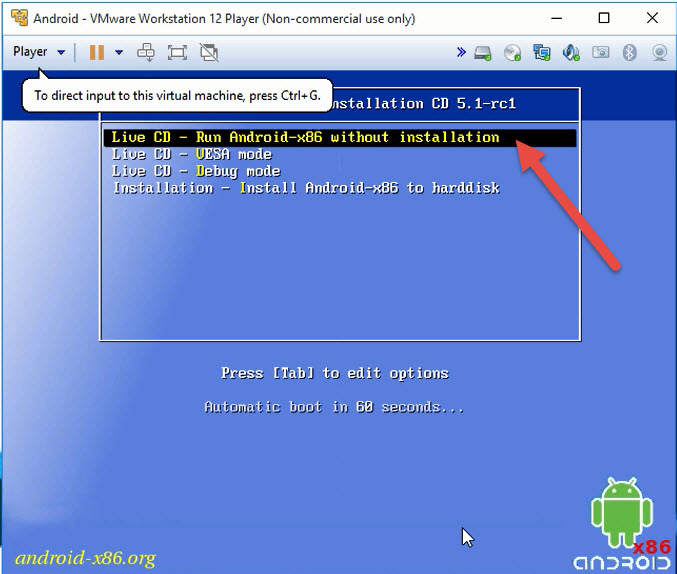
Click on Play virtual machine to boot the system from the ISO installation file.

Choose installation and then the following settings with the arrow keys of your keyboard.
Select the uppermost entry with sda and unknown as install partition.
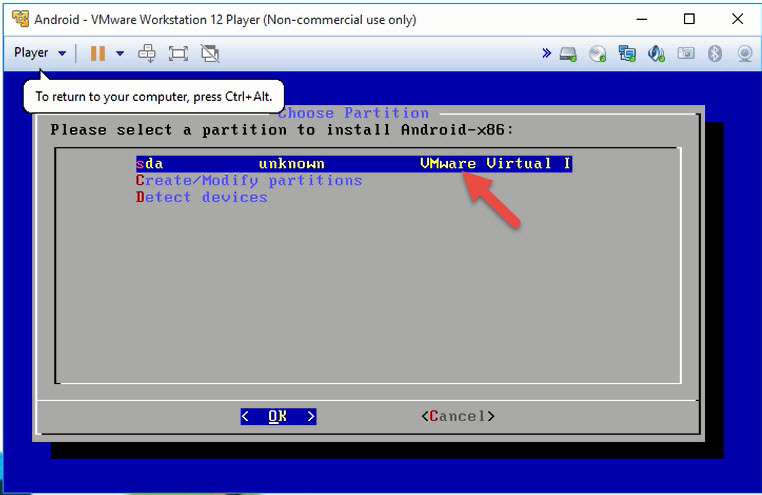
Choose ext4 as filesystem.

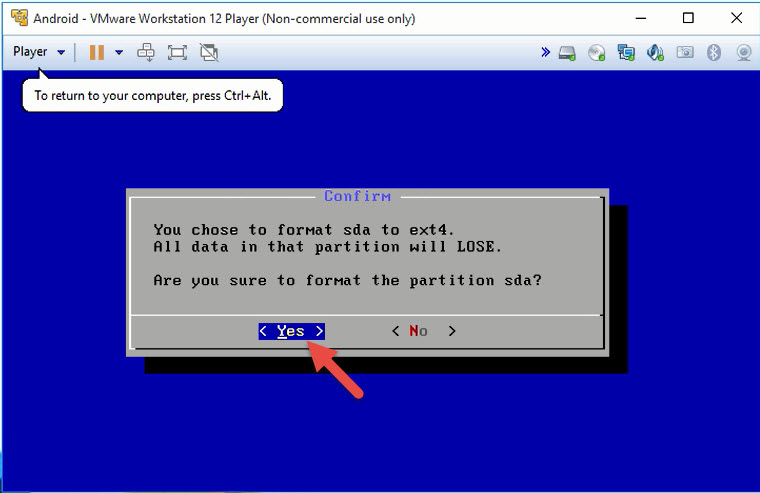
Select yes to format the chosen partition and skip the following two options to install a bootloader.
Agree to create the system directory with the read-write option.

Then Android gets finally written on your virtual disk. When the process is finished you can run Android for the first time. Android x86 will boot up and run you through the setup like on any smartphone or tablet. When the setup is finished you can use Android like on a real device just from your desktop.
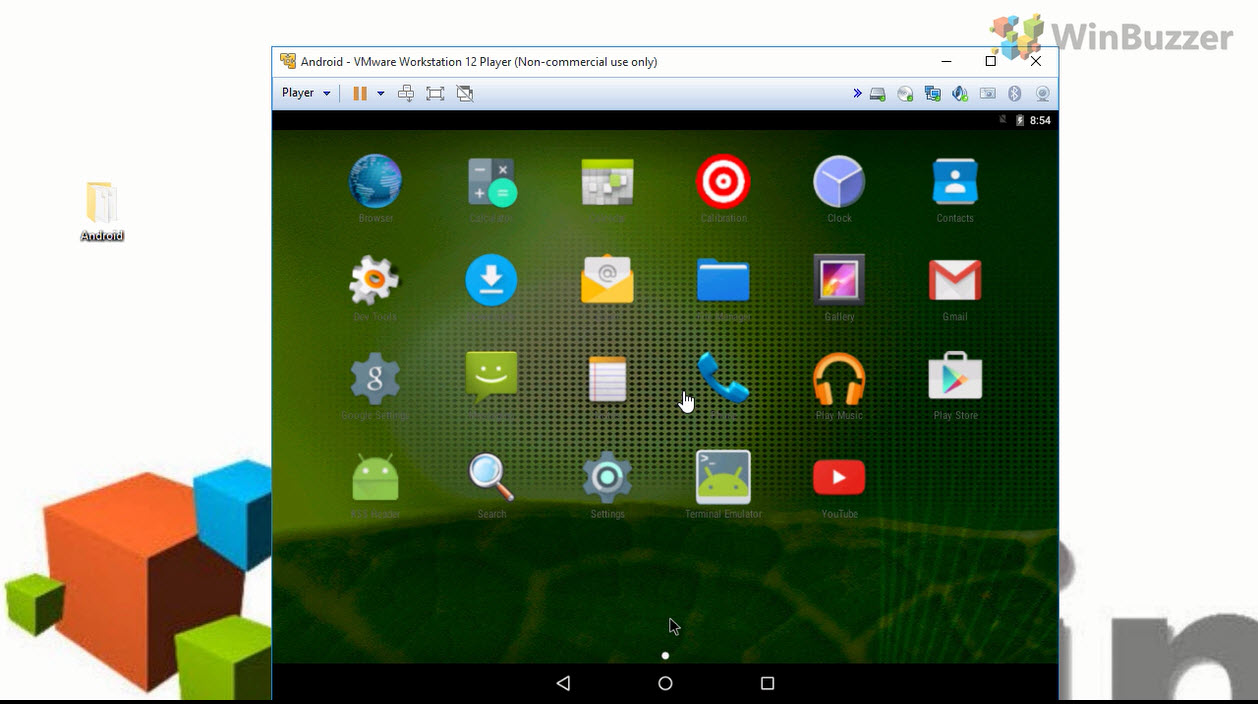
You can install Apps using the Google Play store or use some pre-installed apps. Touch gestures like swiping you can simulate with your mouse holding the button and moving the cursor.
C) How to run Android Apps with Windows 10 using the free Bluestacks App Player
The Bluestacks App Player is a Virtual Machine based on Android which has been modified to offer a good user experience on desktop PCs. Below you have a full video tutorial about how to use Bluestacks on Windows 10 and after that a guide with every single step.
Just download the free program from the Bluestacks webpage and install it with the default options.

On the first launch you will see a dashboard with many tiles of app suggestions. The first row will show your most used apps. When you click on the + sign on the right, you can switch to the full listing of all installed apps.

On the bottom you see the three navigation buttons from Android and some extra buttons on the right side.

The Settings show some specific entries exclusive to Bluestacks while some other settings you might know from Android devices are missing.

The Manage Applications section offers you a nice menu where you can choose if you want to use vertical smartphone mode for an app or to show it horizontally in tablet mode.

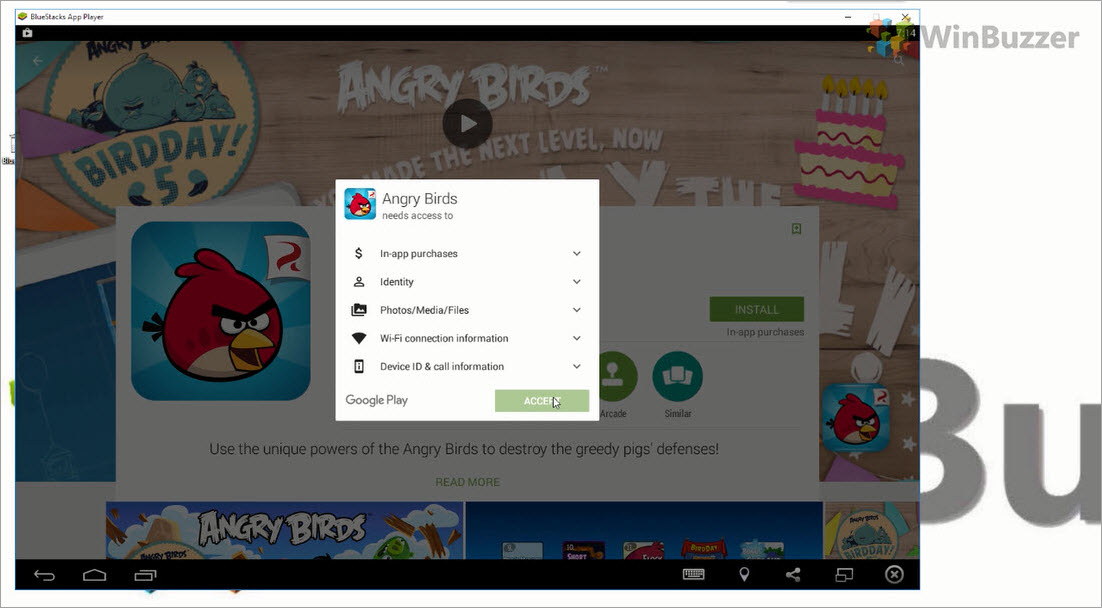
After logging into a Google account you can install apps directly from Google Play which in most cases will run without any problem. As Bluestacks uses a real Android system you can also store settings and files inside Bluestacks.
Like on a real Android device, also multitasking works just fine.

In the settings you will also find a tool which allows you to transfer files between your host computer system and the Bluestacks Android virtual machine.
Last Updated on April 13, 2016 6:24 pm CEST by Markus Kasanmascheff


